

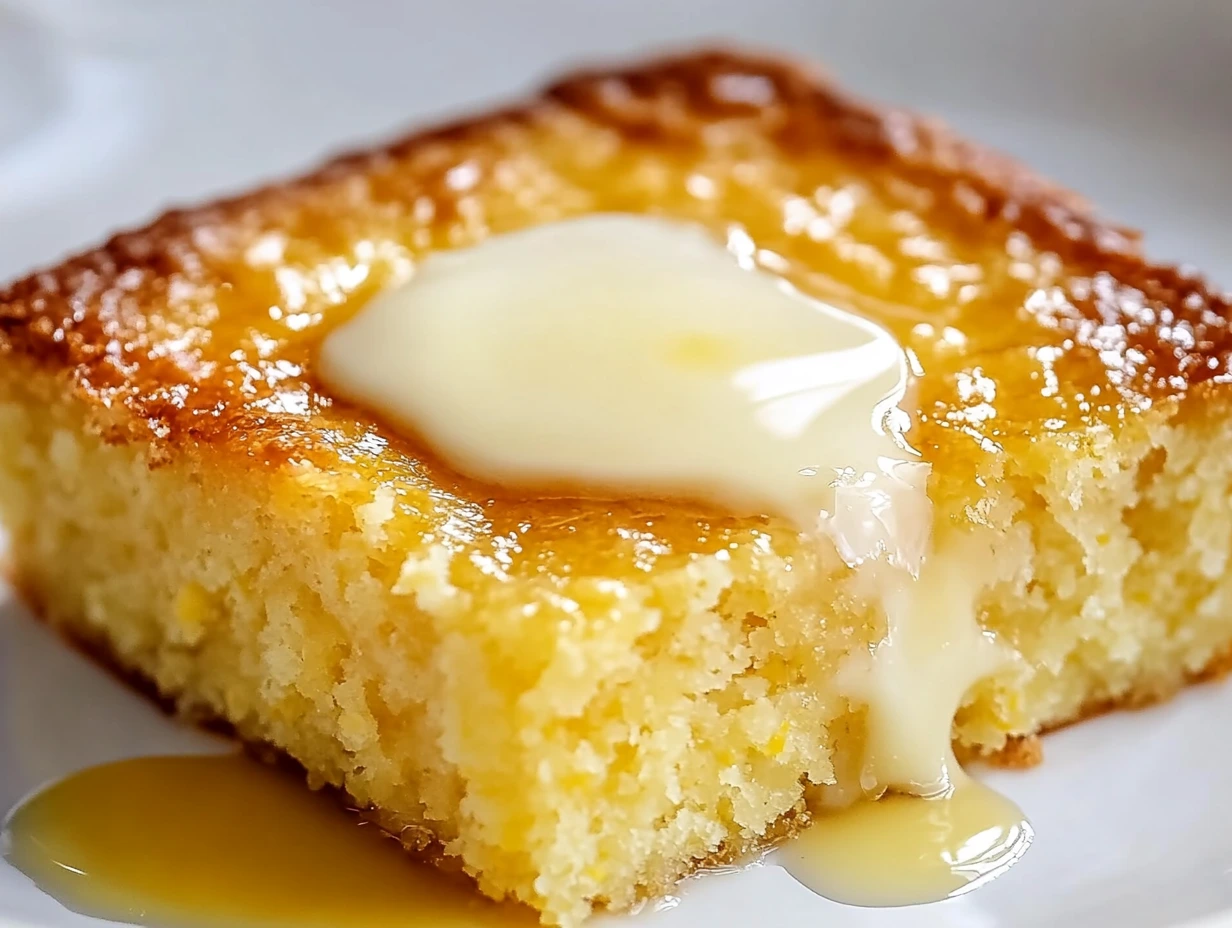
When it comes to cornbread, nothing beats a warm, slightly sweet, and perfectly moist loaf that complements hearty dishes like chili or a bowl of homemade soup. And let me tell you, this Amish Sour Cream Cornbread takes the classic recipe to a whole new level. The sour cream adds a rich, tangy twist that enhances the flavor, while the subtle sweetness makes it irresistibly delicious. Whether you’re serving it as a side at your next family gathering or enjoying a slice with a bit of honey for an afternoon snack, this cornbread is sure to become a favorite.
The magic of Amish-style cornbread lies in its simplicity. With just a handful of ingredients, it delivers a comforting, satisfying result every time. The addition of vanilla extract is a small but essential touch that adds warmth to each bite, making it feel extra special. The best part? It’s easy to make, with no complicated steps, and it comes together in just under an hour.
I first tried this recipe on a chilly fall afternoon when I was craving something cozy and warm. I was looking for a cornbread recipe that would be more moist than the typical dry versions I had encountered, and this one hit the spot perfectly. The sour cream adds that rich, creamy texture that keeps the cornbread from being too crumbly. Plus, it’s incredibly versatile—you can serve it with a spread of butter, drizzle it with honey, or even top it with your favorite jam for an extra burst of sweetness.
Let’s dive into the recipe so you can bring this deliciousness to your own kitchen.
Step 1: Preheat the Oven
Before you do anything else, it’s time to preheat your oven to 375°F (190°C). This ensures that the oven is nice and hot when you pop your cornbread in, which helps it bake evenly and develop that perfect golden-brown top. Grease a 9×9-inch square baking pan or, for an extra special touch, use a cast-iron skillet. The skillet gives the cornbread a beautiful, crispy edge that’s just the right texture contrast to the soft and moist center.
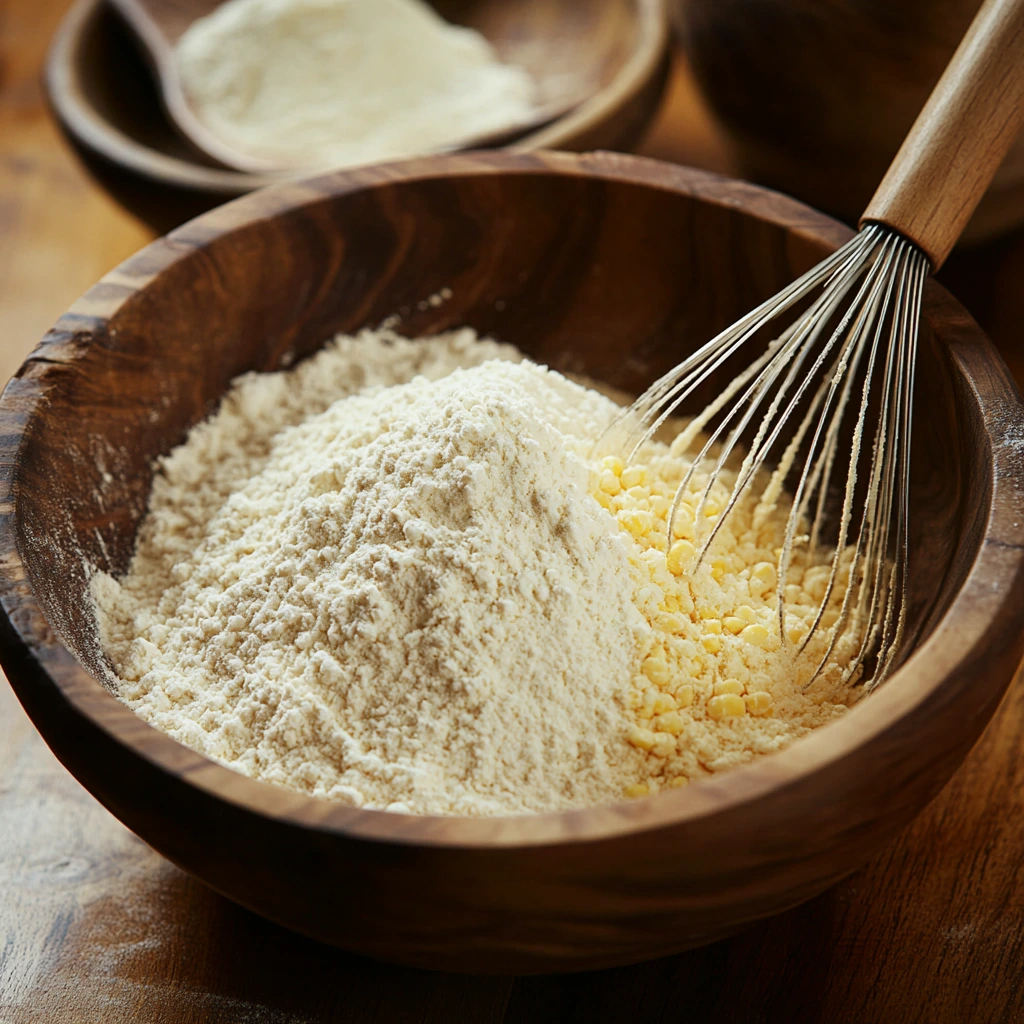
Step 2: Mix the Dry Ingredients
Grab a large mixing bowl and whisk together your dry ingredients. You’ll need 1 1/2 cups of all-purpose flour, 1 cup of yellow cornmeal, 1/2 cup of granulated sugar, 1 tablespoon of baking powder, and 1/2 teaspoon of salt. Whisk them together until everything is well combined. The combination of flour and cornmeal gives the cornbread its hearty texture, while the sugar adds just the right amount of sweetness. The baking powder is essential for helping the cornbread rise to the perfect fluffy consistency, and the salt brings out the flavors and balances the sweetness.
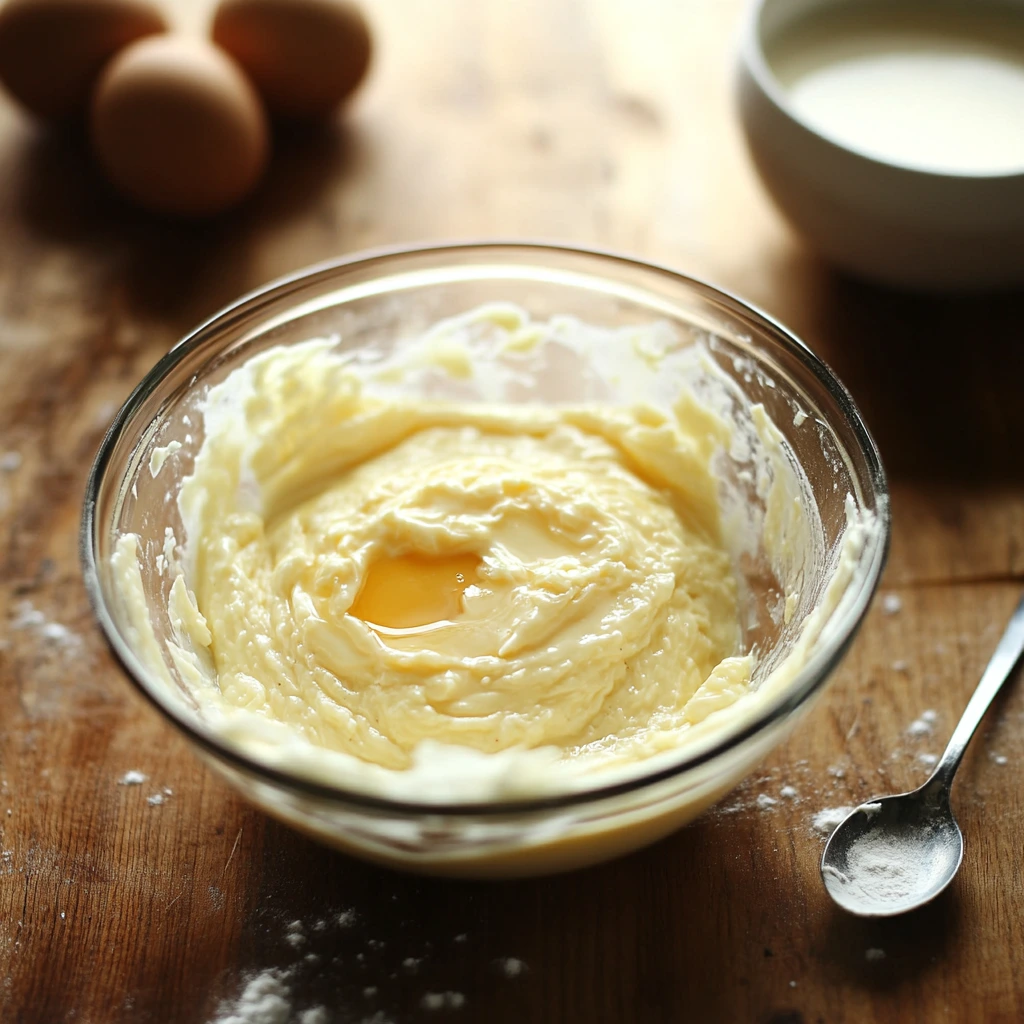
Step 3: Combine the Wet Ingredients
In a separate bowl, whisk together your wet ingredients: 2 lightly beaten large eggs, 1 cup of sour cream (full-fat works best for that rich texture), 1/2 cup of whole milk, 1/4 cup of melted and cooled unsalted butter, and 1 teaspoon of pure vanilla extract (this is optional but highly recommended). Whisk them together until smooth and well combined. The sour cream is what makes this cornbread so moist and adds a nice, tangy depth of flavor. The vanilla extract provides a warm, aromatic touch that makes each bite feel cozy and comforting. I always recommend using full-fat sour cream for the best results—it adds to the richness and moisture of the bread.
Step 4: Make the Batter
Once your wet ingredients are mixed, pour them into the bowl with your dry ingredients. Stir gently with a spatula or wooden spoon until just combined. Be careful not to overmix; overmixing can result in a dense, heavy cornbread, and we want this to be light, airy, and perfectly tender. It’s totally okay if the batter is a little lumpy—that’s a sign that you haven’t overworked it, which is exactly what we want.
Step 5: Bake the Cornbread to Perfection
Now comes the fun part—baking! Once your batter is mixed, pour it into your prepared 9×9-inch square baking pan or cast-iron skillet. Spread it evenly with a spatula to ensure it bakes evenly. The batter should fill the pan about halfway, so don’t worry if it looks a little thick—it’ll rise nicely during baking.
Place your pan or skillet in the preheated oven and bake for 25–30 minutes. The top of the cornbread should turn a lovely golden brown, and if you insert a toothpick into the center, it should come out clean or with just a few moist crumbs clinging to it. This is how you know your cornbread is perfectly baked—moist, tender, and done to perfection.
One thing to keep in mind is that ovens can vary slightly in temperature, so if you’re checking early or after 25 minutes, make sure to check the cornbread regularly to avoid overbaking. A slight overbake won’t ruin it, but it could lead to a drier cornbread than we want. The goal is a beautifully golden top with a soft, moist interior.
Step 6: Cool and Serve
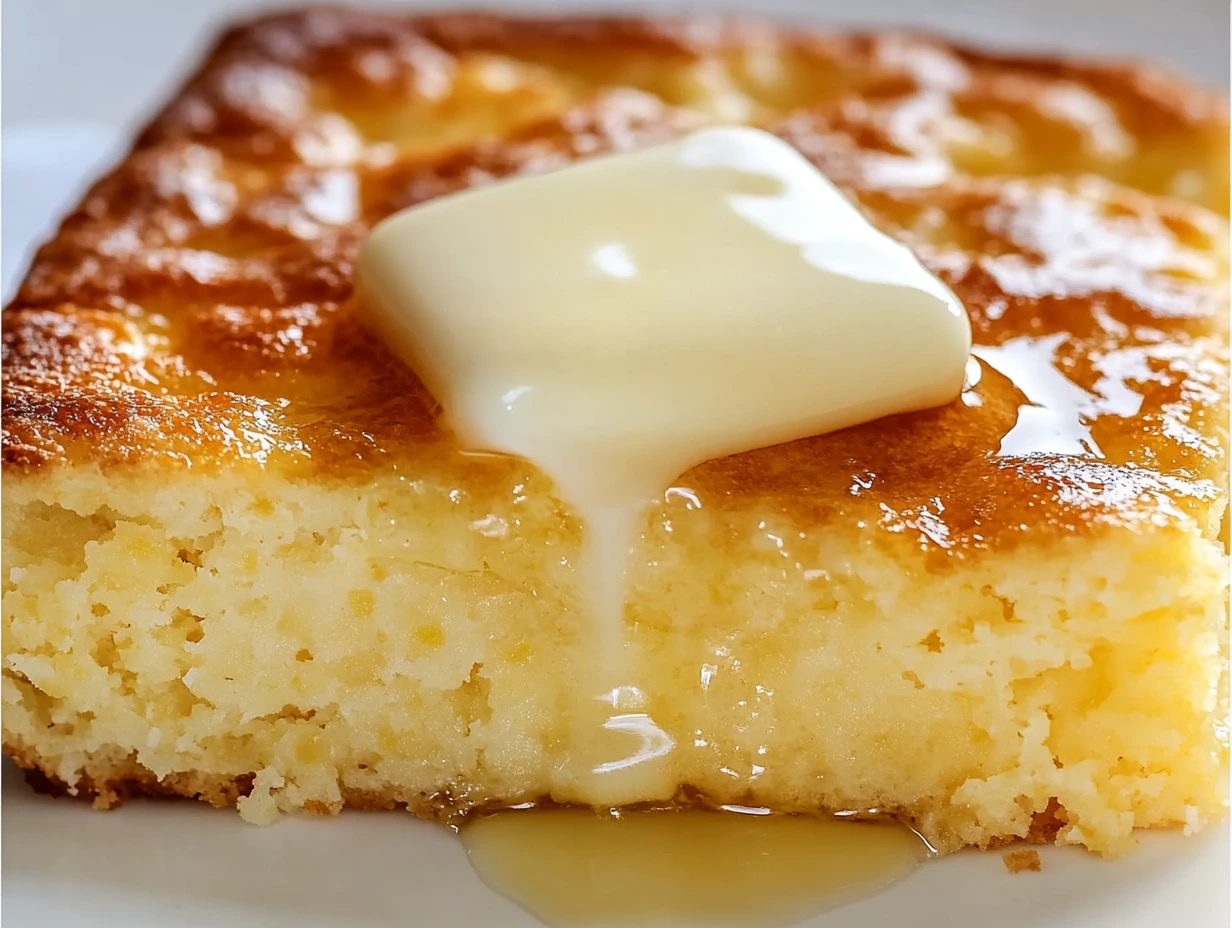
Once the cornbread is out of the oven, allow it to cool in the pan for about 5 to 10 minutes. This helps it set and makes it easier to slice. The moment you cut into it, you’ll notice how soft and moist it is. If you’ve ever had dry cornbread, you’ll appreciate how this one practically melts in your mouth.
Serve your Amish sour cream cornbread warm, with a dollop of softened butter on top. If you’re feeling extra indulgent, drizzle a little honey over it for an added touch of sweetness. I also love pairing it with a spoonful of homemade jam or preserves—strawberry or apricot are my personal favorites, but anything you love works! The warm cornbread combined with these toppings is like a little piece of comfort on a plate.
If you’re serving it alongside chili or soup, it’s a great way to soak up all those delicious flavors. The moist, slightly sweet cornbread balances out the spicy heat from chili and adds a richness to the meal that’s simply divine. I’ve even served this cornbread on its own as a snack with a cup of coffee, and it’s always a hit.
Tips for Perfect Amish Sour Cream Cornbread Every Time
-
Don’t Overmix: As I mentioned earlier, the key to tender cornbread is to avoid overmixing the batter. A few lumps are perfectly fine. Overmixing will activate the gluten in the flour and make the cornbread tough. Gentle stirring is all you need.
-
Use Full-Fat Sour Cream: For the best texture and richness, always opt for full-fat sour cream. It adds moisture and depth of flavor that low-fat versions can’t replicate. Trust me, it’s worth the extra calories!
-
Customize Your Sweetness: The amount of sugar in this recipe is adjustable. If you like a sweeter cornbread, feel free to add a little more sugar. If you prefer it more savory, reduce the sugar slightly. It’s all about finding the balance that works best for you.
-
Cast-Iron Skillet vs. Baking Pan: While you can use any baking pan for this recipe, I highly recommend using a cast-iron skillet if you have one. It gives the cornbread a crispy, golden crust that makes the texture even more delightful.
-
Storage: If you happen to have leftovers (which is rare, I promise), store the cornbread in an airtight container at room temperature for up to 3 days. You can also wrap it in foil and freeze it for later use—just reheat it in the oven for a few minutes to bring it back to life.
Frequently Asked Questions About Amish Sour Cream Cornbread
Before we wrap up, I want to address some common questions that often come up when making this delicious Amish sour cream cornbread. Whether you’re a first-time baker or a seasoned pro, these tips should help you make sure your cornbread turns out perfectly every time.
1. Can I make this cornbread without sour cream?
While sour cream is what gives this cornbread its signature moist texture and rich flavor, you can substitute it with plain yogurt or buttermilk if you don’t have sour cream on hand. Keep in mind that the flavor and texture will change slightly, but you’ll still end up with a tasty cornbread. If using buttermilk, you might need to adjust the amount of baking powder slightly to account for the acidity.
2. Can I use a different type of flour or cornmeal?
You can experiment with different types of flour or cornmeal, but I recommend sticking to yellow cornmeal for the best traditional cornbread texture and flavor. As for the flour, all-purpose flour works best for the light, fluffy texture we’re aiming for. If you’d like to make the recipe gluten-free, you could try a gluten-free all-purpose flour blend, though the results may vary a bit in texture.
3. How do I know when my cornbread is done baking?
The best way to check if your cornbread is done is by inserting a toothpick into the center of the cornbread. If it comes out clean or with just a few moist crumbs, it’s ready. If the toothpick comes out with wet batter, give it a few more minutes in the oven. The top should also be golden brown, which is another good sign that your cornbread is perfectly baked.
4. Can I make this cornbread ahead of time?
Yes! This cornbread actually stores really well and tastes even better the next day. After baking, allow it to cool completely, then store it in an airtight container at room temperature for up to 3 days. You can also freeze it for up to 3 months—just be sure to wrap it tightly in foil or plastic wrap. To reheat, pop it in the oven at 350°F (175°C) for about 10–15 minutes, or until warmed through.
5. Can I add other ingredients like cheese or jalapeños to the cornbread?
Absolutely! One of the best things about cornbread is how customizable it is. If you’re looking to add a savory twist, try folding in some shredded cheddar cheese, chopped jalapeños, or even crispy bacon bits into the batter. Just make sure not to overmix the batter, as this could result in a denser loaf. Keep it gentle, and you’ll have a flavor-packed cornbread in no time.
6. Why is my cornbread dry?
If your cornbread turns out dry, there are a couple of things to check. First, ensure that you’re using full-fat sour cream and that you’re not overbaking the cornbread. Dryness can also occur if the batter was overmixed or if the oven temperature was too high. Make sure your oven is preheated to the right temperature, and keep an eye on your cornbread while it’s baking to avoid overbaking.
7. Can I make this cornbread in a muffin tin?
Yes, you can! If you prefer individual servings or want to serve this cornbread at a party, you can bake the batter in a muffin tin. Grease the muffin cups well and fill each cup about two-thirds full. Bake for 15-20 minutes, or until a toothpick inserted into the center of a muffin comes out clean. You’ll get perfectly portioned cornbread that’s ideal for sharing!
Conclusion: Why You’ll Love Amish Sour Cream Cornbread
There’s no doubt about it—this Amish sour cream cornbread is the perfect addition to your recipe collection. With its rich texture, slight sweetness, and slight tang from the sour cream, it’s everything you want in a cornbread and more. Whether you serve it alongside a warm bowl of chili or enjoy a slice with butter and honey, this cornbread brings comfort and satisfaction to any meal.
I hope you give this recipe a try and enjoy it as much as I have. The beauty of cornbread is its versatility, so don’t be afraid to experiment with different toppings, mix-ins, or even serve it with a variety of dishes. I’d love to hear how your cornbread turns out and if you make any fun variations. Feel free to share your thoughts in the comments or tag me on social media with your cornbread creations!
Happy baking, and I can’t wait for you to enjoy this comforting, homemade Amish-style cornbread!
Print
AMISH SOUR CREAM CORNBREAD
- Total Time: 35-40 minutes
Description
This Amish-style cornbread is rich, moist, and perfectly sweet, with the tang of sour cream adding depth to its flavor. It’s an excellent choice for pairing with chili, soups, or just enjoying as a tasty snack. The addition of vanilla extract gives it a warm, aromatic finish, while optional toppings like honey or jam elevate it even more.
Ingredients
For the Cornbread:
- 1 1/2 cups all-purpose flour
- 1 cup yellow cornmeal
- 1/2 cup granulated sugar (adjust to taste)
- 1 tbsp baking powder
- 1/2 tsp salt
- 2 large eggs, lightly beaten
- 1 cup sour cream (full-fat works best for richness)
- 1/2 cup whole milk
- 1/4 cup unsalted butter, melted and cooled
- 1 tsp pure vanilla extract (optional but recommended)
Optional Toppings:
- Softened butter
- Honey
- Jam or preserves
Instructions
1️⃣ Preheat the Oven
Preheat your oven to 375°F (190°C). Grease a 9×9-inch square baking pan or a cast-iron skillet for an authentic touch.
2️⃣ Mix the Dry Ingredients
In a large mixing bowl, whisk together the flour, cornmeal, sugar, baking powder, and salt until well combined.
3️⃣ Combine the Wet Ingredients
In a separate bowl, whisk together the eggs, sour cream, milk, melted butter, and vanilla extract (if using) until smooth.
4️⃣ Make the Batter
Pour the wet ingredients into the dry ingredients and stir gently until just combined. Avoid overmixing to keep the cornbread tender.
5️⃣ Bake
Pour the batter into the prepared baking pan or skillet and spread it evenly. Bake for 25–30 minutes, or until the top is golden brown and a toothpick inserted into the center comes out clean.
6️⃣ Cool and Serve
Let the cornbread cool in the pan for 5–10 minutes before slicing. Serve warm with softened butter, a drizzle of honey, or your favorite toppings.
Notes
- For extra richness, you can use buttermilk in place of regular milk.
- If you prefer a slightly less sweet cornbread, reduce the sugar by 1-2 tablespoons.
- The cornbread is also great for breakfast when paired with jam or preserves.
- Prep Time: 10 minutes
- Cook Time: 25-30 minutes
Nutrition
- Serving Size: 8–10
