

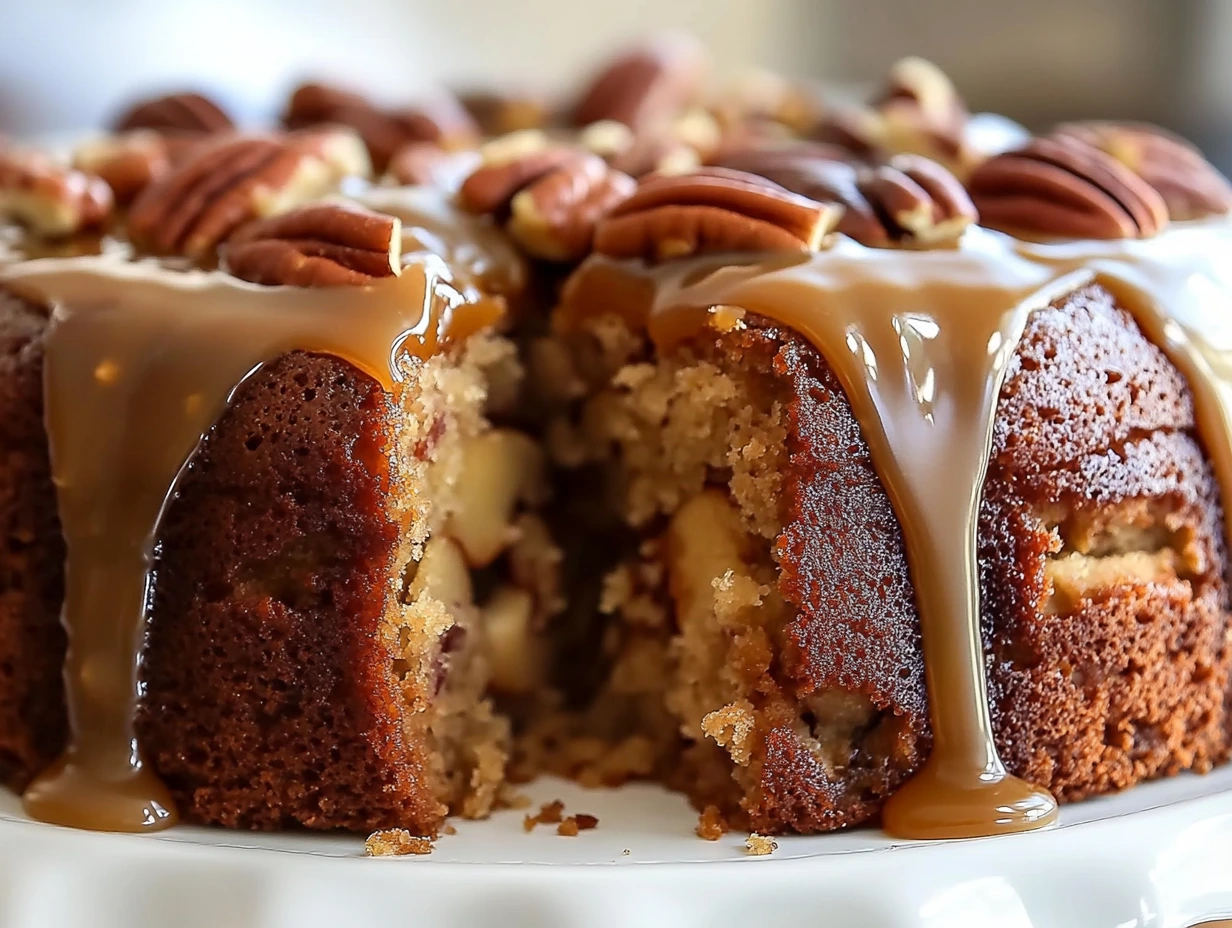
There’s something magical about the scent of apples and cinnamon wafting through the house on a cool fall day. This Apple Pecan Cake with Caramel Glaze is the dessert your autumn dreams are made of—moist, packed with tender apple chunks and crunchy pecans, and topped with a luscious caramel glaze that will have everyone swooning. Whether you’re hosting a cozy family dinner or planning your holiday dessert spread, this cake is guaranteed to be a hit!
Why This Cake is a Fall Favorite
Let’s face it, apples and pecans are practically autumn’s mascots. Their nutty, sweet flavor combinations create a heartwarming dessert that feels like a hug in every bite. The caramel glaze is the cherry on top—smooth, buttery, and just the right amount of sticky to coat this indulgent treat perfectly. Plus, it’s an easy-to-follow recipe that doesn’t require fancy equipment or hard-to-find ingredients.
When I first made this cake, I couldn’t believe how quickly it became a family favorite. I’ve even caught my kids sneaking a slice before dinner—trust me, it’s that good! And with simple pantry staples, you can whip it up anytime the craving strikes.
Let’s Get Started: Prepping the Cake
Before diving into the kitchen, gather everything you’ll need for this recipe. The key is to measure your ingredients in advance so you can focus on the fun part: baking!
Ingredients for the Cake:
- 1 ½ cups cooking oil: Keeps the cake incredibly moist.
- 2 cups granulated sugar: Sweetens the cake to perfection.
- 4 large eggs: Adds structure and richness.
- 3 cups all-purpose flour: The base of this dreamy dessert.
- 1 teaspoon baking soda: Ensures your cake rises beautifully.
- ½ teaspoon cinnamon: The spice that makes everything nice.
- 1 teaspoon salt: Balances all the sweet flavors.
- 2 teaspoons vanilla extract: Enhances the flavor profile.
- 3 ½ cups Granny Smith apples, peeled and finely chopped: The star ingredient that gives the cake its fresh, fruity taste.
- 1 cup pecans, finely chopped: Adds a nutty crunch.
Step 1: Preheat the Oven
First things first, preheat your oven to 325°F (163°C). This lower baking temperature is key to ensuring your cake bakes evenly without drying out. Grease and flour a tube pan or two loaf pans so your cake releases easily once it’s done. Trust me, you don’t want to skip this step—there’s nothing sadder than a stuck cake!
Step 2: Mix the Wet Ingredients
In a large mixing bowl, combine the cooking oil, granulated sugar, and eggs. Beat them together until the mixture is creamy and smooth. This forms the rich, moist base of your cake. If you’ve got a stand mixer, let it do the work while you sip on some apple cider!
Step 3: Combine Dry Ingredients
In a separate bowl, sift together the flour, baking soda, cinnamon, and salt. Sifting helps to remove any lumps and evenly distributes the leavening agent and spices throughout the batter. Slowly add the dry ingredients to the wet mixture, stirring gently to combine. Avoid overmixing—it can make the cake dense.
Step 4: Adding the Apples and Pecans
This is where your cake really starts to shine! The combination of fresh apples and crunchy pecans gives the cake its signature flavor and texture. For the apples, I recommend using Granny Smith because their tartness balances the sweetness of the cake perfectly. Plus, they hold up well during baking, so you’ll get tender apple chunks instead of mushy ones.
Here’s how to fold them in like a pro:
- Stir in the vanilla extract first to enhance the overall flavor of the batter.
- Gently fold in the chopped apples and pecans. You want to mix just enough to evenly distribute the ingredients without overworking the batter. Overmixing at this stage can make the cake tough, and we’re going for tender, moist perfection!
Step 5: Time to Bake!
It’s time to get this masterpiece into the oven. Pour your batter into the prepared tube pan (or two loaf pans, if you’re using those). Be sure to spread the batter evenly so it bakes consistently.
Baking Tips for Success:
- Don’t rush the process. Bake the cake at 325°F (163°C) for about 1 hour. Lower and slower is better for a cake like this—it ensures it bakes all the way through without the edges drying out.
- Check for doneness. Around the 50-minute mark, start checking the cake with a toothpick. Insert it into the center of the cake, and if it comes out clean or with just a few crumbs, your cake is ready to come out of the oven.
When you pull it out, let it cool in the pan for 10-15 minutes before transferring it to a wire rack. This step is crucial! The cake needs time to set and release cleanly from the pan without breaking apart.
Step 6: Making the Caramel Glaze
Now comes the pièce de résistance: the caramel glaze. This rich, buttery topping is what takes this cake from great to truly unforgettable. It’s quick and simple to make, but the flavor payoff is massive.
Ingredients for the Glaze:
- ¾ cup unsalted butter (1 ½ sticks): The foundation of any great caramel.
- 1 cup light brown sugar: Adds that warm, molasses sweetness.
- ¼ cup whole milk: For the perfect creamy consistency.
- 1 teaspoon vanilla extract: Because vanilla makes everything better.
How to Make the Glaze:
- Melt the butter in a small saucepan over low heat. Use a heavy-bottomed pan to prevent scorching.
- Add the brown sugar and milk, and stir constantly as you bring the mixture to a gentle boil over low heat. Keep the heat low and steady—this helps the sugar dissolve completely and creates a silky-smooth glaze.
- Once it’s boiling, reduce the heat to a simmer and keep stirring for about 10 minutes. You’ll notice it starts to thicken and develop that luscious caramel sheen.
- Remove from the heat and stir in the vanilla extract. Let it cool slightly so it’s pourable but not too runny.
Step 7: Glazing the Cake
Once your cake has cooled slightly (but is still warm to the touch), place it on a serving platter or a wire rack with parchment paper underneath to catch any drips. Slowly pour the caramel glaze over the top, letting it cascade down the sides for a beautiful, rustic look.

Pro Tips for Perfect Glazing:
- Control the drizzle: Use a spoon to guide the glaze over specific areas if you want a more polished finish.
- Add texture: For an extra touch, sprinkle a few chopped pecans on top of the glaze while it’s still wet. This adds a nice crunch and visual appeal.
Variations and Customizations
One of the best things about this Apple Pecan Cake is how easy it is to adapt to your personal preferences. Here are some ideas to make it your own:
- Swap the pecans for walnuts: If walnuts are your nut of choice, feel free to substitute them in equal measure.
- Add warm spices: Boost the fall flavors by adding a pinch of nutmeg or allspice to the batter.
- Make it extra caramel-y: Serve the cake with an additional drizzle of warm caramel sauce when plating.
FAQ Section
1. Can I use a different type of apple for this cake?
Absolutely! While Granny Smith apples are ideal because of their tartness and firmness, you can substitute them with other varieties like Honeycrisp, Fuji, or Braeburn. Just keep in mind that sweeter apples may make the cake slightly sweeter overall.
2. What’s the best way to store this cake?
This cake can be stored in an airtight container at room temperature for up to three days. If you want to keep it fresh longer, refrigerate it for up to a week. Just make sure to bring it to room temperature or warm it slightly before serving for the best texture and flavor.
3. Can I make the cake ahead of time?
Yes! This cake is actually even better the next day as the flavors have more time to meld together. You can bake it a day or two in advance, but wait to pour the caramel glaze until just before serving for the freshest presentation.
4. Can I freeze this cake?
Yes, this cake freezes beautifully! Wrap it tightly in plastic wrap, then in aluminum foil, and store it in the freezer for up to three months. Thaw it in the refrigerator overnight and glaze it fresh before serving.
5. Is there a way to make the cake less sweet?
If you’d prefer a slightly less sweet cake, you can reduce the granulated sugar in the batter to 1 ½ cups and swap the caramel glaze for a light dusting of powdered sugar or a dollop of whipped cream.
6. Can I make this cake gluten-free?
Certainly! Substitute the all-purpose flour with a gluten-free baking blend that contains xanthan gum. Ensure the rest of your ingredients (like the baking soda and vanilla extract) are certified gluten-free as well.
7. What’s the best way to serve this cake?
This cake is fantastic on its own, but if you want to take it up a notch, serve it with a scoop of vanilla ice cream or a dollop of freshly whipped cream. For an extra indulgent twist, drizzle a bit of leftover caramel glaze on the plate before serving.
Conclusion: A Cake to Fall in Love With
This Apple Pecan Cake with Caramel Glaze is a true celebration of fall flavors. With its moist, tender crumb, bursts of fresh apples, and crunchy pecans, all topped with a rich caramel glaze, it’s bound to become a favorite in your household. Whether you’re serving it at a holiday table, gifting it to a friend, or simply enjoying it with a cup of coffee, this cake is the ultimate comfort dessert.
I hope you’ll give this recipe a try and fall in love with it as much as I have. If you do, I’d love to hear how it turned out! Did you try any variations or add your own twist? Let me know in the comments below, or share your photos and tag me on social media.
Happy baking, and here’s to creating sweet memories one slice at a time!
Print
Apple Pecan Cake With Caramel Glaze
- Total Time: 1 hour 20 mins
Description
This Apple Pecan Cake is a perfect combination of moist apples, crunchy pecans, and warm spices, finished with a rich caramel glaze that takes it to the next level. It’s a comforting, homestyle dessert that’s perfect for any occasion, from cozy fall gatherings to holiday celebrations.
Ingredients
For the Cake:
- 1 ½ cups cooking oil
- 2 cups granulated sugar
- 4 large eggs
- 3 cups all-purpose flour
- 1 teaspoon baking soda
- ½ teaspoon cinnamon
- 1 teaspoon salt
- 2 teaspoons vanilla extract
- 3 ½ cups Granny Smith apples, peeled and finely chopped (about 3–4 apples)
- 1 cup pecans, finely chopped
For the Caramel Glaze:
- ¾ cup unsalted butter (1 ½ sticks)
- 1 cup light brown sugar
- ¼ cup whole milk
- 1 teaspoon vanilla extract
Instructions
1️⃣ Preheat the oven:
Preheat your oven to 325°F (163°C). Grease and flour a tube pan or two loaf pans to ensure the cake releases easily after baking.
2️⃣ Prepare the batter:
In a large bowl, beat together the cooking oil, granulated sugar, and eggs until creamy and smooth.
In a separate bowl, sift together the flour, baking soda, cinnamon, and salt. Gradually mix the dry ingredients into the wet ingredients, stirring just until combined to avoid overmixing.
3️⃣ Add the mix-ins:
Stir in the vanilla extract to enhance the flavor.
Gently fold in the chopped apples and pecans, making sure they are evenly distributed throughout the batter for a delicious texture.
4️⃣ Bake the cake:
Pour the batter into the prepared pan(s). Place the pan(s) in the preheated oven and bake for approximately 1 hour. Start checking for doneness around the 50-minute mark by inserting a toothpick into the center of the cake. If it comes out clean, the cake is ready.
5️⃣ Make the caramel glaze:
While the cake cools, melt the butter in a small saucepan over low heat.
Stir in the brown sugar and milk, then bring the mixture to a boil over low heat. Once boiling, reduce to a simmer and stir constantly for about 10 minutes until it thickens slightly.
Remove from heat and stir in the vanilla extract. Let the glaze cool slightly so it’s still pourable but not too runny.
6️⃣ Glaze the cake:
Once the cake has cooled slightly, pour the caramel glaze evenly over the top, letting it drip down the sides for a rustic yet elegant look.
Notes
- Apple choice: Granny Smith apples are ideal for their tartness, which balances the sweetness of the cake and glaze. However, you can use other firm apples like Honeycrisp or Fuji.
- Pan choice: A tube pan works best for even baking, but two loaf pans make for easier slicing and storage.
- Storage: The cake can be stored in an airtight container at room temperature for up to 3 days or refrigerated for up to a week.
- Prep Time: 20 mins
- Cook Time: 60 mins
