

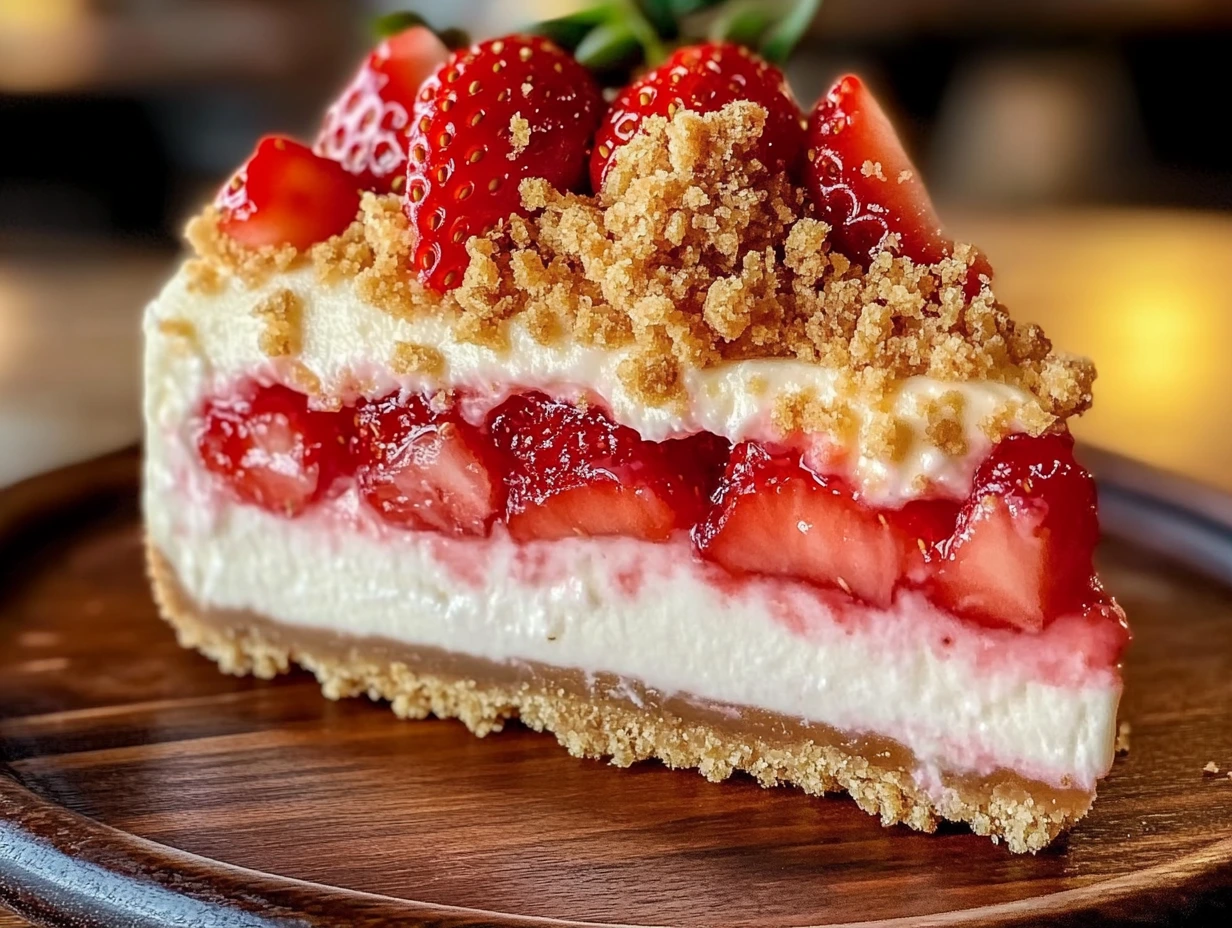
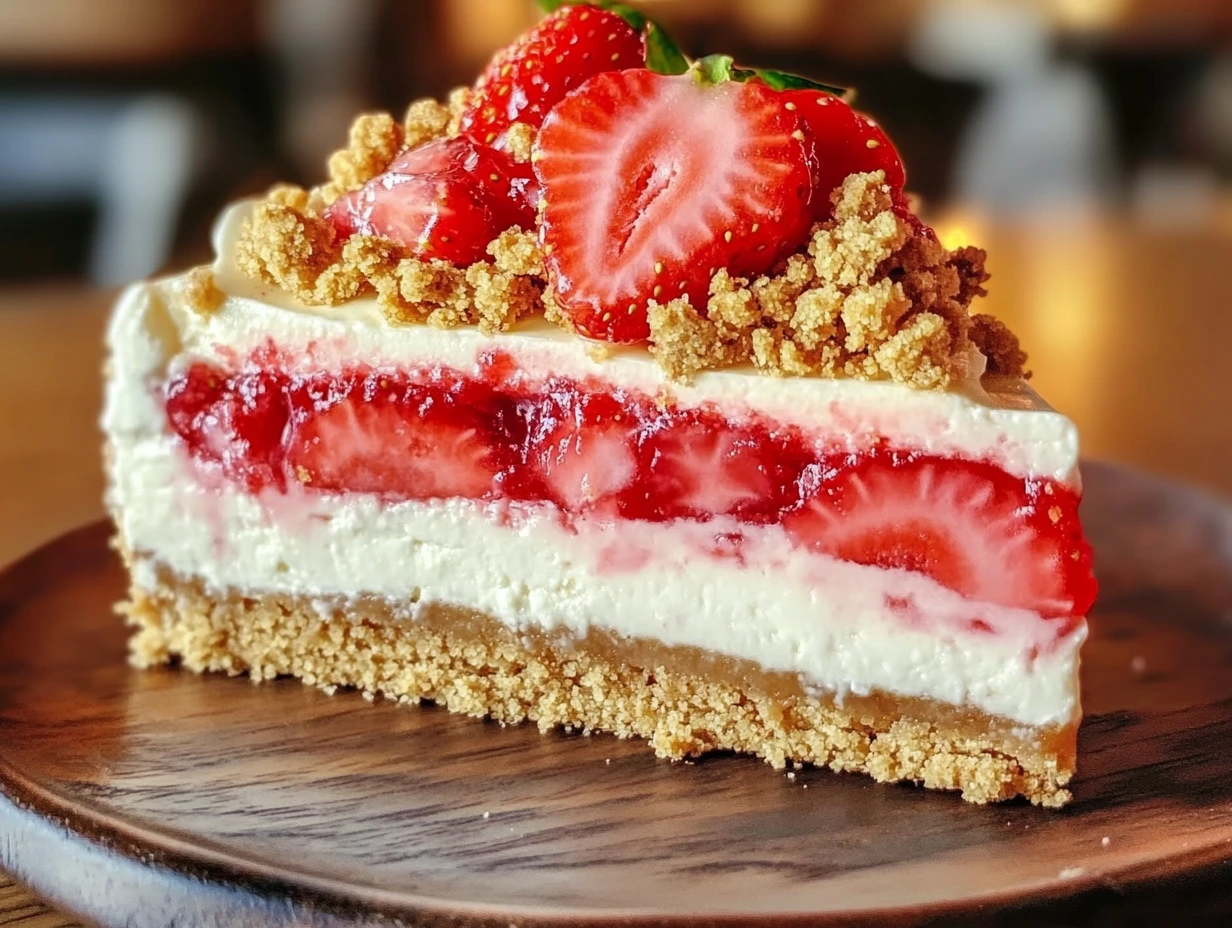
If you’re looking for the ultimate no-bake dessert that’s creamy, crunchy, and packed with fresh strawberry flavor, you’re in the right place! This Berrylicious Strawberry Crunch Cheesecake is the perfect combination of smooth cheesecake filling, a buttery graham cracker crust, and a nostalgic strawberry crunch topping that tastes just like those classic ice cream bars we all loved as kids.
This recipe is incredibly easy to make, no oven required! Whether you need a dessert for a summer gathering, a birthday celebration, or just a sweet treat to enjoy at home, this cheesecake is sure to impress. Plus, it’s totally customizable—switch up the crust, adjust the sweetness, or pile on extra strawberries for an extra fruity kick.
Let’s dive into this dreamy cheesecake, starting with the base: the crust!
Step 1: Making the Perfect No-Bake Crust
A great cheesecake starts with a solid foundation, and this crust is buttery, crisp, and deliciously simple to make. Here’s what you’ll need:
Ingredients for the Crust:
- 2 cups crushed graham crackers (or vanilla wafer cookies for extra flavor!)
- ½ cup melted butter (to bind everything together)
Instructions:
- Crush the crackers – If you have a food processor, pulse the graham crackers (or vanilla wafers) until they turn into fine crumbs. No food processor? No problem! Just place them in a zip-top bag and crush them with a rolling pin.
- Mix with melted butter – In a medium bowl, stir the melted butter into the crumbs until the texture is like wet sand. This helps the crust hold together when you slice into the cheesecake later.
- Press into the pan – Pour the mixture into a 9-inch springform pan (or a pie dish) and press it down firmly using the back of a spoon or the bottom of a glass.
- Chill – Pop the crust into the refrigerator for at least 15 minutes while you prepare the filling. This helps it firm up and keeps it from getting soggy once the cheesecake mixture is added.
Tip: If you love a thicker crust, you can increase the amount of crumbs to 2 ½ cups and add an extra tablespoon of melted butter!
Step 2: Making the Dreamy Cheesecake Filling
The best part of this cheesecake is the light and airy filling. It’s a simple mixture of cream cheese, whipped cream, and just the right amount of sweetness. And because it’s no-bake, there’s no worrying about water baths or cracks—just creamy perfection every time!
Ingredients for the Cheesecake Filling:
- 2 cups whipped cream (homemade or store-bought like Cool Whip)
- 1 cup cream cheese, softened (room temperature for smooth blending)
- ½ cup powdered sugar (for just the right amount of sweetness)
- 1 tsp vanilla extract (adds warmth and flavor)
Instructions:
- Beat the cream cheese – In a large mixing bowl, use an electric mixer to beat the softened cream cheese until it’s smooth and fluffy. Room temperature cream cheese blends more easily, so make sure to take it out of the fridge about 30 minutes before mixing.
- Add the sweetness – Mix in the powdered sugar and vanilla extract until fully combined. This step ensures the filling has just the right balance of sweetness and flavor.
- Fold in the whipped cream – Gently fold in the whipped cream using a spatula (not the mixer!). Be careful not to overmix—you want to keep the filling light and airy.
Once your filling is ready, it’s time to bring everything together and start assembling the cheesecake!
Step 3: Assembling the Cheesecake
Now that you have a perfectly chilled crust and a luscious cheesecake filling, it’s time to layer it all together!
Instructions:
- Spread the filling – Pour the cheesecake filling over the chilled crust, smoothing it out with a spatula so it’s evenly distributed.
- Chill to set – Refrigerate for at least 2 hours, but for the best results, let it chill overnight. This helps the cheesecake firm up so you get those perfect slices.
Step 4: Making the Irresistible Strawberry Crunch Topping
This crunchy, buttery topping is what makes this cheesecake truly stand out. It’s a simple mix of crushed cookies, freeze-dried strawberries, and melted butter—so easy, yet so delicious!
Ingredients for the Strawberry Crunch Topping:
- 1 cup crushed Golden Oreos (or vanilla wafers)
- ½ cup freeze-dried strawberries, crushed
- 3 tbsp melted butter (to bind everything together)
Instructions:
- Crush the cookies and strawberries – In a food processor, pulse the Golden Oreos (or vanilla wafers) until they become fine crumbs. Then, add the freeze-dried strawberries and pulse again until everything is evenly mixed. If you don’t have a food processor, you can place everything in a zip-top bag and crush with a rolling pin.
- Add melted butter – Transfer the crumbs to a small bowl, drizzle in the melted butter, and toss until the mixture is evenly coated. This helps create that delicious crunchy texture.
- Set aside – Keep the topping in a bowl until you’re ready to sprinkle it over the cheesecake.
Pro Tip: If you love a stronger strawberry flavor, you can add a tablespoon of strawberry-flavored gelatin powder to the mixture for an extra punch of fruity sweetness!
Step 5: Making the Fresh Strawberry Topping (Optional but Highly Recommended!)
While the crunch topping adds texture, the fresh strawberry topping adds juiciness and a natural berry flavor that makes this cheesecake even more irresistible. You can also use strawberry pie filling if you’re short on time!
Ingredients for the Fresh Strawberry Topping:
- 1 cup fresh strawberries, diced
- ¼ cup granulated sugar
- ½ tsp lemon juice (enhances the natural sweetness)
Instructions:
- Combine ingredients – In a small bowl, mix the diced strawberries with the sugar and lemon juice. Stir well to coat.
- Let it sit – Allow the mixture to rest for 10–15 minutes so the strawberries release their natural juices and create a syrupy consistency.
- Set aside – Keep it in the fridge until you’re ready to spoon it over the cheesecake.
If you want a thicker strawberry topping, you can mash some of the berries with a fork to create more of a jam-like consistency.
Step 6: Bringing It All Together!
Now for the best part—decorating and serving! Your cheesecake has been chilling and is ready for its final touches.
Instructions:
- Remove the cheesecake from the fridge – If you’re using a springform pan, gently release the sides so you get a clean, beautiful cheesecake.
- Sprinkle on the strawberry crunch topping – Evenly spread the strawberry crunch mixture over the top of the cheesecake, gently pressing it down so it sticks.
- Add the fresh strawberry topping – Spoon the strawberry mixture over the cheesecake, or serve it on the side so people can add as much as they like.
- Slice and enjoy!
FAQ: Your Cheesecake Questions Answered
1. Can I make this cheesecake ahead of time?
Absolutely! This cheesecake is actually best when made ahead since it needs time to chill and set. I recommend making it at least 4 hours in advance, but overnight is even better for the perfect texture.
2. What can I use instead of Golden Oreos for the crunch topping?
If you don’t have Golden Oreos, vanilla wafers or shortbread cookies work great! You can even mix in crushed graham crackers for a slightly different texture.
3. Can I use fresh strawberries instead of freeze-dried ones for the topping?
Freeze-dried strawberries give the crunch topping that classic strawberry shortcake flavor and keep it crispy. If you only have fresh strawberries, you can finely chop them and mix them with the cookies, but the topping will be softer.
4. How do I store leftovers?
Store the cheesecake covered in the refrigerator for up to 4 days. If you’ve already added the strawberry topping, it might get a little juicy over time, but it will still taste amazing!
5. Can I freeze this cheesecake?
Yes! This cheesecake freezes really well. Just leave off the strawberry topping and wrap the whole cheesecake (or individual slices) tightly in plastic wrap and foil. Freeze for up to 2 months and thaw in the fridge before serving.
6. Can I use whipped topping (like Cool Whip) instead of homemade whipped cream?
Yes! Cool Whip works great as a shortcut and keeps the filling super light and fluffy. If using homemade whipped cream, just make sure it’s whipped to stiff peaks before folding it in.
Conclusion: Time to Dig In!
And there you have it—your Berrylicious Strawberry Crunch Cheesecake is ready to be devoured! This no-bake dessert is a total crowd-pleaser, with its buttery graham cracker crust, creamy cheesecake filling, and that irresistible strawberry crunch topping. It’s the perfect dessert for any occasion, whether it’s a summer party, a holiday gathering, or just a special treat for yourself (because you deserve it!).
Now, go grab a slice, enjoy every bite, and don’t forget to share with someone who loves cheesecake as much as you do. Happy baking!
Print
SOFT CINNAMON APPLE FRITTERS WITH VANILLA GLAZE
- Total Time: 2 hours 20 minutes
Description
A creamy, no-bake cheesecake with a buttery graham cracker crust, velvety smooth filling, and a crunchy, sweet strawberry topping—this dessert is bursting with flavor! Perfect for summer gatherings or any time you need a refreshing, fruity treat.
Ingredients
For the Crust:
- 2 cups crushed graham crackers (or vanilla wafer cookies for extra flavor!)
- ½ cup melted butter (to bind the crust together)
For the Cheesecake Filling:
- 2 cups whipped cream (homemade or store-bought like Cool Whip)
- 1 cup cream cheese, softened (room temperature for smooth blending)
- ½ cup powdered sugar (for just the right sweetness)
- 1 tsp vanilla extract (adds warmth and flavor)
For the Strawberry Crunch Topping:
- 1 cup crushed Golden Oreos (or vanilla wafers)
- ½ cup freeze-dried strawberries, crushed (for intense strawberry flavor)
- 3 tbsp melted butter (to bind the topping together)
For the Strawberry Topping: (Optional but highly recommended!)
- 1 cup fresh strawberries, diced (or strawberry pie filling for a shortcut!)
- ¼ cup granulated sugar (to macerate the berries for a syrupy effect)
- ½ tsp lemon juice (enhances the natural sweetness of the strawberries)
Instructions
1️⃣ Prepare the Crust:
In a medium bowl, mix the crushed graham crackers and melted butter until the mixture resembles wet sand.
Press the crust mixture firmly into the bottom of a 9-inch springform pan or pie dish.
Place in the refrigerator to set for at least 15 minutes while preparing the filling.
2️⃣ Make the Cheesecake Filling:
In a large bowl, beat the cream cheese with an electric mixer until smooth and fluffy.
Add the powdered sugar and vanilla extract, and mix until well combined.
Gently fold in the whipped cream using a spatula until fully incorporated.
3️⃣ Assemble the Cheesecake:
Spread the cheesecake filling evenly over the chilled crust, smoothing the top with a spatula.
Refrigerate for at least 2 hours, or until set. (For best results, chill overnight!)
4️⃣ Prepare the Strawberry Crunch Topping:
In a small bowl, mix together the crushed Golden Oreos and freeze-dried strawberries.
Drizzle in the melted butter and toss to coat evenly.
Set aside until ready to use.
5️⃣ Prepare the Strawberry Topping: (Optional but enhances the flavor!)
In a bowl, combine diced strawberries, sugar, and lemon juice.
Let sit for 10–15 minutes, allowing the strawberries to release their natural juices.
6️⃣ Decorate and Serve!
Remove the cheesecake from the fridge and sprinkle the strawberry crunch topping evenly over the top.
Spoon the strawberry topping over the cheesecake, or serve it on the side for extra freshness.
Slice and serve cold!
Notes
- Make-Ahead Friendly: This cheesecake can be prepared a day in advance and stored in the fridge until ready to serve.
- Shortcut Option: Use store-bought strawberry pie filling if fresh strawberries aren’t available.
- Crunchy Goodness: For an even crunchier texture, toast the Golden Oreos in a dry pan for a minute before mixing with strawberries.
- Prep Time: 20 minutes
- Cook Time: 2 hours
