
If you’re anything like me, you know that freshly baked bread has a kind of magical pull—it fills your kitchen with that warm, comforting aroma and somehow makes any meal feel just a little more special. But let’s be real: sometimes we just don’t have the time (or energy) to deal with yeast, rising times, or complicated techniques. That’s where this no-yeast cheesy bread comes in.
This recipe is my go-to when I want something quick, comforting, and totally crave-worthy. It’s everything you want in a homemade bread—soft on the inside, golden and crispy on the outside, and absolutely loaded with melty cheese and rich flavor. And the best part? You can have it ready in under 30 minutes with no need to wait for dough to rise.
I originally made this cheesy bread on a whim one weeknight when I had some Greek yogurt to use up and a serious craving for something savory. I threw it together using ingredients I already had in my fridge—cheddar, Parmesan, garlic powder—and it turned out way better than I expected. Now it’s a staple in our house, especially when we’re having soups, salads, or even pasta nights. It’s also amazing just on its own, fresh from the oven and brushed with a little melted butter.
Let’s get into how easy it is to make this warm, cheesy masterpiece.
STEP 1: PREHEAT THE OVEN
Start by preheating your oven to 400°F (200°C). You want it nice and hot to help the bread get that gorgeous golden crust. Line a baking sheet with parchment paper, or if you don’t have any on hand, lightly grease it with a little oil or nonstick spray. The bread doesn’t stick much, but the parchment just makes cleanup easier.
STEP 2: MIX THE DOUGH
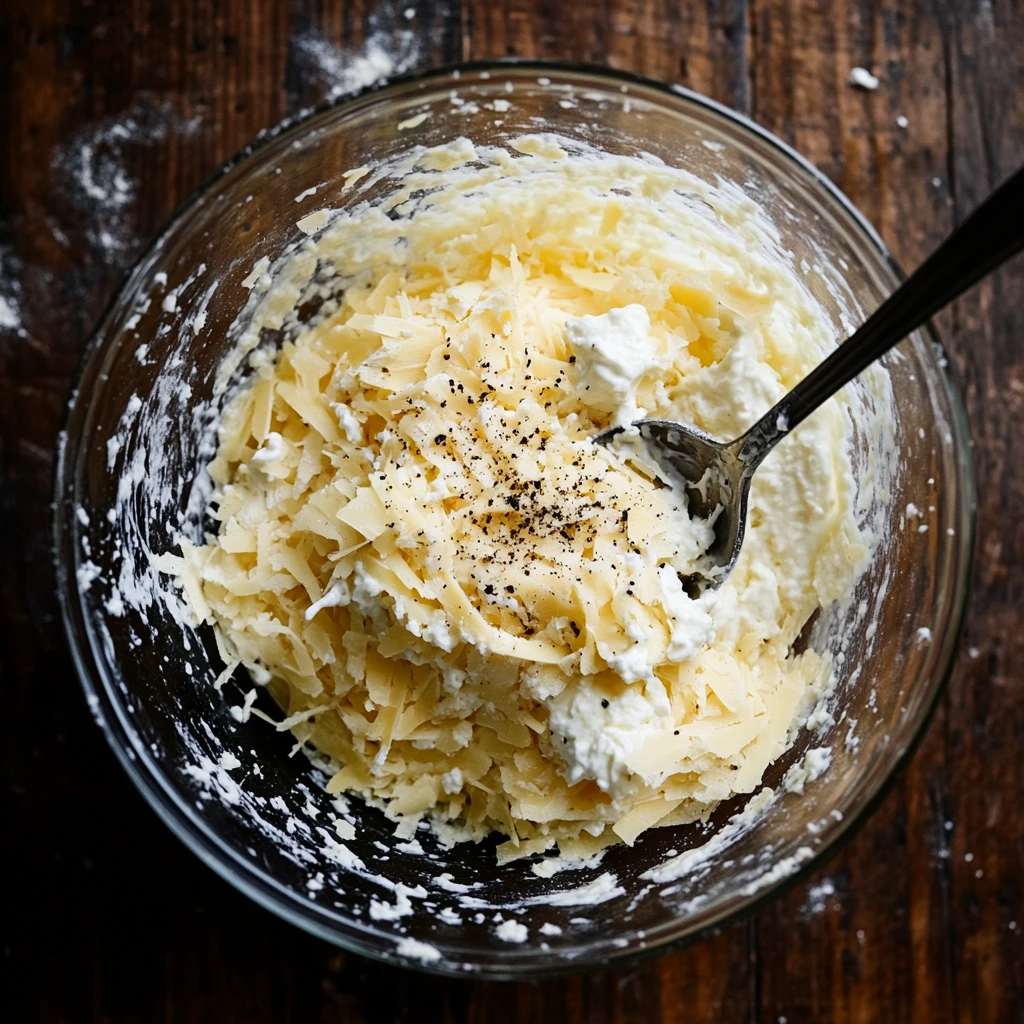
In a large mixing bowl, combine the following ingredients:
-
2 cups self-rising flour – If you don’t have self-rising flour, don’t worry! You can easily make your own by combining 2 cups of all-purpose flour with 2 teaspoons baking powder and ½ teaspoon salt.
-
1 cup plain Greek yogurt – Full-fat works best here because it gives the bread a richer flavor and fluffier texture.
-
½ cup shredded cheddar cheese – Sharp cheddar adds the best punch of flavor, but you can use mild if that’s what you have.
-
½ cup grated Parmesan cheese – This adds a nutty, salty bite that balances the richness of the cheddar.
-
½ teaspoon garlic powder – Totally optional, but I really recommend it if you love a subtle garlic flavor in your bread.
-
¼ teaspoon black pepper – Just a touch to round out the flavor.
Use a spoon or spatula to mix everything together until it forms a shaggy dough. The dough should come together fairly easily and be soft but not too sticky. If it feels a bit dry or crumbly, go ahead and add 1–2 tablespoons of milk—just enough to help it bind. Don’t worry about overmixing; this bread is super forgiving.
I’ve made this dough dozens of times, and every now and then it behaves slightly differently depending on the yogurt or cheese moisture level. So if it seems a bit too dry or too wet, just trust your gut and adjust with a tiny bit more flour or milk. The dough should hold together easily and feel pliable.
STEP 3: SHAPE THE LOAF
Now that your dough is ready, turn it out onto a lightly floured surface. You don’t need to knead it—just gently bring it together and shape it into a rustic round loaf. Aim for a size of about 6 to 7 inches wide and 1½ inches thick.
Place the shaped dough onto your prepared baking sheet. Then, using a sharp knife, score an “X” across the top. This helps the bread bake evenly and gives it that nice, rustic bakery look.
At this point, your kitchen already smells good thanks to that cheesy dough, and you haven’t even put it in the oven yet!
STEP 4: ADD THE CHEESY TOPPING
Before you pop that loaf into the oven, sprinkle the top with:
-
¼ cup shredded cheddar cheese
-
¼ cup grated Parmesan cheese
This extra layer of cheese bakes right onto the crust and gives the bread a bubbly, golden top that’s full of flavor. The cheddar melts beautifully while the Parmesan adds a slightly crisp texture and deep, savory notes.
If you like a little extra flair, you can even throw on a pinch of Italian seasoning or a light dusting of garlic powder. Totally optional, but definitely delicious.
STEP 5: BAKE TO PERFECTION
Place your cheesy loaf in the preheated oven (400°F/200°C) and bake for 20 to 25 minutes. You’re looking for a deep golden-brown crust, and the bread should sound slightly hollow when tapped on the bottom—kind of like knocking on a wooden cutting board.
Every oven is a little different, so keep an eye on it around the 20-minute mark. If the top is browning too quickly, you can loosely tent a piece of foil over it for the last few minutes of baking.
Once it’s done, take it out of the oven and immediately brush the top with 1 tablespoon of melted butter. This not only gives the crust a beautiful sheen but also adds that extra rich, buttery flavor we all love. Seriously, don’t skip this step—it’s simple but makes a big difference.
Let it cool for about 5 minutes before slicing. It’ll still be warm and soft on the inside, but letting it sit for just a few minutes helps it slice cleanly without tearing.
STEP 6: SLICE & SERVE
Once your bread has had a few minutes to rest, grab a sharp knife and slice it into wedges or thick rustic slices. If you’re feeling fancy, sprinkle on a little chopped fresh parsley for a pop of color and freshness. That green against the golden cheese just looks so inviting.
This bread is absolute heaven served warm, especially alongside soups, stews, or a crisp green salad. I also love it with pasta—it’s like a shortcut garlic bread with extra personality. And yes, I’ve absolutely eaten it on its own as a snack straight from the cutting board. No judgment here.
VARIATIONS & TIPS FOR SUCCESS
This recipe is super flexible, so feel free to get creative depending on what you have on hand. Here are a few of my favorite twists:
-
Swap the cheese: Try mixing in Monterey Jack, mozzarella, or even a spicy pepper jack for a little heat. A combo of sharp cheddar and smoked gouda? Game-changer.
-
Add herbs: Mix in a teaspoon of dried oregano, thyme, or Italian seasoning with the dough for a fragrant, herby touch.
-
Make it spicy: Add a pinch of red pepper flakes or a finely chopped jalapeño to the dough if you like a bit of heat.
And if you’re wondering how to get the perfect texture every time, here are a few quick tips:
-
Don’t overwork the dough. Just mix until it comes together. Overmixing can make the bread a bit dense.
-
Use full-fat Greek yogurt. It gives the bread a richer flavor and fluffier interior. Lower-fat versions work, but the texture won’t be quite the same.
-
Check your baking powder. If you’re making your own self-rising flour, make sure your baking powder is fresh—old baking powder won’t give you that nice lift.