

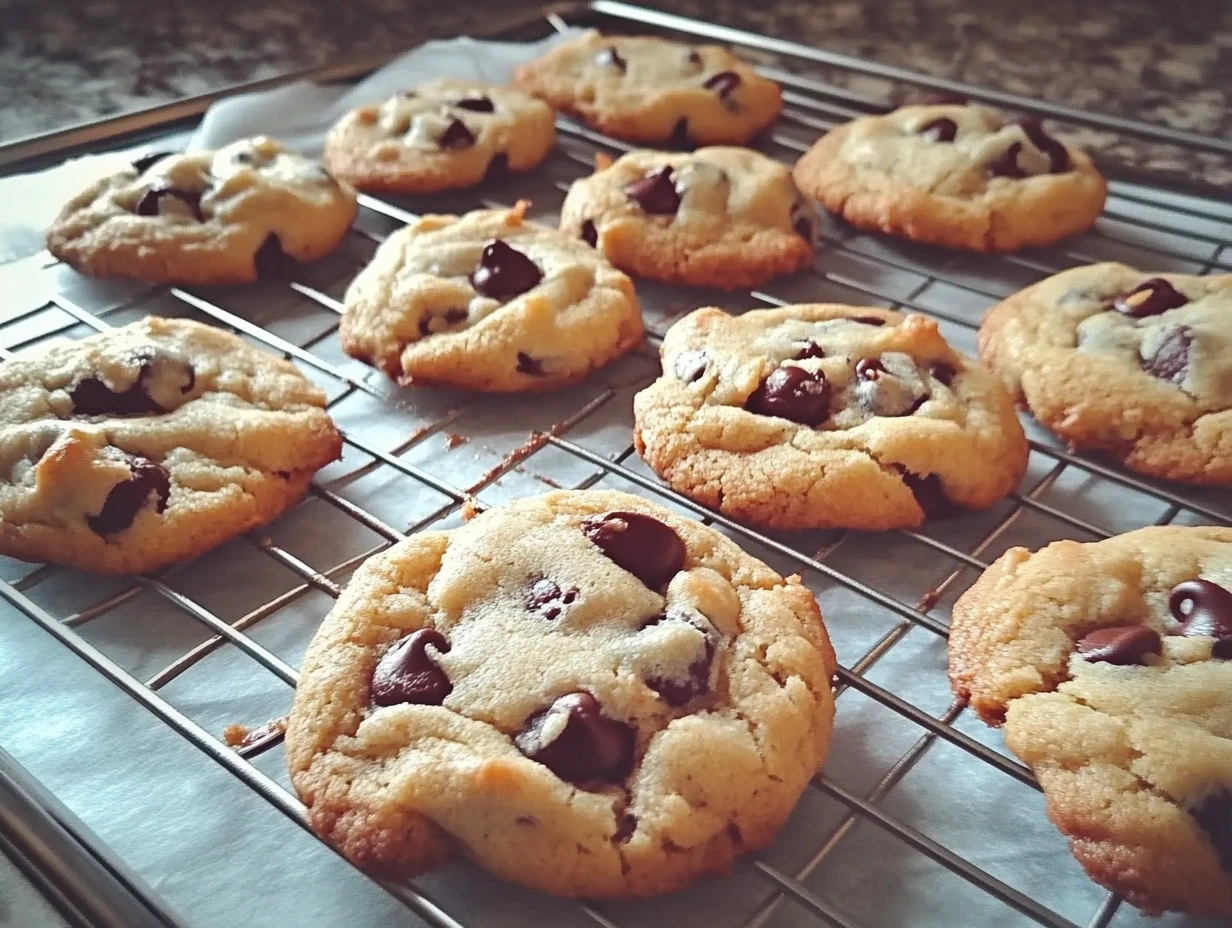
There’s just something about a warm chocolate chip cookie that speaks to the soul, isn’t there? Maybe it’s the comforting aroma that fills the kitchen, or the way the edges crisp up just enough while the center stays soft and gooey. Or maybe it’s the nostalgia—reminding you of after-school treats, bake sales, or late-night cravings. Either way, these classic chocolate chip cookies are the kind of tried-and-true recipe every home baker needs in their back pocket.
Over the years, I’ve tested more cookie recipes than I can count. Some were too cakey, others spread out into puddles, and a few just didn’t have that wow factor. But this one? It nails it. Every. Single. Time. Crisp, golden edges? Check. Melt-in-your-mouth center? Oh yes. And with just the right balance of brown sugar and granulated sugar, you get that perfect chewiness that makes these cookies completely irresistible.
This recipe is incredibly simple to make and uses pantry staples you probably already have on hand. You can stick to the classic version with just chocolate chips or toss in some walnuts or pecans for an extra bit of crunch. Either way, you’re in for a treat.
Let’s dive right into the first part of this dreamy chocolate chip cookie recipe!
STEP 1: PREHEAT THE OVEN
Before you touch a mixing bowl, go ahead and get that oven going. Preheat it to 375°F (190°C). You’ll also want to line your baking sheets with parchment paper or a silicone baking mat to prevent sticking and help your cookies bake up evenly.
This step might seem minor, but it makes a big difference. A properly preheated oven means your cookies will start baking the moment they hit the rack, helping them set properly and avoid overspreading.
STEP 2: MIX YOUR DRY INGREDIENTS
Grab a medium-sized bowl and whisk together the following:
-
2 ¼ cups all-purpose flour
-
1 teaspoon baking soda
-
½ teaspoon salt
Whisking these dry ingredients helps evenly distribute the baking soda and salt throughout the flour. This way, every bite of cookie gets just the right lift and balance of flavor.
Set this bowl aside—we’ll come back to it in a bit.
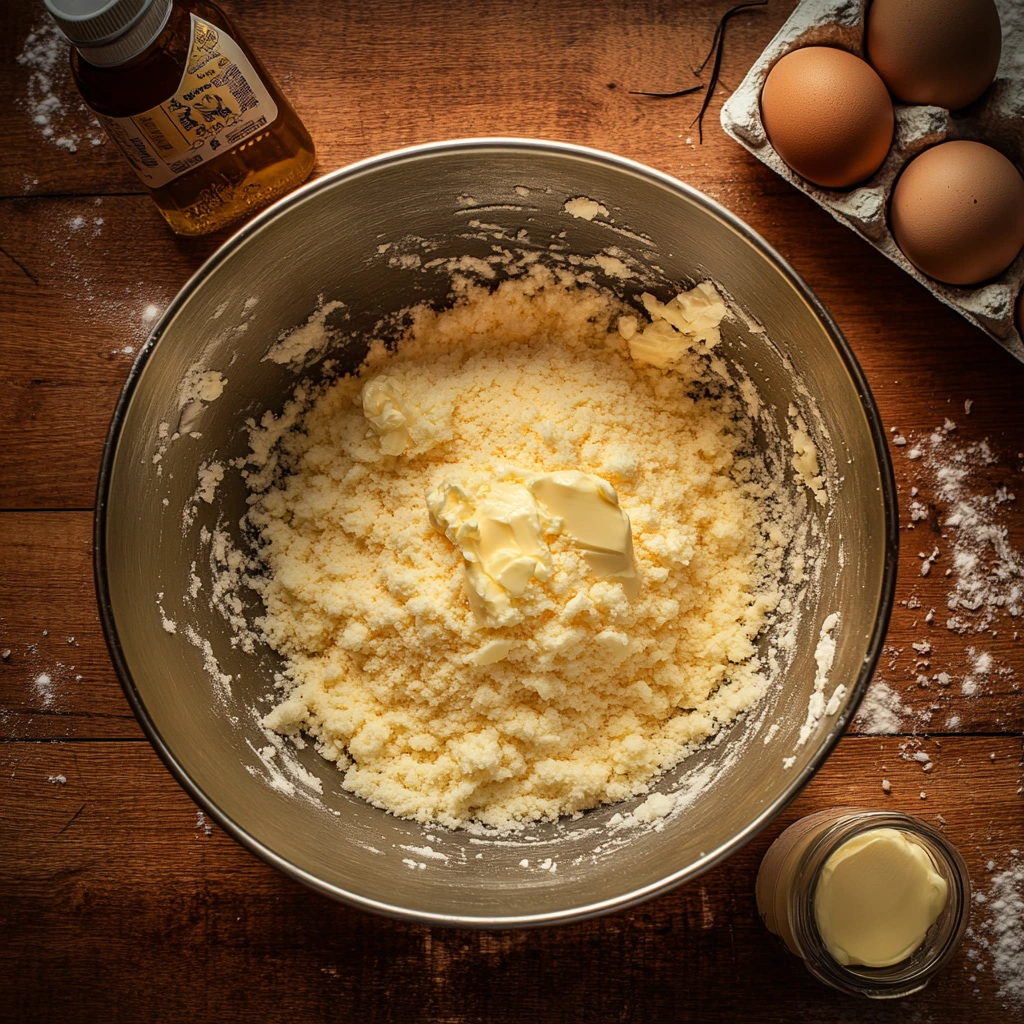
STEP 3: CREAM BUTTER AND SUGARS
Now, in a large mixing bowl (or the bowl of a stand mixer if you have one), beat together:
-
1 cup unsalted butter, softened
-
¾ cup granulated sugar
-
¾ cup packed brown sugar (light or dark both work, but dark adds a deeper molasses flavor)
Beat this mixture on medium-high speed for about 2–3 minutes, until it’s light and fluffy. This creaming process adds air to the dough, helping the cookies rise and giving them that soft, tender texture.
Next, add in:
-
1 teaspoon vanilla extract
-
2 large eggs, one at a time
Make sure each egg is fully incorporated before adding the next. Using eggs at room temperature helps them blend in more smoothly, which leads to a better dough consistency.
By now, your kitchen should be smelling pretty incredible—and we haven’t even started baking yet!
STEP 4: COMBINE THE WET AND DRY INGREDIENTS
With the mixer on low speed (or using a spatula if you’re mixing by hand), gradually add the dry ingredient mixture to the wet ingredients. Mix just until everything is combined—don’t overdo it! Overmixing can lead to tough cookies, and no one wants that.
Once the dough is just combined, it’s time for the fun part.
STEP 5: ADD THE CHOCOLATE CHIPS AND NUTS
Fold in:
-
2 cups semisweet chocolate chips
-
Optional: 1 cup chopped walnuts or pecans
I like to use semisweet chocolate chips for that classic cookie flavor, but feel free to get creative—milk chocolate, dark chocolate chunks, or even white chocolate can all be amazing. If you’re adding nuts, go for lightly toasted ones to bring out their natural flavor. They add a lovely crunch that pairs perfectly with the gooey chocolate.
Once everything’s folded in, your cookie dough is ready for scooping!
STEP 6: SCOOP AND SHAPE YOUR COOKIE DOUGH
Using a cookie scoop or just a good old-fashioned tablespoon, drop rounded spoonfuls of dough onto your prepared baking sheets. You’re looking for about 1 tablespoon of dough per cookie, spaced about 2 inches apart. Trust me, they’ll spread a bit in the oven, and giving them that space helps them keep their shape.
Here’s a little tip: gently press down each ball of dough with the palm of your hand or the back of a spoon. You don’t need to flatten them completely—just enough to help them bake more evenly and get that beautiful round, slightly domed top. If you like those picture-perfect bakery-style cookies, you can even press a few extra chocolate chips into the tops of each dough ball before baking.
STEP 7: BAKE TO GOLDEN PERFECTION
Slide your baking sheets into the preheated 375°F oven and bake the cookies for 8 to 10 minutes. Now here’s where you want to keep a close eye.
The key is to pull them out when the edges are golden, but the centers still look just slightly underbaked. Don’t worry—those centers will continue to cook on the baking sheet as they cool, resulting in that dreamy, soft-and-gooey middle.
If you’re someone who likes a bit more crunch, leave them in for an extra minute. But be careful not to overbake—dry cookies are no fun.
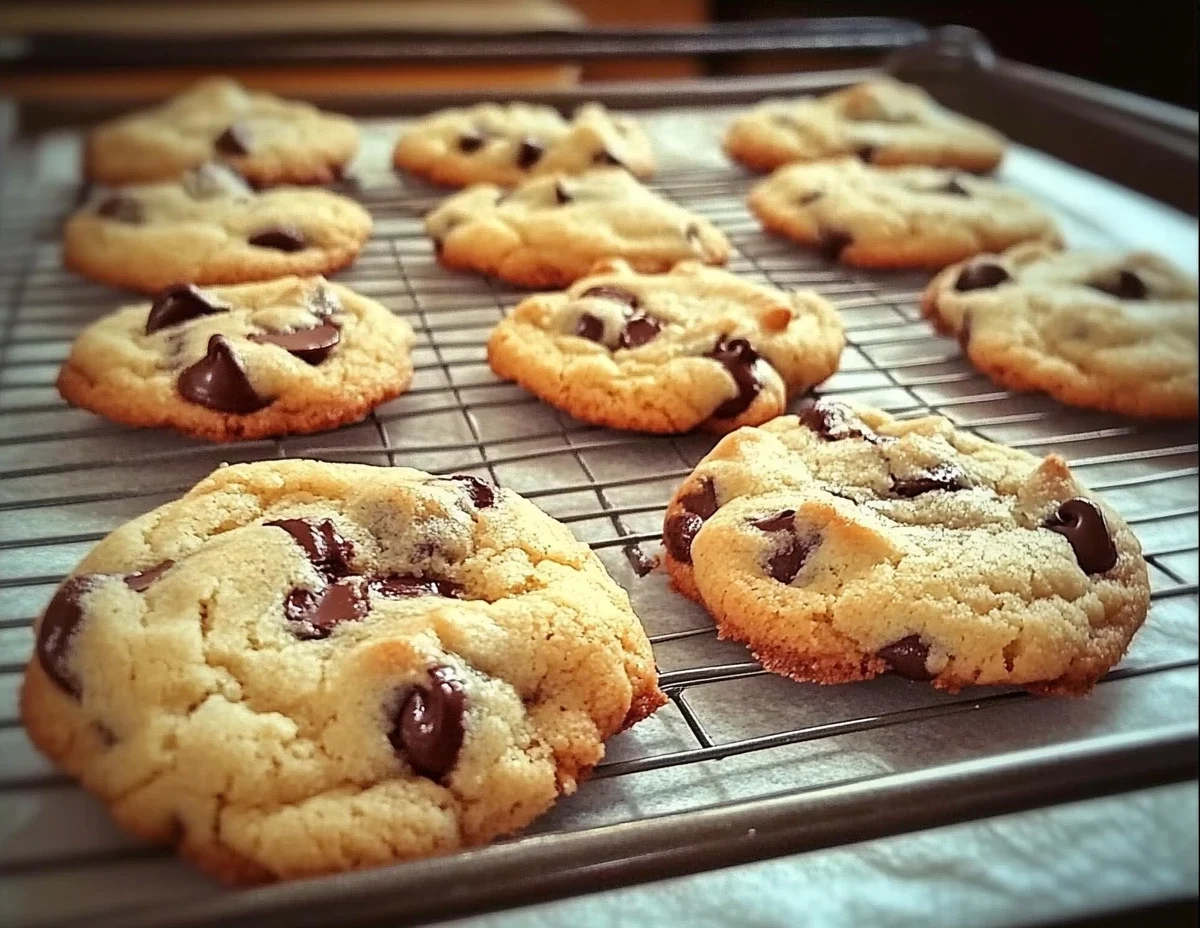
STEP 8: COOLING THEM DOWN (JUST A LITTLE)
Once they’re out of the oven, let your cookies cool on the baking sheet for about 5 minutes. This gives them time to set up a bit so they don’t fall apart when you move them. Then, carefully transfer them to a wire rack to cool completely (or as long as you can wait before sneaking a warm one).
At this point, your kitchen smells like a dream. There’s melty chocolate, buttery goodness, and maybe even the warm, nutty aroma if you went the walnut route. This is the part where my kids come running, and let’s be honest—sometimes the first batch doesn’t even make it to the cooling rack.
STORAGE TIPS: KEEPING YOUR COOKIES FRESH
If (and that’s a big if) you have leftovers, here’s how to store them:
-
Room temperature: Store in an airtight container for up to 5 days. Adding a slice of bread to the container can help keep them soft.
-
Freezer: You can also freeze both the baked cookies and the unbaked dough. To freeze dough, scoop it into balls, freeze on a baking sheet, then transfer to a freezer bag. Bake straight from frozen—just add an extra 1–2 minutes to the baking time.
TIPS FOR THE BEST CHOCOLATE CHIP COOKIES EVERY TIME
Here are a few tried-and-true tips to get the most out of this classic recipe:
-
Use room temperature ingredients: This helps everything blend together more smoothly for a better dough texture.
-
Don’t skip the chilling (if you have time): While this recipe works beautifully as-is, chilling the dough for 30 minutes to an hour can help deepen the flavor and keep the cookies from spreading too much.
-
Experiment with chocolate: Try mixing semisweet chips with dark chocolate chunks for layers of chocolatey flavor.
-
Add a sprinkle of sea salt on top: Right before baking, a tiny pinch of flaky sea salt brings out the sweetness of the chocolate and adds a touch of sophistication.
-
Rotate your pans: Halfway through baking, rotate the pans front to back and top to bottom if you’re using two racks. This helps them bake evenly.
COOKIE VARIATIONS TO TRY
While this recipe is an absolute classic, don’t be afraid to play around with it. Here are some fun variations:
-
Add cinnamon and a pinch of nutmeg for a warm, spiced twist.
-
Swap out the chocolate chips for white chocolate, butterscotch, or peanut butter chips.
-
Mix in dried fruits like cranberries or cherries for a tart contrast.
-
Use browned butter instead of regular softened butter for a rich, nutty depth of flavor.
Sometimes I’ll make half the batch with nuts and half without, just to keep everyone in the family happy. And every once in a while, I’ll double the recipe and freeze half of the dough for a rainy day. Because honestly, having cookie dough ready to bake on demand? That’s a little slice of baking magic.
FREQUENTLY ASKED QUESTIONS
1. Can I make the dough ahead of time?
Absolutely! This dough keeps really well in the fridge for up to 3 days. Just cover it tightly with plastic wrap or transfer it to an airtight container. When you’re ready to bake, let it sit at room temperature for about 15–20 minutes before scooping if it’s too firm.
2. Why did my cookies turn out flat?
Flat cookies can happen for a few reasons. Your butter might have been too warm, or you may have overmixed the dough. Also, be sure your baking soda is fresh—that makes a big difference in helping the cookies rise and hold their shape.
3. Can I freeze the dough?
Yes, and I highly recommend it. Scoop the dough into individual portions, freeze them on a baking sheet, then store in a freezer bag. You can bake them straight from the freezer—just add 1–2 minutes to the bake time.
4. What type of chocolate works best?
Semisweet chips are the classic choice, but dark chocolate chunks, milk chocolate, or even chopped chocolate bars can all work. Using a mix of types creates a more complex flavor. I also love using mini chips if I want chocolate in every bite.
5. Do I need to chill the dough?
Chilling is optional for this recipe, but it does help prevent too much spreading and enhances the flavor. Even 30 minutes in the fridge can make a noticeable difference, especially if your kitchen is warm.
6. Can I make these cookies gluten-free?
Yes, you can use a 1:1 gluten-free all-purpose flour blend. Just be sure it contains xanthan gum or a binding agent for the best texture.
7. Why are my cookies dry?
Dry cookies often mean they were baked too long or had too much flour. Be sure to measure your flour properly by spooning it into the measuring cup and leveling it off. And always remove the cookies from the oven when the centers still look slightly underdone.
FINAL THOUGHTS: YOUR NEW FAVORITE COOKIE RECIPE
These chocolate chip cookies aren’t fancy or complicated, but that’s exactly what makes them special. They’re the kind of cookies that feel like home—warm from the oven, full of rich, gooey chocolate, and just the right amount of crispness around the edges.
Whether you’re baking these for your family, sharing with friends, or keeping a secret stash all to yourself (no judgment here), this is a recipe that never goes out of style. It’s endlessly adaptable, simple enough for weeknight cravings, and impressive enough for a bake sale or holiday tray.
And once you make them a few times, you’ll start to know the dough by feel—the way it softens when the butter is just right, how the aroma changes as the edges start to turn golden, and the perfect timing to take them out for that gooey center. That’s when you know a recipe has become your own.
If you try this recipe, I’d love to hear how it turned out! Did you go with classic chocolate chips, or did you add a personal twist? Leave a comment, share your favorite variation, or even tag your cookie photos—there’s nothing better than seeing this recipe come to life in your kitchens.
Now go pour yourself a glass of cold milk, grab a warm cookie, and enjoy the sweet reward of a homemade classic done right.
Print
CHOCOLATE CHIP COOKIES
- Total Time: 25 minutes
Description
Classic, chewy chocolate chip cookies with crisp edges and gooey centers—perfect with a glass of cold milk or warm right off the baking sheet. Optional nuts add a satisfying crunch!
Ingredients
Dry Ingredients:
- 2 ¼ cups all-purpose flour
- 1 tsp baking soda
- ½ tsp salt
Wet Ingredients:
- 1 cup unsalted butter, softened
- ¾ cup granulated sugar
- ¾ cup packed brown sugar (light or dark)
- 1 tsp vanilla extract
- 2 large eggs, room temperature
Mix-ins:
- 2 cups semisweet chocolate chips
- Optional: 1 cup chopped walnuts or pecans
Instructions
1️⃣ Preheat the oven:
Preheat your oven to 375°F (190°C). Line baking sheets with parchment paper or silicone baking mats.
2️⃣ Mix dry ingredients:
In a medium bowl, whisk together the flour, baking soda, and salt. Set aside.
3️⃣ Cream butter and sugars:
In a large mixing bowl, beat the softened butter, granulated sugar, and brown sugar until light and fluffy (about 2–3 minutes).
Beat in the vanilla extract and eggs, one at a time, until well combined.
4️⃣ Combine and fold:
Gradually add the dry ingredients to the wet ingredients, mixing on low speed until just combined. Avoid overmixing.
Fold in the chocolate chips and optional nuts with a spatula.
5️⃣ Scoop and shape:
Drop rounded spoonfuls of dough (about 1 tablespoon each) onto the prepared baking sheets, spacing them about 2 inches apart.
Gently press down each dough ball slightly for more even baking.
6️⃣ Bake:
Bake for 8–10 minutes, or until the edges are golden and the centers look slightly underbaked.
Let the cookies cool on the baking sheet for 5 minutes, then transfer to a wire rack to cool completely.
7️⃣ Serve:
Enjoy warm with milk or store in an airtight container for up to 5 days.
Notes
- Butter Temperature: Make sure the butter is softened but not melted. This helps create the perfect cookie texture—chewy in the center, crisp on the edges.
- Sugar Balance: A mix of granulated and brown sugar gives these cookies a balanced flavor and chewy consistency. Brown sugar adds moisture and a slight caramel note.
- Eggs at Room Temp: Using room-temperature eggs helps them mix more easily into the dough and results in a more uniform texture.
- Prep Time: 15 minutes
- Cook Time: 10 minutes
Nutrition
- Serving Size: 24–30 cookies
