

Cool Whip Candy has been a delightful discovery on my zero-carb journey, and I can’t wait to share it with you! I remember the first time I stumbled upon this recipe. I was searching for something easy and satisfying to satisfy a sweet craving without a ton of carbs, and boy, did this hit the spot. It’s funny how sometimes the simplest combinations can lead to the most enjoyable treats, especially when you’re navigating the world of zero-carb cooking.
Now, don’t get me wrong—I love a freshly grilled steak or a beautifully seared piece of salmon, but sometimes, you just want something a little different, something that feels indulgent yet aligns with your zero-carb lifestyle. That’s where this Cool Whip Candy comes in. It’s a no-bake wonder that’s creamy, sweet, and oh-so-satisfying, making it a perfect addition to your collection of cool whip desserts.
As I stood in my standard apartment kitchen, the sun streaming through the window, I felt a wave of excitement. I had all my ingredients laid out, ready to transform a simple tub of Cool Whip into something special. It’s moments like these—when you realize how versatile zero-carb cooking can be—that make the journey so rewarding. Plus, the kids love it (and who wouldn’t?).
So, grab your mixing bowl, and let’s dive into making this delicious Cool Whip Candy together. Trust me, it’s going to be a blast!
📌 Pinterest Images
Save these images to your Pinterest boards!
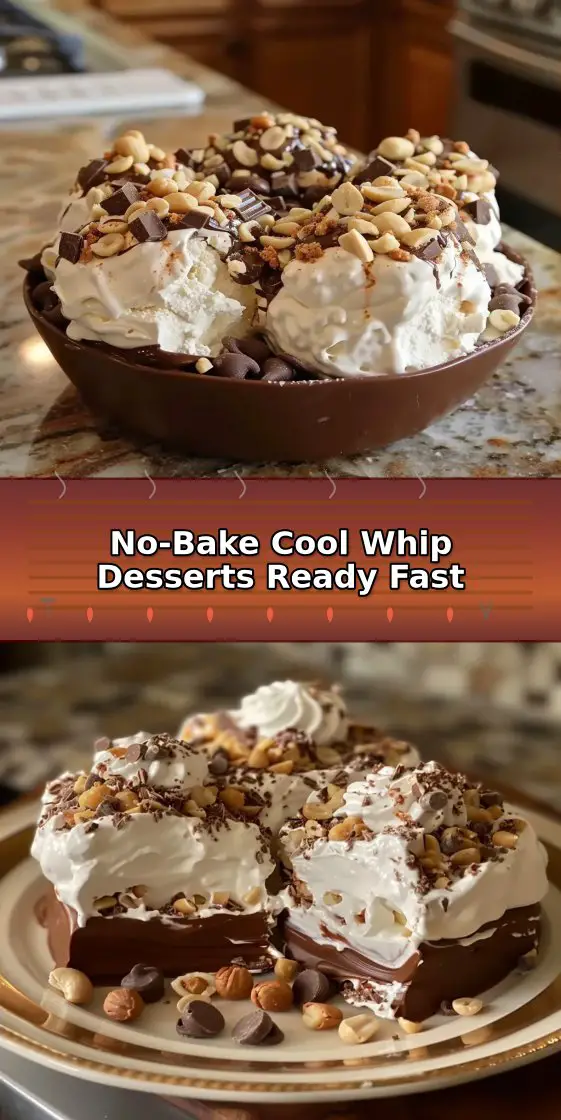
Cool Whip Candy
“No-Bake Cool Whip Desserts Ready Fast”
💡 Tip: Right-click any image above and save to share on your social media or Pinterest!
Why This Recipe Hits Different
What makes this Cool Whip Candy special from a zero-carb perspective is how it cleverly combines texture and flavor without relying on traditional sugars or heavy carb-laden ingredients. The fluffy Cool Whip brings a lightness that is complemented beautifully by the rich chocolate coating. It’s a dessert that feels decadent but is actually quite simple to make. Honestly, I was surprised at the satisfaction it brought—like biting into a candy bar but without the sugar crash!
I’ve experimented with various cool whip desserts over the years, but this one stands out because of its ease and the ability to customize it. You can toss in your favorite nuts or even swap the chocolate for a different flavor if you’re feeling adventurous. The skill level here? Honestly, if you can fold, scoop, and dip, you’re golden. It’s perfect for anyone—from busy parents to the novice cook—who wants to whip up something special without spending hours in the kitchen.
Let’s just say, if you’re looking for a sweet treat that doesn’t compromise your zero-carb goals, this is it. The flavor payoff is incredible, and it’s a great way to show that satisfying your cravings doesn’t have to mean sacrificing on taste.
What You’ll Need
Here’s what you’ll need to whip up this delightful Cool Whip Candy:
- 1 (8 oz) tub Cool Whip, fully thawed (full-fat recommended)
- 1/2 cup powdered sugar
- 1 teaspoon vanilla extract (optional, for flavor depth)
- 16 oz milk or dark chocolate melting wafers (or almond bark)
- 1/4 cup finely chopped roasted peanuts or almonds
- 2 tablespoons mini chocolate chips or shaved chocolate (for topping)
When it comes to sourcing ingredients, I always prioritize quality. I recommend using full-fat Cool Whip for the best texture. If you can find it, opt for high-quality chocolate melting wafers; they melt beautifully and give that shiny finish we all love. And as for the nuts, feel free to choose your favorites based on your personal preferences or what you have on hand. It’s all about making this recipe work for you!
Let’s Make This Happen
Now, let’s get to the good stuff—the steps to make this delicious Cool Whip Candy!
- In a large bowl, gently fold the powdered sugar into the thawed Cool Whip using a spatula. If desired, add vanilla extract. Fold the mixture just until it is smooth and slightly thickened—be careful not to overmix. It should be soft yet able to hold its shape when scooped.
- Line a baking sheet with parchment paper. Using a small cookie scoop or a tablespoon, portion out rounded mounds and place them on the prepared sheet. If you wish, smooth the tops of the mounds. Freeze for 1 hour, or until they are firm enough to handle.
- In a microwave-safe bowl, heat the chocolate wafers in 30-second intervals, stirring well after each interval until the mixture is smooth and fluid. Allow it to cool slightly—ensuring it is still pourable but not hot.
- Working one at a time, use a fork to dip each frozen dome into the melted chocolate. Tap off the excess chocolate and return the coated dome to the lined baking tray.
- While the chocolate coating is still wet, sprinkle the tops with chopped nuts and mini chocolate chips or shavings. It’s important to work quickly, as the coating sets rapidly.
- Refrigerate the candies for 20–25 minutes, or until the chocolate shell is firm. They can be served chilled or at cool room temperature.
As you’re preparing this, you might find the folding technique a bit tricky at first. I remember when I first tried it; I overmixed and ended up with a runnier texture. The key is to be gentle and just combine until it’s smooth. Also, keep an eye on those chocolate wafers! They melt quickly, so stirring after each interval is crucial for achieving that silky smooth consistency.
Making It Work for You
If you’re new to zero-carb cooking or just looking for tips to make this recipe your own, here’s what I’ve found helpful. First, don’t hesitate to experiment with flavors—adding a bit of almond extract instead of vanilla can give a lovely twist. For those with nut allergies, you can skip the nuts altogether or substitute with crushed sugar-free cookies for some crunch.
Timing can be a challenge, especially if you’re juggling a busy schedule. I’ve found it’s helpful to make these candies ahead of time when you know you’ll need a treat. You can easily whip this up in the morning and leave it to chill while you go about your day. They also make a great addition to any gathering or potluck; just be prepared to share the recipe!
Storage and Reheating Reality
So, what happens with leftovers? If you manage to have any (which is rare in my house), these Cool Whip Candies can be stored in an airtight container in the refrigerator for up to a week. Just a heads up: the texture may change slightly, but they still taste fantastic! I wouldn’t recommend freezing them after they’re coated in chocolate, as it can affect that lovely chocolate shell. Instead, enjoy them fresh for the best experience.
Questions I Actually Get
Can I use sugar substitutes instead of powdered sugar?
Absolutely! Just make sure to choose a powdered sugar substitute that measures like regular sugar. I’ve tried erythritol-based ones, and they work well, though the texture might be slightly different.
What if I can’t find melting wafers?
No worries! Almond bark works just as well. Just keep an eye on the melting process, as it can behave a little differently depending on the brand.
Can I add different toppings?
Definitely! I’ve tried adding unsweetened coconut flakes, crushed freeze-dried strawberries, and even a sprinkle of sea salt for a sweet-and-salty combo. Get creative!
How do I make these dairy-free?
You can substitute the Cool Whip with a dairy-free whipped topping, and use dairy-free chocolate options. Just check the labels to ensure they fit your dietary needs.
Closing Thoughts:
So there you have it! Cool Whip Candy is not just a dessert; it’s a celebration of flavors that fits perfectly into a zero-carb lifestyle. I hope you enjoy making these as much as I did. Whether you’re treating yourself or impressing friends, this recipe proves that zero-carb doesn’t mean sacrificing on fun or flavor. I can’t wait to hear your thoughts and any variations you try out. Happy cooking!

Cool Whip Candy Delight
Ingredients
Method
- In a large bowl, gently fold the powdered sugar into the thawed Cool Whip using a spatula. If desired, add vanilla extract. Fold the mixture just until it is smooth and slightly thickened—be careful not to overmix. It should be soft yet able to hold its shape when scooped.
- Line a baking sheet with parchment paper. Using a small cookie scoop or a tablespoon, portion out rounded mounds and place them on the prepared sheet. If you wish, smooth the tops of the mounds. Freeze for 1 hour, or until they are firm enough to handle.
- In a microwave-safe bowl, heat the chocolate wafers in 30-second intervals, stirring well after each interval until the mixture is smooth and fluid. Allow it to cool slightly—ensuring it is still pourable but not hot.
- Working one at a time, use a fork to dip each frozen dome into the melted chocolate. Tap off the excess chocolate and return the coated dome to the lined baking tray.
- While the chocolate coating is still wet, sprinkle the tops with chopped nuts and mini chocolate chips or shavings. It’s important to work quickly, as the coating sets rapidly.
