I don’t know about you, but when the afternoon slump hits or I’m winding down after dinner, I always find myself reaching for something sweet. But let’s be real—it’s way too easy to go overboard with sugar-loaded treats that leave you more sluggish than satisfied. That’s why these Frozen Greek Yogurt Peanut Butter Bites are a total game-changer in our house. They’re creamy, a little nutty, and have just the right amount of chocolate to hit the spot. Even better? They’re packed with protein, low in added sugar, and made with simple ingredients you probably already have in your kitchen.
This recipe is kind of a cross between a mini ice cream bar and a peanut butter cup, but without all the guilt. The Greek yogurt makes them tangy and rich, the peanut butter adds that salty-sweet combo we all love, and the chocolate coating makes them feel like a legit dessert. And the best part? No baking involved! Just mix, freeze, dip, and done.
I first made these on a hot summer afternoon when I was looking for something refreshing that wasn’t a smoothie or yet another popsicle. My kids were skeptical at first (they’re tough critics when it comes to “healthy treats”), but once they took a bite, they were hooked. Now, they ask for them weekly—and I’m not mad about it. It feels like a win-win: they get something sweet, and I know exactly what’s in it.
So let’s get into it! Here’s how to make your own batch of these frozen delights:
INGREDIENTS YOU’LL NEED
For the Bites:
-
1 cup plain Greek yogurt (you can go nonfat if you want to keep it light, or full-fat for extra creaminess)
-
1/4 cup creamy peanut butter (almond butter works great too)
-
2 tablespoons honey (or maple syrup if you want to keep it vegan)
-
1/2 teaspoon vanilla extract
-
1/4 cup mini chocolate chips (plus a few extras for topping, if you want to get fancy)
For the Chocolate Coating:
-
1 cup dark chocolate chips (semi-sweet is totally fine too)
-
1 teaspoon coconut oil (optional, but helps the chocolate melt smoother and coat more easily)
Optional Toppings:
-
Crushed peanuts
-
Sea salt flakes
-
Shredded coconut
STEP 1: MIX THE BASE
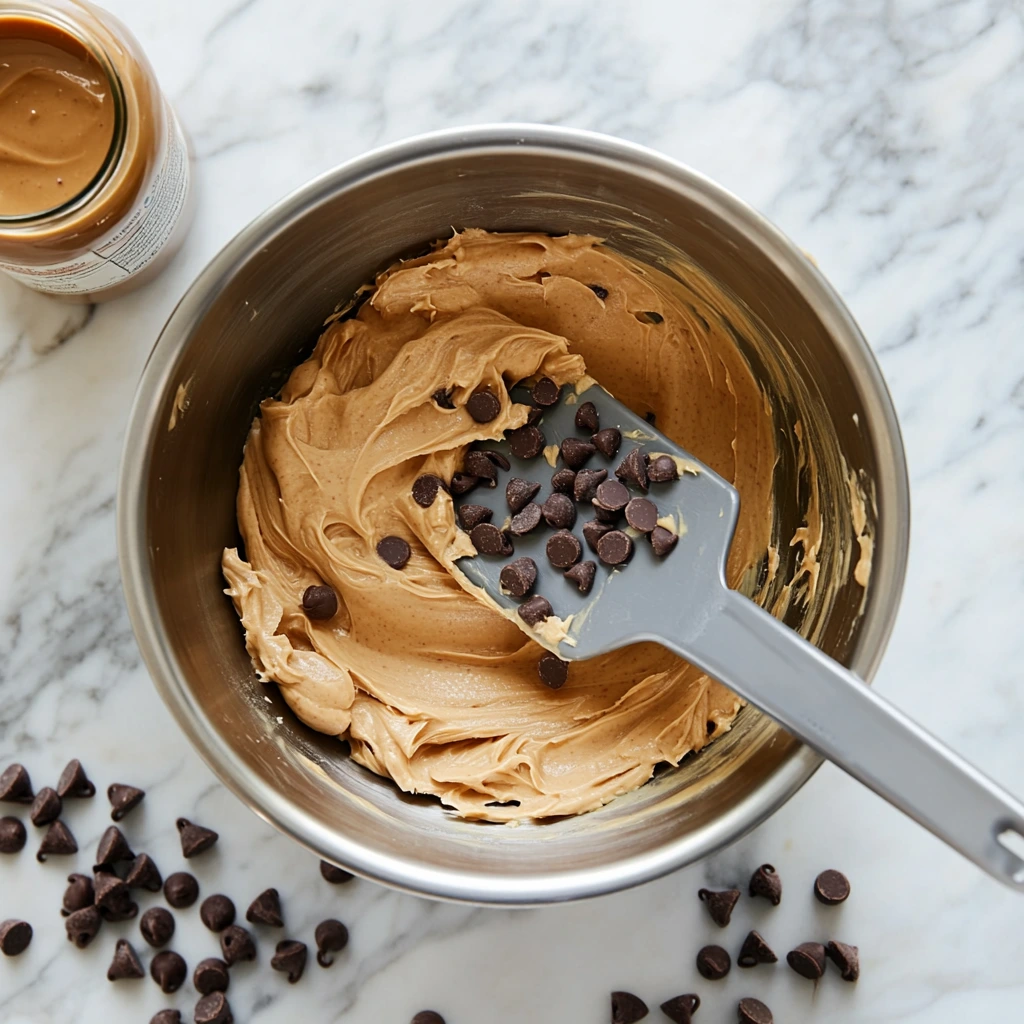
Start by grabbing a medium-sized mixing bowl. Add in your Greek yogurt, peanut butter, honey, and vanilla extract. Give it a good stir until the mixture is completely smooth and creamy—no lumps or streaks. Once that’s looking good, fold in the mini chocolate chips. Try not to eat it all with a spoon right then and there, because trust me, it’s tempting.
This base is so creamy and flavorful that it could honestly be served just as a chilled pudding or frozen on its own. But we’re taking it up a notch, because that chocolate coating? It’s everything.
STEP 2: SHAPE AND FREEZE
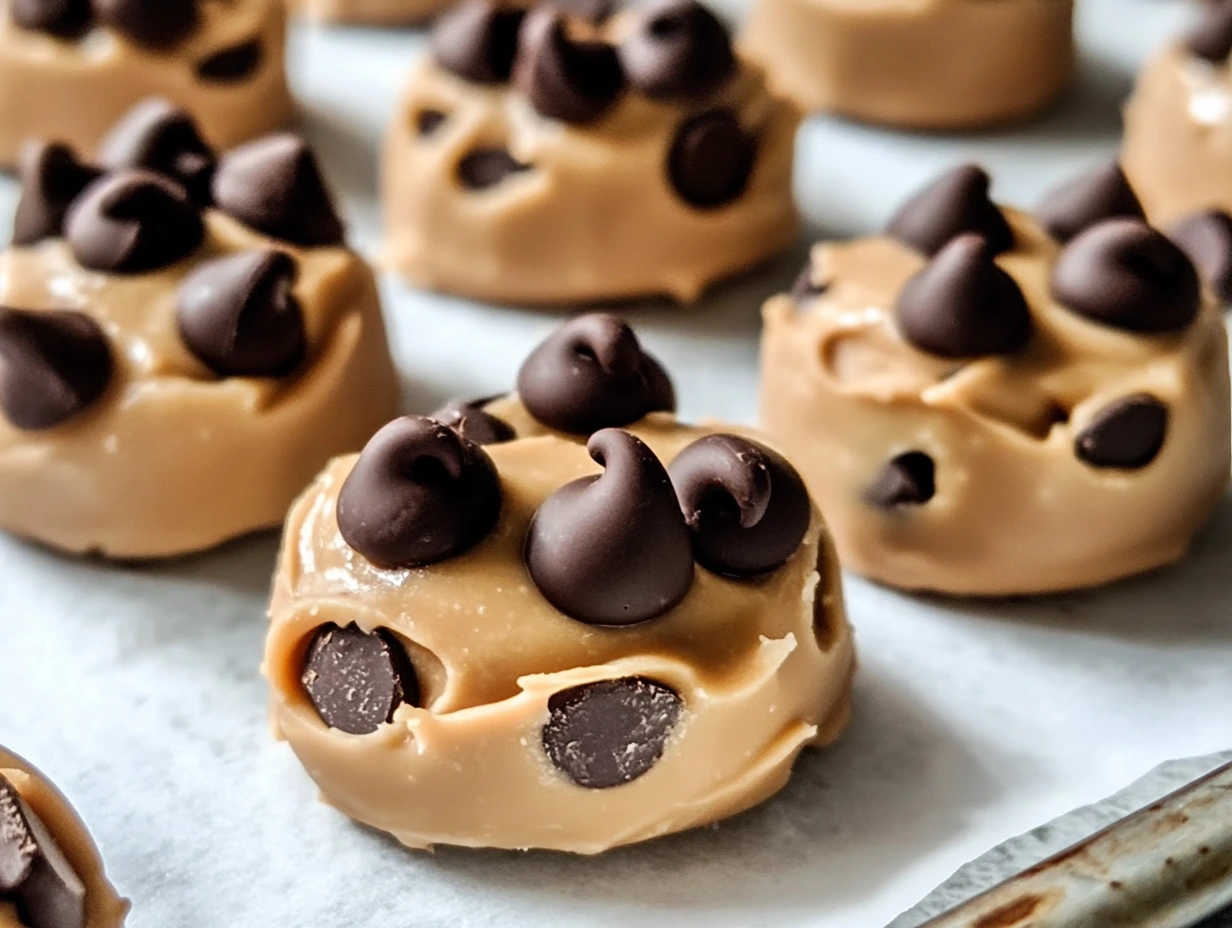
Now it’s time to shape your bites. Line a baking sheet with parchment paper so nothing sticks. Scoop out about 1 tablespoon of the mixture for each bite and drop it onto the sheet. Flatten them just slightly so they form little discs—kind of like thick coins. Don’t worry if they’re not perfect; they’ll all taste the same once they’re dipped in chocolate.
Once you’ve got all your bites shaped, pop the tray into the freezer. Let them chill for 1 to 2 hours, or until they’re nice and firm. This step is key—if the bites are too soft, the chocolate won’t stick properly when you dip them.
STEP 3: MELT THE CHOCOLATE
In a microwave-safe bowl, pour in your dark chocolate chips. Add the coconut oil if you’re using it—it’s optional, but it helps make the chocolate a little silkier and easier to work with. Heat it in 30-second increments, stirring between each round, until everything is melted and smooth. You can also use a double boiler if you prefer not to microwave, but I’ll be honest—I almost always go with the microwave for the sake of ease (and fewer dishes).
Make sure not to overheat the chocolate! It should be silky and pourable, not clumpy or scorched. If it starts to thicken up while you’re dipping, just give it a quick reheat.
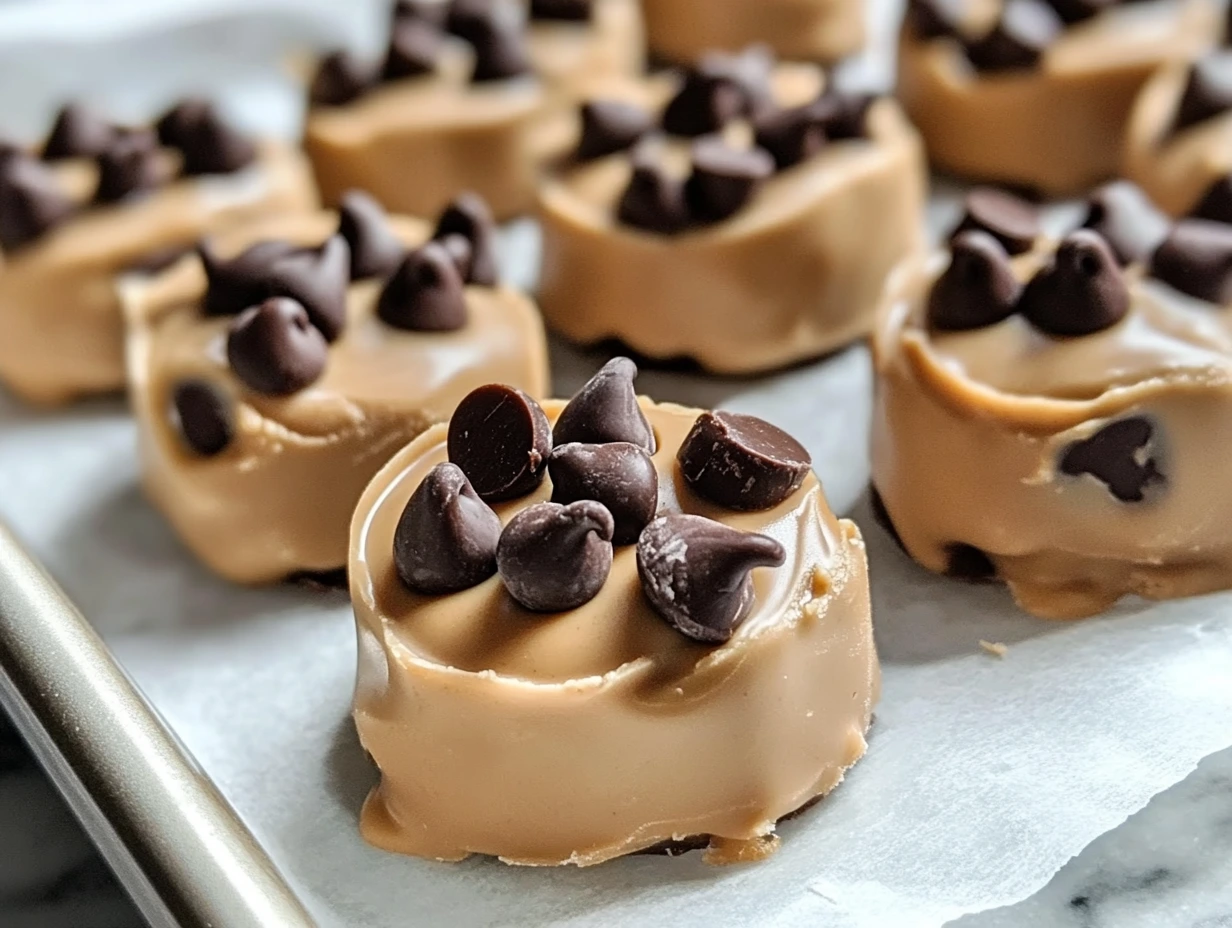
STEP 4: DIP THE BITES
Once your chocolate is ready and the bites are frozen solid, it’s time to coat them. Grab each bite using a fork or a small spatula and carefully dip it into the melted chocolate. Let any excess chocolate drip off (you can tap the fork lightly on the side of the bowl), then place it back onto the parchment-lined tray.
If you want to add toppings, now’s the time—while the chocolate is still wet. A sprinkle of crushed peanuts, a pinch of flaky sea salt, or a dusting of shredded coconut really makes them look as good as they taste. My kids love to add extra mini chocolate chips on top (because why not?), while I go for sea salt and peanuts. That salty-sweet combo? So good.
STEP 5: FREEZE AGAIN TO SET
After all the bites are dipped and topped, slide the tray back into the freezer for about 15–20 minutes. This will allow the chocolate to set up completely, so you get that nice, crisp shell when you take a bite. If you’re in a warm kitchen, it might take a little longer, but you’ll know they’re ready when the chocolate is fully hardened and no longer glossy.
STEP 6: STORE AND ENJOY
Once they’re fully set, you can transfer the bites into an airtight container. Keep them stored in the freezer, and just let them sit at room temperature for 2 to 3 minutes before enjoying. That short thaw time makes all the difference—the filling softens just enough to be ultra-creamy, while the chocolate stays crisp.
I like to keep a stash of these in the freezer for easy grab-and-go snacks. They’re perfect after a workout, great for school lunches (just pack with an ice pack), and honestly, they’re the kind of treat that satisfies without making you feel like you overdid it.
MAKE IT YOUR OWN: VARIATIONS TO TRY
What I love most about this recipe is how adaptable it is. Once you’ve nailed the basic version, there are tons of ways to switch things up based on your preferences or what you have on hand. Here are a few of my favorite variations:
-
Go Vegan: Use a plant-based yogurt and swap honey for maple syrup. You’ll still get that creamy texture and sweet flavor without any dairy or animal products.
-
Switch the Nut Butter: Almond butter, cashew butter, or even sunflower seed butter (for a nut-free version) all work great here.
-
Add Crunch: Mix chopped peanuts or crushed pretzels right into the yogurt base for added texture.
-
Fruit Twist: Stir in some chopped dried fruit—like raisins, cranberries, or dates—for a chewy bite.
-
Cocoa Boost: Add a teaspoon of cocoa powder to the base for a richer, chocolatey flavor throughout.
This is definitely one of those recipes that rewards creativity. Don’t be afraid to experiment! The base is super forgiving, so you can play around with flavors and textures until you find your perfect combo.