


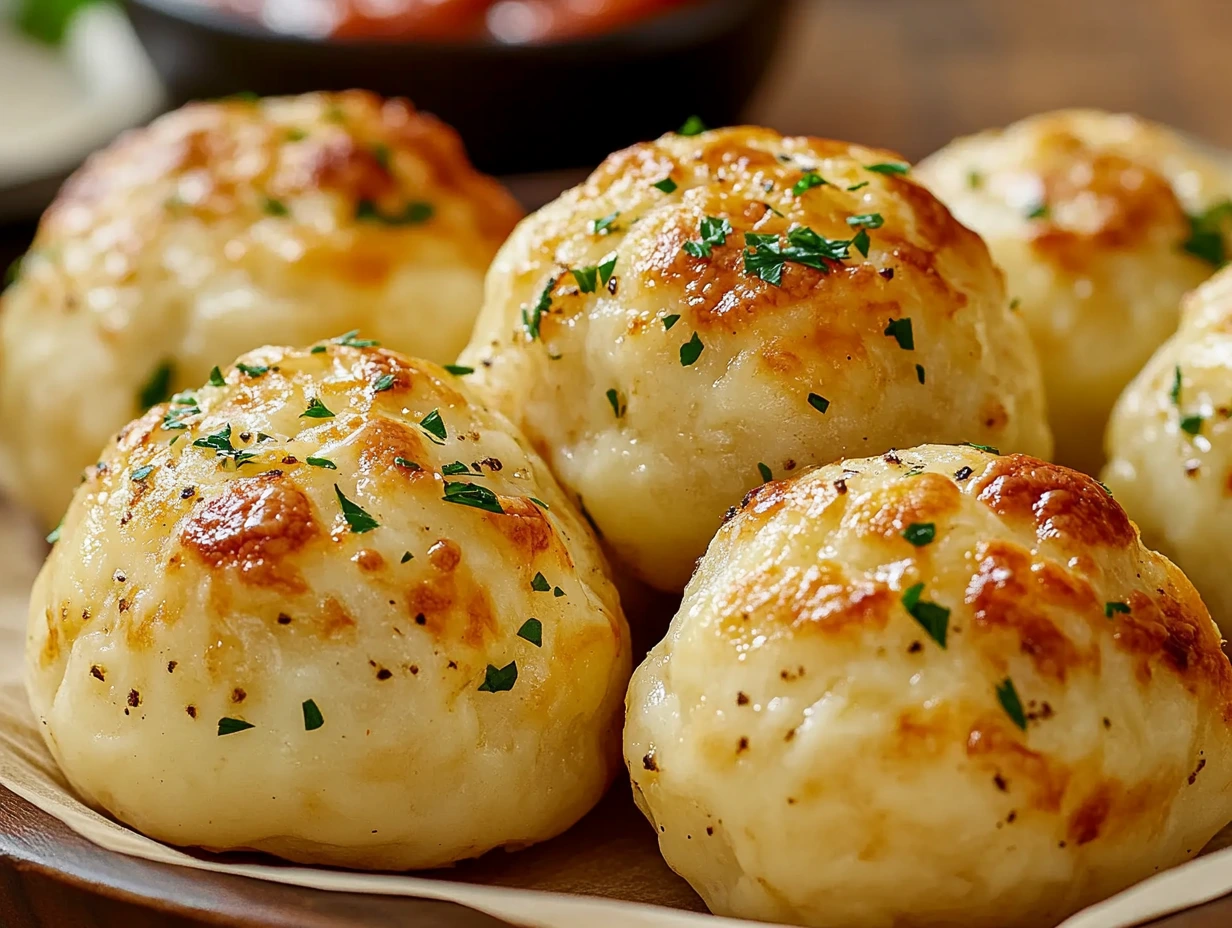
There’s something magical about biting into a warm, soft, and fluffy bread roll only to be met with an ooey-gooey, cheesy explosion inside. Enter Garlic Butter Cheese Bombs—the ultimate comfort snack that’s perfect for game nights, parties, or just a lazy Sunday indulgence. These little bites of heaven are not only ridiculously easy to make but also incredibly addictive.
The best part? You only need a handful of ingredients, and the whole process takes less than 30 minutes from start to finish. Whether you’re serving them as an appetizer, a side dish, or a snack, trust me—these cheesy bombs will disappear from the plate before you know it!
Why You’ll Love This Recipe
- Super easy to make – Thanks to store-bought biscuit dough, there’s no need to mess with yeast or rising times.
- Irresistibly cheesy – Each bite is loaded with melty mozzarella cheese.
- Garlic butter goodness – A flavorful blend of butter, garlic, and herbs gives these cheese bombs their signature taste.
- Great for any occasion – Serve them as a snack, an appetizer, or a side for pasta night.
Ingredients You’ll Need
For the Cheese Bombs:
- 1 can refrigerated biscuit dough
- 1 cup shredded mozzarella cheese
For the Garlic Butter Topping:
- ¼ cup unsalted butter (melted)
- 3 garlic cloves (minced)
- ½ teaspoon Italian seasoning
- 1 tablespoon chopped parsley
- ¼ teaspoon salt
Step 1: Prep the Oven & Baking Dish
Before we get into the cheesy magic, start by preheating your oven to 375°F (190°C). This ensures that the cheese bombs will bake evenly and develop that beautiful golden brown color.
Next, grease a baking dish or line it with parchment paper. This step prevents the cheese bombs from sticking and makes cleanup a breeze.
Step 2: Preparing the Dough
Now, let’s get those biscuit dough pieces ready!
- Open the can of refrigerated biscuit dough (yes, that pop sound is always a little startling!).
- Separate each biscuit and flatten them into small circles using your fingers. You don’t need a rolling pin—just press them out until they’re large enough to hold the cheese filling.
Tip: If you’re feeling fancy, you can use homemade biscuit dough instead, but the store-bought version makes this recipe super quick and convenient.
Step 3: Stuffing the Cheese Bombs
Here’s where the magic happens:
- Place about a tablespoon of shredded mozzarella in the center of each flattened dough circle.
- Carefully fold the edges over the cheese and pinch them together tightly, forming a ball.
- Place each cheese-filled dough ball seam-side down into the prepared baking dish.
Tip: Make sure the dough is sealed completely—you don’t want the cheese oozing out while baking! If needed, pinch the dough extra well or give it a quick roll between your palms.
Step 4: Make the Garlic Butter Sauce
This step is incredibly simple but packs a ton of flavor!
- In a small bowl, combine the following ingredients:
- ¼ cup melted unsalted butter
- 3 garlic cloves, minced
- ½ teaspoon Italian seasoning
- ¼ teaspoon salt
- 1 tablespoon chopped parsley
- Stir well to mix everything together. The warmth of the butter will infuse with the garlic and seasonings, creating an aromatic, buttery masterpiece.
Tip: Love extra garlic flavor? Feel free to add more garlic or even a dash of garlic powder for an extra punch. If you’re a spice lover, a pinch of crushed red pepper flakes can add a bit of heat!
Step 5: Coat the Cheese Bombs with Garlic Butter
Now comes the best part—brushing the garlic butter on our cheese bombs!
- Use a pastry brush to generously coat each cheese bomb with the melted garlic butter mixture.
- Make sure to get all the sides and tops—this helps them bake up golden brown and deliciously flavorful.
- If you have any extra butter left, save it for a post-baking brush-up for extra shine and flavor.
Tip: If you don’t have a pastry brush, no worries! Just spoon the butter mixture over each cheese bomb and let it naturally spread.
Step 6: Bake Until Golden & Gooey
It’s time to let the oven do its thing!
- Place the prepared cheese bombs into the preheated oven (375°F / 190°C).
- Bake for 12-15 minutes, or until they turn a beautiful golden brown and the cheese inside is perfectly melted.
- Keep an eye on them during the last few minutes to prevent over-browning.
How do you know they’re done?
- The tops should be lightly crispy and golden brown.
- You may see tiny cheese bubbles peeking out—this means they’re perfectly gooey inside!
- If needed, give one a gentle poke—it should feel soft yet firm enough to hold its shape.
Step 7: Extra Garlic Butter Love (Optional but Recommended!)
As soon as the cheese bombs come out of the oven, you can brush them with any leftover garlic butter for even more flavor. The heat will help absorb the butter, making them even more irresistible!
Step 8: Serve & Enjoy!
Now the best part—eating these golden, cheesy beauties!
How to Serve Garlic Butter Cheese Bombs:
- With Marinara Sauce – The classic pairing! Dip them in warm marinara sauce for a pizza-like experience.
- With Ranch Dressing – For a creamy and tangy contrast.
- With Garlic Parmesan Butter – More garlic butter? Yes, please!
- As a Side for Pasta – These go amazingly well with pasta dishes like spaghetti or Alfredo.
- With Soup – Serve them alongside tomato soup or creamy broccoli cheddar soup for a cozy meal.
Tip: If you want to elevate these cheese bombs even further, sprinkle them with grated Parmesan cheese before serving for an extra cheesy bite!
Frequently Asked Questions (FAQ)
1. Can I make Garlic Butter Cheese Bombs ahead of time?
Yes! You can assemble the cheese bombs up to a day in advance and store them in the refrigerator. Just make sure to cover them tightly with plastic wrap. When you’re ready to bake, brush them with the garlic butter mixture and pop them into the oven—no need to let them come to room temperature.
2. How do I store leftovers?
If you have any leftovers (which is rare because they’re so addicting!), store them in an airtight container in the refrigerator for up to 3 days.
3. What’s the best way to reheat them?
The best way to keep them crispy and delicious is to reheat them in the oven at 350°F (175°C) for about 5-7 minutes. If you’re in a rush, you can microwave them for 15-20 seconds, but they might be a bit softer.
4. Can I freeze these cheese bombs?
Yes! You can freeze them before or after baking.
- Before baking: Place assembled (but unbaked) cheese bombs on a baking sheet and freeze until solid. Transfer them to a freezer bag and store for up to 2 months. When ready to bake, pop them in the oven from frozen, adding a few extra minutes to the baking time.
- After baking: Let them cool completely, then freeze them in an airtight container. Reheat in the oven at 350°F (175°C) for 10-12 minutes.
5. Can I use a different type of cheese?
Absolutely! While mozzarella is the classic choice, you can switch things up with other cheeses like:
- Cheddar – For a sharper, more flavorful bite.
- Gouda – For a creamy and smoky twist.
- Pepper Jack – If you like a little spicy kick.
6. Can I make these with homemade dough instead of canned biscuits?
Of course! If you have a favorite homemade biscuit or pizza dough recipe, you can use that instead of store-bought dough. Just make sure to roll it out thin enough to wrap around the cheese.
7. Can I make these in an air fryer?
Yes! Air frying is a great alternative to baking. Preheat your air fryer to 350°F (175°C) and cook for about 8-10 minutes, checking for golden brown tops. Make sure to leave enough space between them for even cooking.
Final Thoughts: Why You Need These Cheese Bombs in Your Life!
If you’re looking for an easy, cheesy, crowd-pleasing snack, Garlic Butter Cheese Bombs are your answer! Whether you’re making them for a party, a cozy night in, or just because you’re craving something cheesy and delicious, this recipe is a total winner.
They’re crispy on the outside, soft and fluffy inside, and oozing with melted cheese—all coated in buttery garlic goodness. What’s not to love?!
Happy baking and happy eating!
Print
GARLIC BUTTER CHEESE BOMBS
- Total Time: 22-25 mins
Description
These Garlic Butter Cheese Bombs are golden, buttery, and filled with gooey melted cheese. Perfect as an appetizer, side dish, or snack, they’re super easy to make with refrigerated biscuit dough and a delicious garlic butter topping.
Ingredients
For the Cheese Bombs:
- 1 can refrigerated biscuit dough
- 1 cup shredded mozzarella cheese
For the Garlic Butter Topping:
- 1/4 cup unsalted butter (melted)
- 3 garlic cloves (minced)
- 1/2 teaspoon Italian seasoning
- 1 tablespoon chopped parsley
- 1/4 teaspoon salt
Instructions
1️⃣ Preheat the oven to 375°F (190°C) and grease a baking dish or line it with parchment paper.
2️⃣ Prepare the dough: Open the biscuit dough and separate into individual biscuits. Flatten each biscuit into a small circle.
3️⃣ Stuff the biscuits: Place about a tablespoon of shredded mozzarella in the center of each biscuit. Fold the edges over the cheese and pinch to seal, forming a ball.
4️⃣ Make the garlic butter sauce: In a small bowl, mix the melted butter, minced garlic, Italian seasoning, salt, and parsley.
5️⃣ Coat the cheese bombs: Arrange the cheese-filled dough balls in the prepared baking dish. Brush generously with the garlic butter mixture.
6️⃣ Bake: Place in the oven and bake for 12-15 minutes, or until golden brown and the cheese inside is melted.
7️⃣ Serve: Let them cool slightly before serving. Enjoy warm with marinara sauce or your favorite dip!
Notes
- Cheese Variation: Swap mozzarella for cheddar, gouda, or a mix of cheeses for extra flavor.
- Extra Crispy: For a crispier exterior, bake them on a baking sheet instead of a dish.
- Make Ahead: Assemble the cheese bombs ahead of time and store them in the fridge for up to 24 hours before baking.
- Prep Time: 10 mins
- Cook Time: 12-15 mins
