

If your mornings are anything like mine, they can feel a little… chaotic. Between getting the kids ready, trying to find a clean coffee mug, and convincing myself that leggings count as pants, breakfast often ends up being an afterthought. That’s exactly why I started making these Healthy Peanut Butter Greek Yogurt Breakfast Blondies — they’ve become a total game-changer around here!
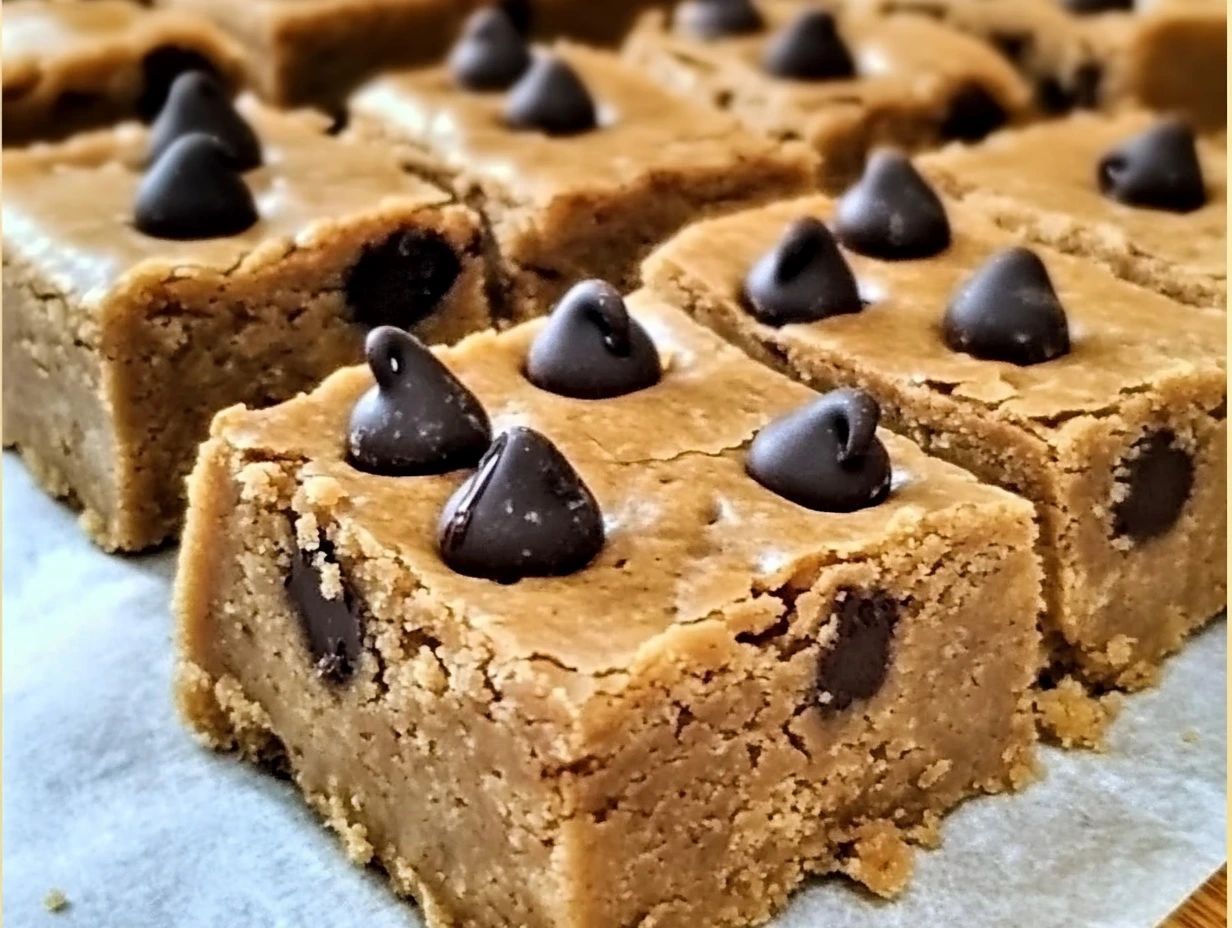
Not only are they soft, chewy, and packed with flavor, but they also happen to be loaded with protein thanks to Greek yogurt and peanut butter. And let me tell you — these aren’t your typical “healthy” bars that taste like cardboard. Nope. These are legit delicious. Just sweet enough to satisfy your cravings, but wholesome enough that you won’t feel like you need to chase them with a green juice to feel better about your choices.
And here’s the best part: they’re made with simple pantry staples, come together in one bowl, and are totally customizable. Oh, and they freeze beautifully — so yes, go ahead and double the batch.
Let’s get into how to make them, shall we?
STEP 1: PREHEAT THAT OVEN
Start by preheating your oven to 350°F (175°C). Grab an 8×8-inch baking pan and either line it with parchment paper or lightly grease it. I like using parchment for easier cleanup — plus, it makes lifting the blondies out to slice them a total breeze.
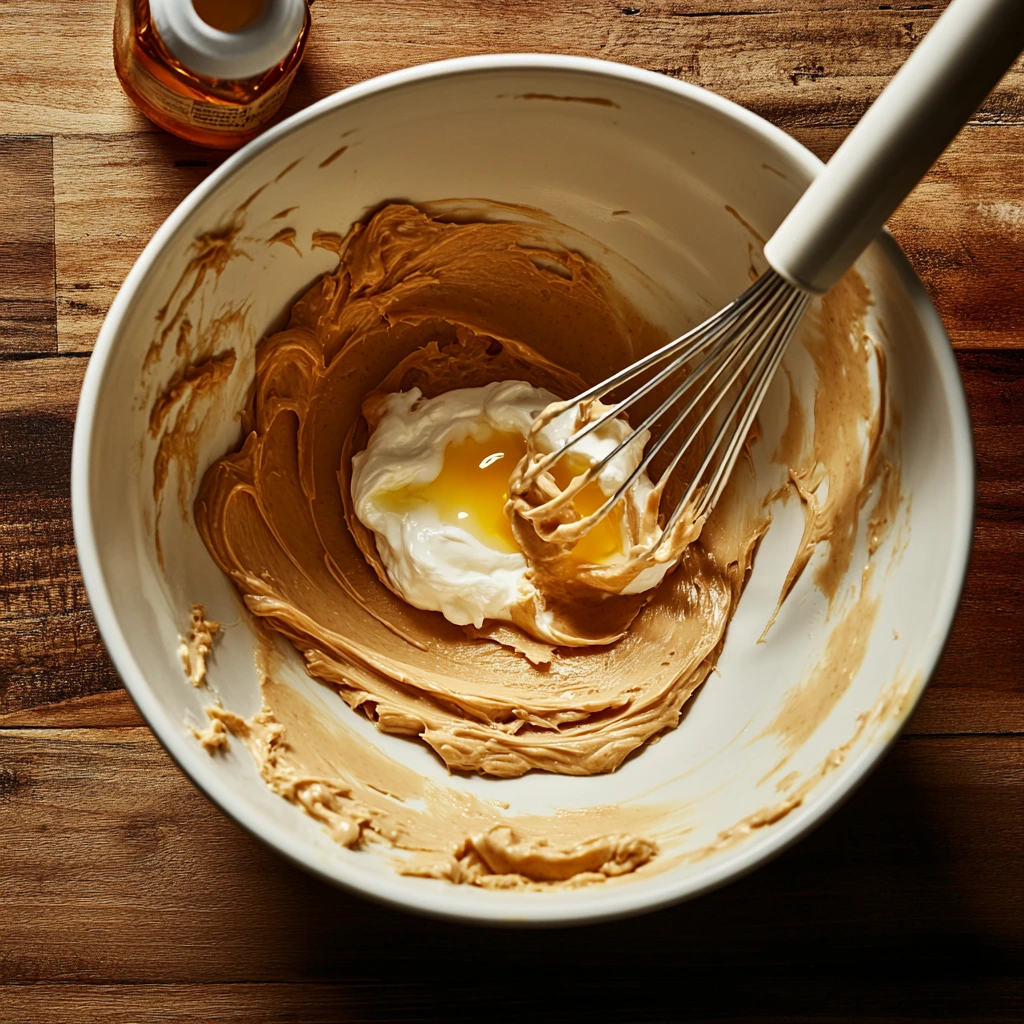
STEP 2: MIX YOUR WET INGREDIENTS
In a large mixing bowl, you’ll combine all your wet ingredients:
-
1 cup creamy peanut butter (natural and unsweetened is best — the kind that’s just peanuts and maybe a little salt)
-
1/2 cup plain Greek yogurt (nonfat or full-fat both work, depending on your texture preference)
-
1/4 cup honey (or use maple syrup if you want to make it fully plant-based)
-
1 large egg
-
1 tsp vanilla extract
Whisk everything together until it’s smooth and creamy. You’re looking for a thick, well-blended batter here — the kind that makes you want to lick the spoon. (Okay, I always do. No shame.)
STEP 3: ADD THE DRY INGREDIENTS
Now it’s time to stir in the dry stuff:
-
1/2 cup rolled oats (make sure they’re certified gluten-free if needed)
-
1/4 cup almond flour (or sub with all-purpose flour if you’re not gluten-sensitive)
-
1/2 tsp baking powder
-
Pinch of salt
Mix until everything is well incorporated. The batter should be thick but spreadable — almost like a soft cookie dough.
If you want to add in any extras (and I highly recommend it!), this is the moment. Some of my favorite mix-ins include:
-
A handful of dark chocolate chips
-
Chopped walnuts or pecans for a little crunch
-
A tablespoon of chia seeds for extra fiber
-
Or even some dried cranberries or raisins for a chewy twist
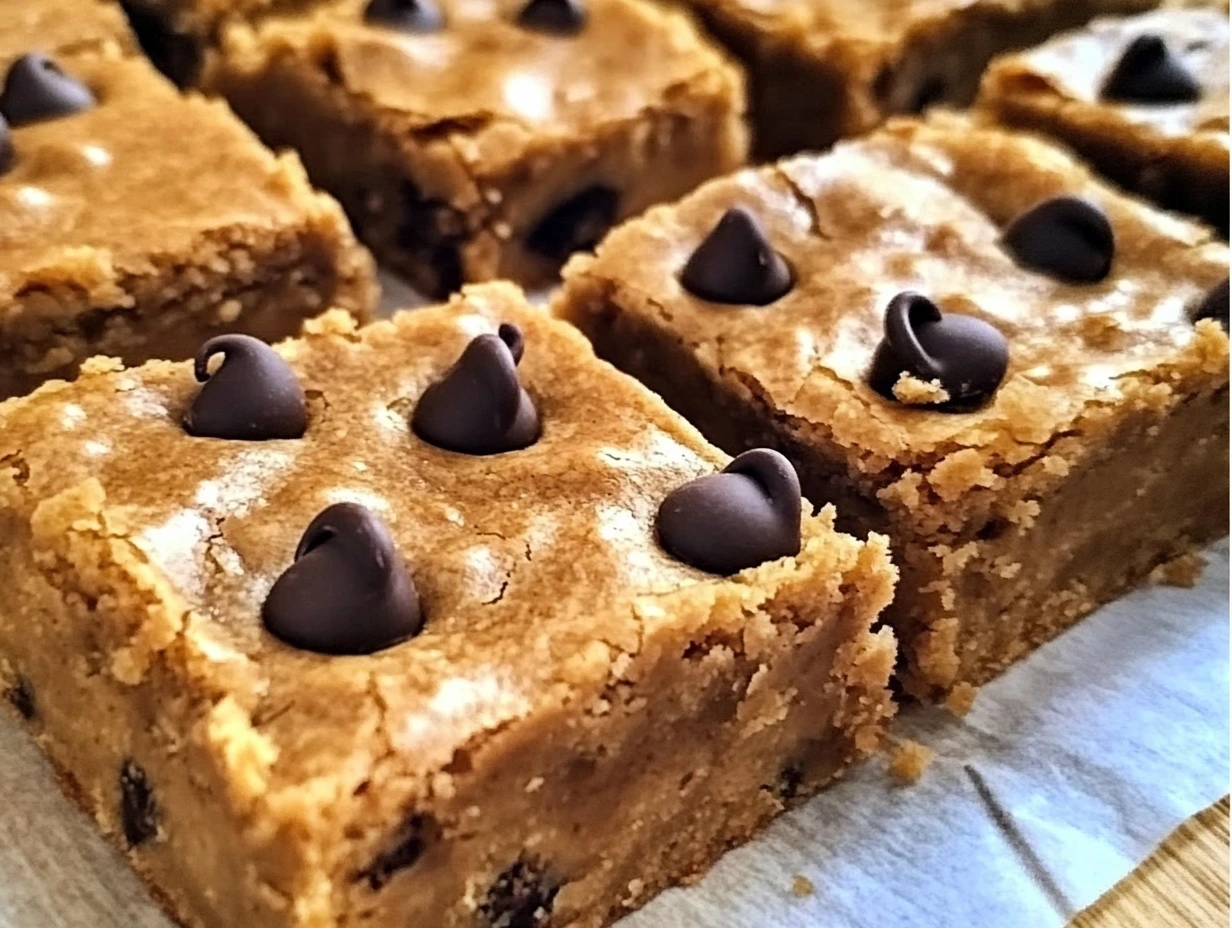
STEP 4: BAKE TO GOLDEN PERFECTION
Once your batter is ready and spread evenly in your prepared 8×8-inch pan, pop it into your preheated 350°F (175°C) oven.
Bake for 15 to 20 minutes, keeping an eye on those edges. You’re looking for a lightly golden top, especially around the outer rim. A toothpick inserted into the center should come out mostly clean — a few moist crumbs are totally fine, just no wet batter.
The bake time can vary slightly depending on your oven and mix-ins. For example, if you added a bunch of chocolate chips or extra fruit, they may need an extra minute or two. But be careful not to overbake — you want these blondies to stay soft and a little fudgy, not dry.
Once they’re done, pull the pan out and let them cool in the pan for about 10 minutes. This step helps them firm up a bit before slicing, so they won’t fall apart on you.
STEP 5: COOL, SLICE, AND ENJOY
After the 10-minute mark, gently lift the blondies out using the edges of the parchment (if you used it), and place them on a wire rack to cool completely. Once they’re cool to the touch, go ahead and slice them into 9 to 12 bars, depending on how big you want each one.
I usually cut them into 12 smaller bars if I’m serving them alongside breakfast or packing them in lunchboxes. But if I’m keeping them as a mid-morning snack or post-workout bite, 9 heartier squares are perfect.
MAKE-AHEAD & STORAGE TIPS
Let’s talk about why these breakfast blondies are so good for busy mornings — because they’re not just easy to make, they’re also great for meal prep.
-
Storage: Keep them in an airtight container at room temperature for up to 3 days. If you want them to last a bit longer, store them in the fridge for up to a week. They firm up slightly in the fridge but stay super chewy.
-
Freezing: These freeze beautifully. Just layer them between parchment in a freezer-safe container and freeze for up to 2 months. Let them thaw at room temp or give them 10–15 seconds in the microwave for a warm, soft treat.
SUBSTITUTIONS & VARIATIONS
I love a recipe that gives you some wiggle room, and these blondies are exactly that kind. Here are a few of my favorite ways to switch things up:
-
Swap the nut butter: Try almond butter or cashew butter for a different flavor profile. Just make sure it’s creamy and unsweetened.
-
Make them vegan: Use maple syrup instead of honey and sub the egg for a flax egg (1 tbsp ground flaxseed + 3 tbsp water, mixed and rested for 5 mins).
-
Pump up the protein: Stir in a tablespoon or two of your favorite vanilla or unflavored protein powder. You may need to add a splash of milk to balance the texture.
-
Add texture: Fold in chopped nuts, shredded coconut, or a sprinkle of oats on top before baking for extra crunch and visual appeal.
And if you’re baking for little ones or someone with a peanut allergy, sunflower seed butter works great, too.
TROUBLESHOOTING TIPS
Here are a few quick pointers in case your first batch isn’t quite perfect:
-
Too dry? You may have baked a minute or two too long. Try reducing the bake time slightly next round or use full-fat yogurt for more moisture.
-
Too soft or underbaked? This can happen if you use too much yogurt or a very runny peanut butter. Make sure to measure carefully and let them cool fully before slicing.
-
Crumbly edges? Use a very sharp knife to cut, and don’t skip the cooling step. The cooler they are, the cleaner the cut.
FAQ: YOUR BLONDIE QUESTIONS, ANSWERED
1. Can I make these blondies completely gluten-free?
Yes! Just be sure to use certified gluten-free rolled oats and stick with almond flour (instead of all-purpose). That’s it—no tricky swaps or extra steps needed.
2. What’s the best kind of peanut butter to use?
Natural, unsweetened creamy peanut butter works best here. You want the kind with just peanuts (and maybe salt). Avoid brands with added sugar or oils, which can throw off the texture.
3. Can I use flavored Greek yogurt?
You can, but keep in mind it will sweeten the batter more than plain yogurt. If you’re using vanilla or honey-flavored yogurt, you may want to slightly reduce the added honey or maple syrup in the recipe.
4. How do I know when they’re done baking?
The edges should look golden and slightly puffed. A toothpick inserted into the center should come out mostly clean — a few moist crumbs are okay. If it comes out with wet batter, give it a couple more minutes.
5. Are these bars freezer-friendly?
Absolutely. They freeze like a dream. Just slice them first, separate layers with parchment, and store in a freezer-safe container. Defrost overnight or warm in the microwave for a quick snack.
6. What’s a good egg substitute for a vegan version?
A flax egg works great here. Mix 1 tablespoon ground flaxseed with 3 tablespoons water, let it sit for 5 minutes to thicken, and use it in place of the egg. Combine that with maple syrup instead of honey, and you’ve got a fully vegan bar.
7. Can I make these without peanut butter?
Yes, you can substitute another nut or seed butter. Almond butter, cashew butter, or sunflower seed butter all work well. Just make sure they have a similar creamy texture to peanut butter.
THE FINAL SLICE: WRAPPING IT ALL UP
There you have it — your new go-to for a healthy, satisfying breakfast that feels more like a treat than a chore. These Healthy Peanut Butter Greek Yogurt Breakfast Blondies check all the boxes: they’re easy, packed with protein, naturally sweetened, and perfect for meal prep. Whether you enjoy them straight from the fridge or slightly warmed with your morning coffee, they’re one of those recipes that just works.
Plus, you can mix and match ingredients based on what you have in your pantry or dietary needs. Want to add chocolate chips? Go for it. Need a nut-free option? Swap in sunflower seed butter. Looking for a way to sneak a little extra fiber into your family’s morning routine? Toss in those chia seeds.
And if you try these out, I’d love to hear how they turned out for you! Leave a comment, share your favorite mix-ins, or let me know how you made them your own. Recipes like this are meant to be flexible, fun, and—most importantly—enjoyed.
Because breakfast should be something to look forward to. And with these blondies, it finally is.
Print
HEALTHY PEANUT BUTTER GREEK YOGURT BREAKFAST BLONDIES
- Total Time: 30 minutes
Description
These healthy breakfast blondies are soft, satisfying, and packed with protein from Greek yogurt and peanut butter. Naturally sweetened and optionally gluten-free, they’re the perfect grab-and-go morning treat or post-workout snack.
Ingredients
Wet Ingredients:
- 1 cup creamy peanut butter (natural, unsweetened preferred)
- 1/2 cup plain Greek yogurt (nonfat or full-fat)
- 1/4 cup honey (or maple syrup for vegan option)
- 1 large egg
- 1 tsp vanilla extract
Dry Ingredients:
- 1/2 cup rolled oats (gluten-free if needed)
- 1/4 cup almond flour (or all-purpose flour)
- 1/2 tsp baking powder
- Pinch of salt
Optional Mix-Ins:
- Dark chocolate chips, chopped nuts, chia seeds, dried fruit
Instructions
1️⃣ Preheat the oven:
Preheat to 350°F (175°C). Line an 8×8-inch baking pan with parchment paper or lightly grease it.
2️⃣ Mix wet ingredients:
In a large bowl, whisk together the peanut butter, Greek yogurt, honey (or maple syrup), egg, and vanilla extract until smooth and creamy.
3️⃣ Add dry ingredients:
Stir in the rolled oats, almond flour, baking powder, and salt. Mix until combined.
If using any mix-ins, gently fold them in now.
4️⃣ Bake:
Pour the batter into the prepared pan and spread evenly with a spatula. Bake for 15–20 minutes, or until the edges are golden and a toothpick inserted in the center comes out mostly clean.
5️⃣ Cool and slice:
Let blondies cool in the pan for 10 minutes, then transfer to a wire rack to cool completely. Slice into 9–12 bars.
Notes
- Peanut Butter Tip: Use natural, unsweetened peanut butter for the healthiest option. Stir well before using to avoid separation of oil.
- Sweetener Options: Honey gives a classic sweetness, while maple syrup makes the blondies vegan-friendly. You can also use agave syrup or a sugar-free syrup if preferred.
- Texture Variations: Rolled oats give a hearty, chewy texture. For a smoother consistency, pulse them a few times in a blender before mixing.
- Prep Time: 10 minutes
- Cook Time: 20 minutes
Nutrition
- Serving Size: 9–12 blondies
