

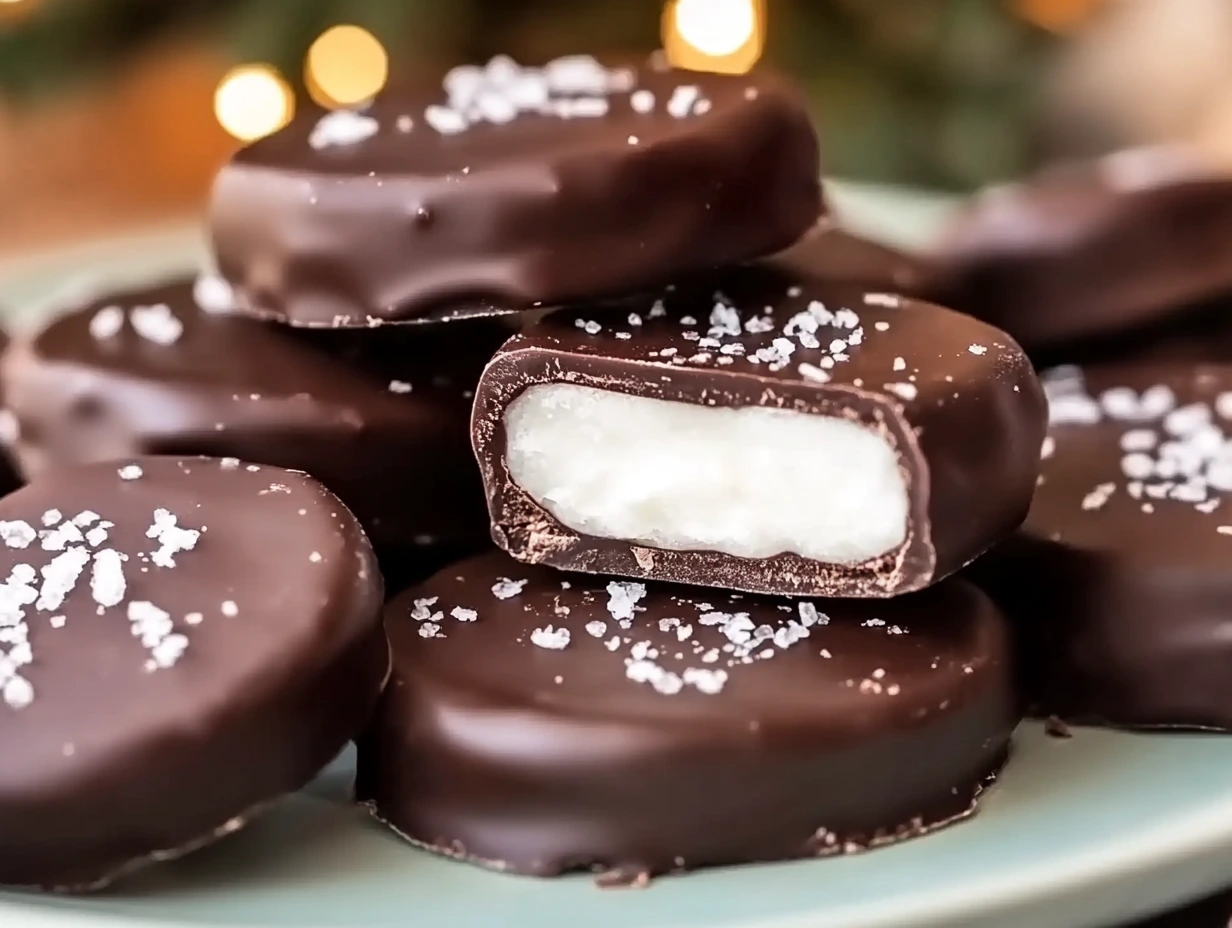
Who doesn’t love the cool, refreshing bite of a peppermint patty? It’s the perfect balance of minty sweetness and smooth chocolate that makes them irresistible, right? What’s even better is making them at home—where you get to control every single ingredient and create a batch that’s just as delicious (if not better!) than the ones you find in the store. Plus, these homemade peppermint patties are so simple to make, and you only need a few basic ingredients. So, whether you’re looking to satisfy a sweet craving or you want to gift something homemade this season, these peppermint patties will be the star of the show.
Now, I’ll be honest with you, I love a good peppermint treat. It reminds me of winter nights, cozying up with a cup of hot cocoa, and sharing something sweet with family. Making these peppermint patties from scratch takes me back to those moments every time I bite into one, and trust me, they taste even better when you’ve put a little love into them.
Step 1: Make the Peppermint Filling
The first step to making your homemade peppermint patties is preparing the filling. This is where the magic happens, so let’s get started! Grab a mixing bowl and combine your powdered sugar, softened butter, heavy cream (or milk for a lighter version), and peppermint extract. It’s important to sift your powdered sugar here to avoid any clumps and get a smooth, creamy filling.
Now, mix everything together until you have a soft, pliable dough. You want the consistency to be smooth and slightly firm but still flexible enough to shape into discs. If the dough feels too sticky and hard to work with, no problem! Just sprinkle in more sifted powdered sugar, a tablespoon at a time, until the dough comes together and holds its shape nicely.
This is the fun part—feeling that dough transform into something you know is going to taste amazing. The combination of butter and cream gives the filling that rich, melt-in-your-mouth texture, while the peppermint extract adds that delightful minty kick. You’ll definitely want to sneak a little taste before you move on to the next step, but don’t overdo it, or you’ll have no filling left to shape into patties!
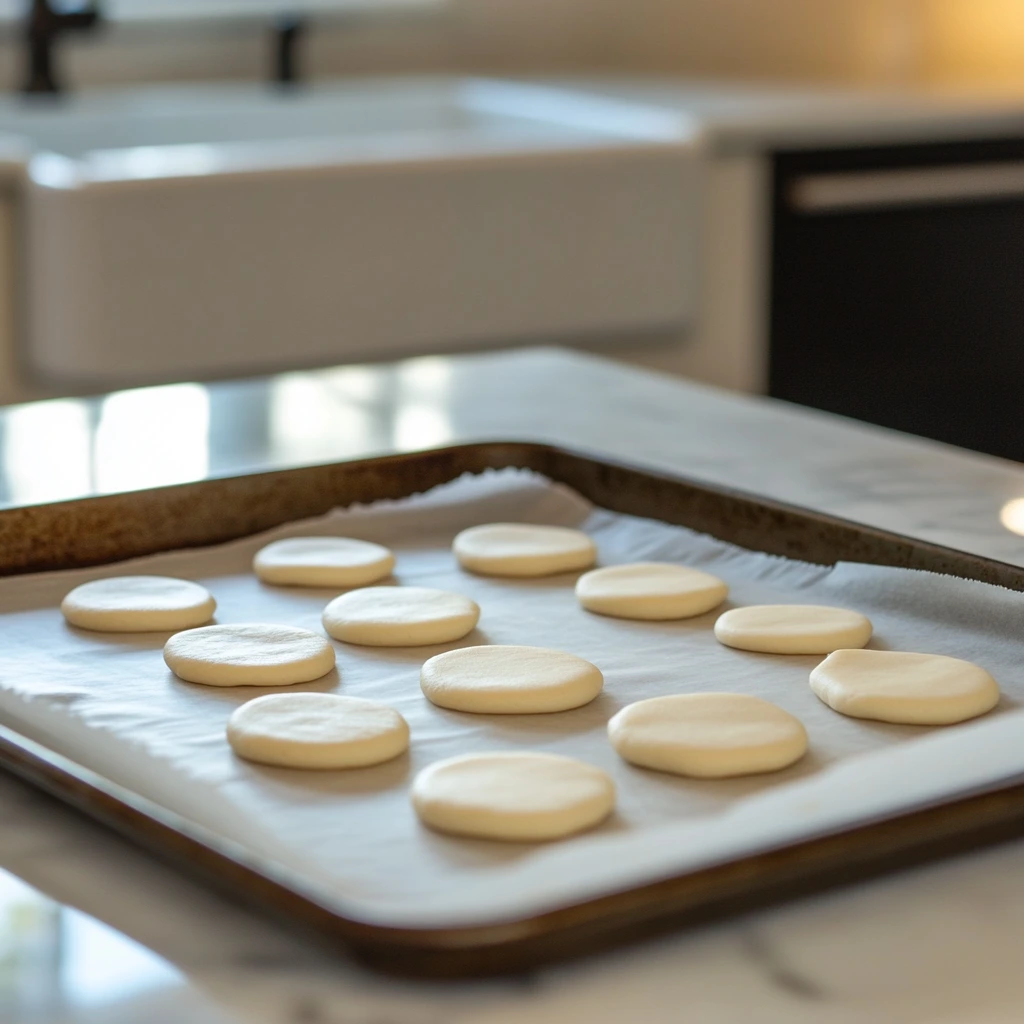
Step 2: Shape the Patties
Once your dough is ready, it’s time to shape the peppermint filling into little patties. Roll the dough into small balls—about 1 inch in diameter. I like to use my hands for this step, but if you want them to be more uniform, a spoon works just as well. After forming the balls, gently flatten each one with your fingers or the back of a spoon to create round, flat discs.
The best part of this step is knowing you’re so close to the end result! Arrange the flattened discs on a baking sheet lined with parchment paper to avoid any sticking. It’s important to use parchment paper here to make the cleanup easy once everything’s done. Then, pop the tray into the refrigerator and let the discs chill for about an hour. This will help them firm up, making them easier to dip in chocolate later.
Step 3: Prepare the Chocolate Coating
To start preparing the chocolate coating, you’ll want to melt the chocolate chips with some coconut oil (or vegetable shortening, if you prefer). The coconut oil helps the chocolate stay smooth and glossy, making it easier to dip your peppermint discs without the chocolate seizing up or becoming too thick.
If you’ve got a microwave, that’s probably the easiest method. Place the chocolate chips and coconut oil in a microwave-safe bowl, and microwave them in 30-second intervals. Make sure to stir the mixture in between each interval, so the chocolate doesn’t burn. You want the chocolate to be completely smooth and shiny, so keep going until it’s all melted and lump-free.
Alternatively, if you prefer using a double boiler, that works great too. Simply fill a small saucepan with water, bring it to a simmer, and place a heatproof bowl with your chocolate and coconut oil on top. Stir constantly as the chocolate melts, and you’ll have the perfect consistency in no time.
One thing I love about this step is the aroma that fills the kitchen as the chocolate melts. It’s such a cozy, comforting scent that adds to the excitement of making these at home. It’s almost like you can already taste the mint and chocolate combination just from the smell!
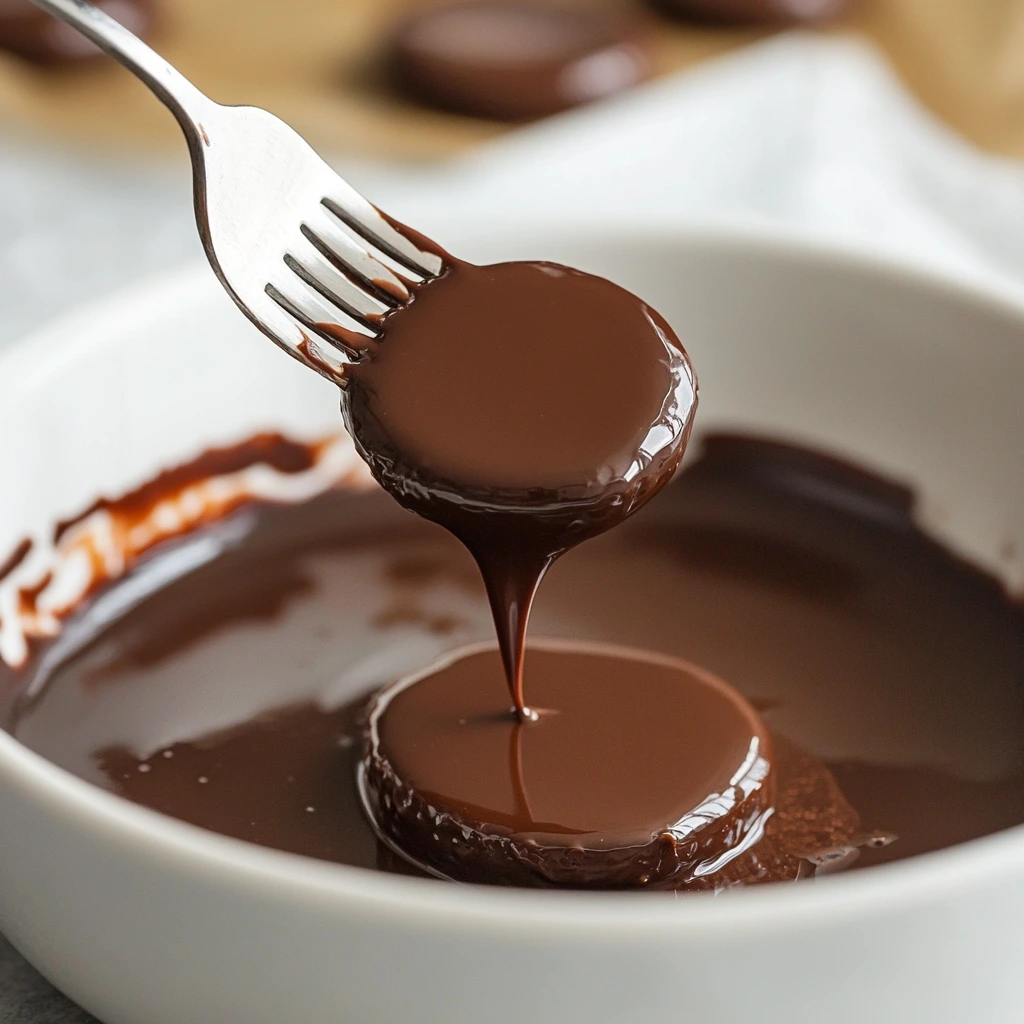
Step 4: Dip the Patties
Now for the fun part! Grab your chilled peppermint discs from the fridge, and get ready to dip them into the chocolate. Use a fork to carefully pick up each disc and lower it into the melted chocolate, ensuring that it’s fully coated. The fork helps keep things neat and prevents you from getting chocolate all over your hands, though let’s be honest, a little mess can be part of the fun.
Once each peppermint disc is dipped, gently tap the fork on the edge of the bowl to let any excess chocolate drip off. You don’t want them to be too thickly coated, or they’ll lose that delicate balance of mint and chocolate. Then, carefully place each chocolate-covered patty back onto the parchment-lined baking sheet.
If you’d like, you can even drizzle a bit more chocolate over the top of each patty for that extra decorative touch, but that’s entirely optional. Either way, they’ll look just as delicious!
Step 5: Chill and Set
Now that all your patties are dipped in chocolate, it’s time to give them some time to chill and set. Place the tray back in the refrigerator for about 30 minutes, or until the chocolate has hardened completely. This is crucial to make sure the patties hold their shape and the chocolate coating is firm to the touch.
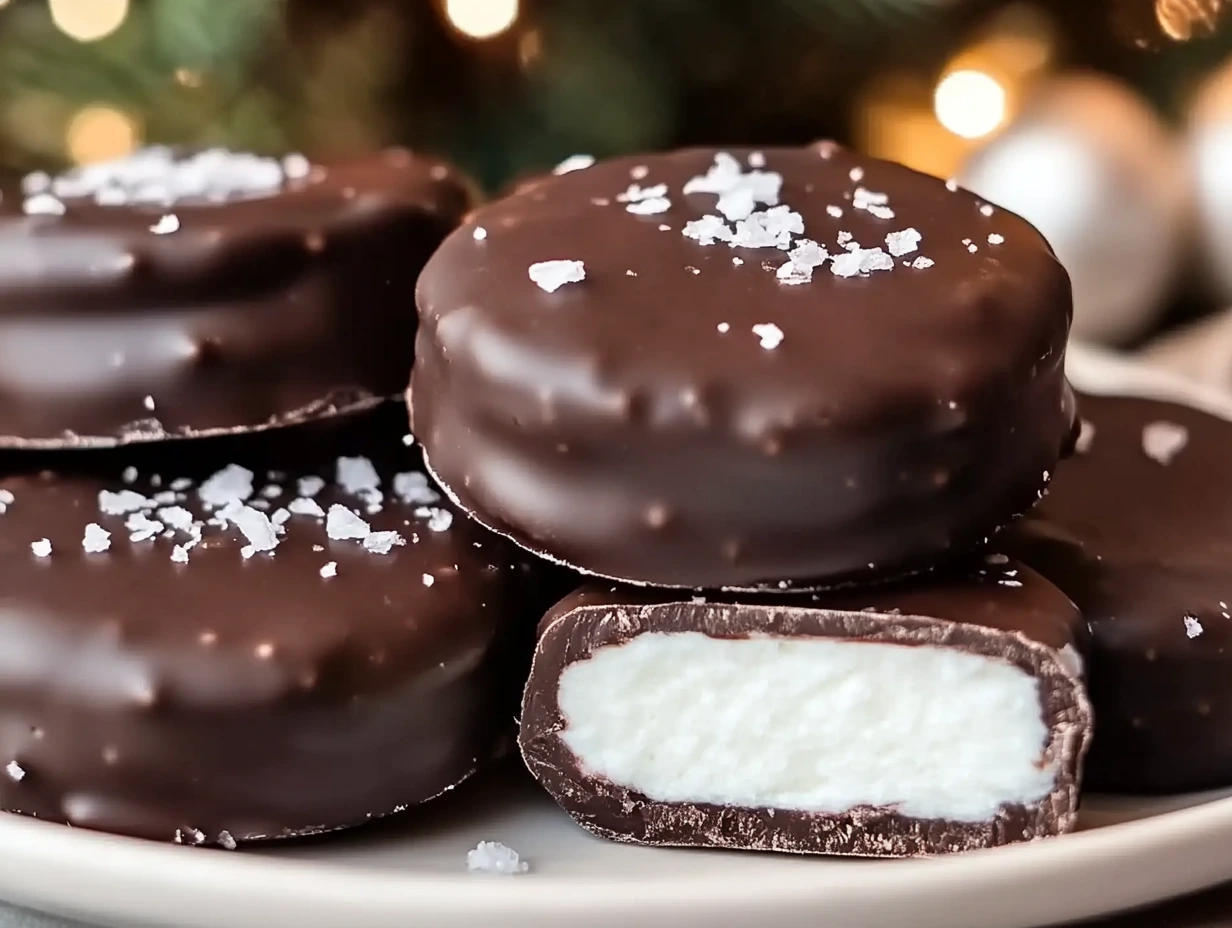
I recommend letting them set for the full 30 minutes because that will give the chocolate the best chance to firm up completely. The result will be a beautiful peppermint patty with a smooth, crisp chocolate exterior that gives way to that soft, creamy peppermint center.
Once the chocolate is set and the patties are ready to go, you’ll have a batch of peppermint patties that not only taste amazing but look like you spent hours in the kitchen. The best part? You didn’t!
Tips for Success
-
Get the Right Consistency for the Filling: If your filling feels too sticky, don’t panic. Just keep adding powdered sugar, a tablespoon at a time, until you achieve that perfect texture. The goal is for the dough to be smooth, pliable, and not too sticky to handle.
-
Make Sure the Chocolate is Smooth: Stir often when melting the chocolate, especially if you’re using the microwave. This ensures a silky, smooth finish that won’t harden too quickly when dipped.
- Chill for Best Results: The chilling time is key to getting the perfect texture. Let both the filling and the chocolate set properly, and your peppermint patties will have that perfect firm yet creamy bite.
FAQ Section
1. Can I use a different type of chocolate for the coating?
Absolutely! While semisweet or dark chocolate gives that rich, slightly bitter contrast to the sweet peppermint filling, you can totally switch it up. Milk chocolate is a great alternative if you prefer a sweeter taste. You can even experiment with white chocolate for a different look and flavor. Just keep in mind that each type of chocolate will melt a bit differently, so you might need to adjust the melting process slightly to get that perfect smooth coating.
2. How do I store homemade peppermint patties?
Once the peppermint patties have fully set and the chocolate coating is firm, you can store them in an airtight container. Keep them in the refrigerator to maintain the chocolate’s crispness and the filling’s creamy texture. They’ll last for about 1 to 2 weeks—though I doubt they’ll last that long once you start eating them!
3. Can I freeze these peppermint patties?
Yes, you can! If you want to make a big batch in advance or have leftovers (if that’s even possible!), you can freeze your peppermint patties. Just place them on a baking sheet in a single layer, freeze until solid, then transfer them to an airtight container or a zip-top bag. They’ll stay good in the freezer for up to 2 months. When you’re ready to enjoy them, let them thaw in the refrigerator for a few hours.
4. Can I make the filling ahead of time?
Definitely! The filling can be made ahead of time and stored in an airtight container in the refrigerator for up to 3 days. Just bring it to room temperature before shaping the patties so it’s easier to work with. It’s a great way to split up the process if you’re short on time!
5. What can I do if the filling is too soft to shape?
If the filling feels too soft or sticky to shape, don’t worry! Simply add a little more powdered sugar, a tablespoon at a time, until it firms up. If you’ve already shaped the discs and they’re too soft to handle, pop them back in the fridge for a little longer to firm them up before dipping in chocolate.
6. Can I make these peppermint patties without peppermint extract?
While peppermint extract is the key ingredient for that classic mint flavor, if you don’t have any on hand or want to try something different, you can substitute with a few drops of peppermint oil. Just be careful with the quantity—peppermint oil is much stronger than extract, so a little goes a long way. If you’re looking for a milder flavor, you could also experiment with other mint extracts or even use a splash of vanilla extract for a twist.
7. Can I use a different type of fat in the chocolate coating?
Yes, you can substitute coconut oil with vegetable shortening, which will also help create a glossy, smooth coating. Some people also use butter, but it may alter the texture slightly. Coconut oil, though, works best in terms of achieving that silky, firm finish.
Conclusion
And there you have it—perfect homemade peppermint patties! With just a few simple steps, you can create these little bites of minty, chocolatey bliss that are sure to impress your family and friends. Whether you’re making them for the holidays, a special occasion, or just because, these treats are always a hit. The best part is how customizable they are—experiment with different types of chocolate or even a touch of sea salt on top for an added burst of flavor.
I hope this recipe has inspired you to give it a try. Homemade candies like these peppermint patties are not only delicious, but they also make for a thoughtful gift or an enjoyable snack to keep on hand. Don’t forget to share your creations with others, and feel free to get creative with variations you love.
If you have any questions or tips of your own to share, I’d love to hear from you in the comments below. Happy candy-making, and enjoy these delicious peppermint patties!
Print
HOMEMADE PEPPERMINT PATTIES
- Total Time: 1 hour 50 minutes
Description
These homemade peppermint patties are a delicious, refreshing treat perfect for the holiday season or any time you want a minty chocolate indulgence. The creamy peppermint filling paired with the smooth, rich chocolate coating creates a delightful contrast. The coconut oil helps the chocolate harden quickly, ensuring a perfect finish. Store in an airtight container in the fridge to keep them fresh and firm.
Ingredients
For the Filling:
- 2 1/2 cups powdered sugar, sifted
- 3 tablespoons unsalted butter, softened
- 1/4 cup heavy cream (or milk, for a lighter version)
- 1 1/2 teaspoons peppermint extract
For the Coating:
- 1 1/2 cups semisweet or dark chocolate chips
- 1 tablespoon coconut oil (or vegetable shortening)
Instructions
1️⃣ Make the Peppermint Filling:
In a mixing bowl, combine the powdered sugar, butter, heavy cream, and peppermint extract. Mix everything together until a smooth and pliable dough forms. If the mixture is too sticky, add more powdered sugar, a tablespoon at a time, until the dough holds its shape.
2️⃣ Shape the Patties:
Roll the peppermint dough into small balls, about 1-inch in diameter. Gently flatten each ball with your fingers or the back of a spoon to form discs. Arrange the discs on a baking sheet lined with parchment paper. Refrigerate for 1 hour, or until firm.
3️⃣ Prepare the Chocolate Coating:
In a microwave-safe bowl, melt the chocolate chips and coconut oil together in 30-second intervals, stirring in between until smooth. Alternatively, use a double boiler for melting.
4️⃣ Dip the Patties:
Using a fork, dip each chilled peppermint disc into the melted chocolate, ensuring it’s fully coated. Let the excess chocolate drip off before placing the coated patties back on the parchment-lined baking sheet.
5️⃣ Chill and Set:
Refrigerate the coated patties for 30 minutes, or until the chocolate has completely set and is firm.
Notes
- For a smoother chocolate coating, you can substitute the coconut oil with vegetable shortening. It will help the chocolate harden more uniformly and give it a nice glossy finish.
- If you prefer a stronger peppermint flavor, you can adjust the amount of peppermint extract to your taste. Just be careful not to add too much, as it can become overpowering.
- You can also experiment with different types of chocolate, such as milk chocolate or white chocolate, for a unique twist on the classic peppermint patty.
- Prep Time: 20 minutes
- Cook Time: 1 hour 30 minutes

Genuinely when someone doesn’t know after that its up to
other people that they will help, so here it takes place.
★★★★★