


I still remember the first time I tasted Amish sour cream cornbread in my friend Sarah’s cozy farmhouse kitchen. The aroma of sweet cornmeal and melted butter wafted through the air, and I swear I heard a choir of angels sing. Okay, maybe that’s a bit dramatic—but this cornbread really is that good. Unlike the dry, crumbly squares you might have encountered elsewhere, this version is tender, moist, and subtly tangy thanks to a generous dollop of sour cream. Whether you’re serving it alongside a steaming bowl of chili, a hearty soup, or simply slathering each piece with butter and honey, it’s bound to become a family favorite.
What I love most about this recipe is its simplicity. There are no fancy ingredients hiding in some specialty store—just pantry staples you probably already have. Yet, the end result tastes like something you’d only find at a rustic country fair. Today, I’m sharing the first half of this easy, foolproof cornbread, complete with tips and tricks I’ve picked up after countless batches (and a few, ahem, slightly overbaked ones).
Ingredients
(Makes one 8-inch square pan; about 9–12 servings)
-
Dry Ingredients:
-
1 cup (120 g) cornmeal
-
1 cup (125 g) all-purpose flour
-
¼ cup (50 g) granulated sugar
-
1 tbsp (14 g) baking powder
-
½ tsp salt
-
-
Wet Ingredients:
-
1 cup (240 ml) sour cream
-
½ cup (120 ml) milk
-
¼ cup (56 g) unsalted butter, melted
-
2 large eggs
-
Tip: Measure your flour by spooning it into the cup and leveling off the top—scooping directly can pack it down and lead to dense cornbread.
Step 1: Preheat & Prep
Before you do anything else, preheat your oven to 400 °F (200 °C). I like to turn it on right away so it’s nice and hot by the time the batter is ready. While the oven warms, grease an 8-inch square pan with a bit of butter or oil, or line it with parchment paper. This cornbread releases beautifully, but a little prepping goes a long way to make cleanup a breeze.
Step 2: Combine Dry Ingredients
In a large mixing bowl, whisk together the cornmeal, flour, sugar, baking powder, and salt. Give it a good stir so everything is evenly distributed—you don’t want to bite into a pocket of sugar or get a bland mouthful of straight cornmeal. If you’re feeling fancy, sift the flour and baking powder together first to break up any lumps. But honestly, a whisk does the trick just fine for this rustic recipe.

Step 3: Whisk Wet Ingredients
Grab a medium bowl and whisk the sour cream and milk until smooth and free of lumps. The tangy sour cream is the secret weapon here—it keeps the crumb tender and gives a subtle zing that balances the sweetness. Next, add the melted butter; make sure it’s cooled just slightly so it doesn’t cook the eggs when you pour it in. Crack in the eggs, then whisk everything together until the mixture is silky and fully combined.
Pro Tip: If your melted butter separates a bit, just whisk vigorously. It’ll come together, and you won’t notice any texture issues in the final crumb.

Mix & Pour the Batter
With your dry and wet mixtures ready, it’s time to bring them together. Pour the sour cream–milk mixture into the bowl of dry ingredients. Using a rubber spatula or wooden spoon, gently stir until the batter just comes together—no need to chase every last speck of flour. You’ll still see a few small streaks of flour, and that’s perfectly fine. Overmixing develops gluten in the flour, which can lead to a tougher crumb—definitely not what we’re going for in this tender Amish‐style cornbread.
Baker’s Note: I like to make one slow “figure-8” stir around the bowl, then scrape the sides and do one more turn right through the middle. That’s it!
Bake to Golden Perfection
Scrape the batter into your prepared 8-inch square pan and spread it out evenly with your spatula. Pop it into the center rack of your preheated 400 °F (200 °C) oven. Set your timer for 20 minutes, but don’t wander too far—start checking at 18 minutes if your oven runs hot. You’re looking for:
-
A golden brown top that looks slightly set and pulls away just a bit from the edges of the pan.
-
A toothpick inserted into the center should come out clean or with a few moist crumbs—not wet batter.
If you pull it out and find it needs another minute or two, don’t be afraid to give it the extra time. Every oven is slightly different, and that little bit of patience ensures the very best texture.
Cooling & Serving
Once it’s baked through, remove the pan from the oven and let the cornbread rest for 5–10 minutes. This brief cooling period allows the steam to settle and makes slicing easier. Using a sharp knife, cut into 9 or 12 squares, depending on how generous you want each piece to be.
Serve warm with a pat of butter melting into each square, or drizzle with honey for a sweet-tangy finish. If you’re pairing it with chili or soup, you’ll love how the cornbread soaks up those savory juices.
Helpful Tips & Variations
-
Cast-Iron Skillet Swap: For an extra-crispy crust, melt the butter directly in a 9-inch cast-iron skillet and pour the batter in. Bake as directed for that irresistible edge.
-
Jalapeño Cornbread: Stir in ½ cup of diced, seeded jalapeños and ¼ cup shredded cheddar for a spicy, cheesy twist.
-
Herb Infusion: Add 1 tbsp chopped fresh chives or rosemary to the dry ingredients for a savory herbal note.
-
Gluten-Free Option: Substitute the all-purpose flour for a 1:1 gluten-free baking blend. The sour cream keeps it moist, so you’ll still get that tender crumb.
-
Sweet Corn Boost: Fold in ½ cup of fresh or frozen sweet corn kernels for added texture and pops of sweetness.

Frequently Asked Questions
1. Can I make the cornbread ahead of time?
Absolutely! You can bake the cornbread up to a day in advance. Once it’s completely cooled, wrap the pan tightly in plastic wrap or aluminum foil and store at room temperature. When you’re ready to serve, reheat individual squares in a 350 °F (175 °C) oven for 5–7 minutes, or microwave a single piece for about 15–20 seconds until warm.
2. How should I store leftovers?
Leftover cornbread keeps beautifully for 2–3 days at room temperature in an airtight container. If you won’t eat it that quickly, freeze cooled slices in a zip-top bag for up to one month. Thaw overnight in the fridge, then warm gently before serving.
3. My cornbread came out dense—what went wrong?
A dense crumb usually means the batter was overmixed or the leavening was old. Be sure to stir just until the flour streaks disappear, and always check that your baking powder is fresh (it should bubble vigorously if you test it in warm water). Also, don’t pack the flour when measuring—lightly spoon and level instead.
4. Can I swap yogurt for sour cream?
Yes! Plain full-fat Greek yogurt is a great substitute—use it in a 1:1 ratio. The tang and moisture level are very similar, so you’ll still end up with that tender, rich crumb. If you only have low-fat yogurt, you may notice a slightly drier texture, so consider upping the milk by 1–2 tablespoons.
5. What’s the secret to a crispier edge?
For a crisper crust, use a well-seasoned cast-iron skillet. Heat the empty skillet in the oven while it preheats, then carefully add the melted butter and swirl to coat. Pour in the batter and bake as directed. The hot iron sears the outside, giving you bakery-style edges.
6. Can I reduce the sugar?
Sure—you can cut the sugar to 3 tablespoons (37 g) if you prefer a less-sweet cornbread. Keep in mind that sweetness balances the tang from the sour cream, so dialing it back too much may make the tang more pronounced. Taste the batter if you’re unsure, and adjust before baking.
7. How do I know when it’s done without a toothpick?
If you don’t have a toothpick, look for these visual cues: the top should be evenly golden brown, the edges will pull away minutely from the pan, and the center will spring back when gently pressed.
Conclusion
And there you have it: your go-to Amish sour cream cornbread recipe, complete with tips, tricks, and answers to all your burning questions. This tender, tangy, and irresistibly moist cornbread is perfect for weeknight dinners, holiday spreads, or whenever you need that cozy, homemade comfort.
Give it a whirl this weekend—whether you stick to the classic or riff on one of the variations, I guarantee it’ll disappear in record time. Don’t forget to let me know how yours turns out! Drop a comment below with your favorite add-ins, serving suggestions, or any tweaks you’ve discovered along the way. Happy baking!
Print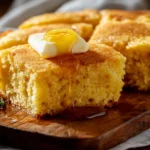
Irresistible Amish Sour Cream Cornbread
- Total Time: 30–35 minutes
Description
This tender, moist cornbread hails from traditional Amish kitchens, where simple ingredients deliver big flavor. The addition of sour cream creates a rich, tangy crumb that’s perfect alongside chili, soups, or enjoyed on its own with a pat of butter and a drizzle of honey.
Ingredients
Dry Ingredients:
- 1 cup (120 g) cornmeal
- 1 cup (125 g) all-purpose flour
- ¼ cup (50 g) granulated sugar
- 1 tbsp (14 g) baking powder
- ½ tsp salt
Wet Ingredients:
- 1 cup (240 ml) sour cream
- ½ cup (120 ml) milk
- ¼ cup (56 g) unsalted butter, melted
- 2 large eggs
Instructions
1️⃣ Preheat & Prep:
Preheat your oven to 400 °F (200 °C). Grease an 8-inch square pan (or line with parchment paper) and set aside.
2️⃣ Combine Dry Ingredients:
In a large bowl, whisk together the cornmeal, flour, sugar, baking powder, and salt until evenly distributed.
3️⃣ Whisk Wet Ingredients:
In a separate medium bowl, whisk the sour cream and milk until smooth. Add the melted butter and eggs, whisking until completely combined.
4️⃣ Mix & Pour:
Pour the wet ingredients into the dry ingredients. Stir with a rubber spatula just until no streaks of flour remain—do not overmix.
5️⃣ Bake:
Transfer the batter to the prepared pan, spreading it into an even layer. Bake for 20–25 minutes, or until the top is golden brown and a toothpick inserted in the center comes out clean.
6️⃣ Cool & Serve:
Let the cornbread cool in the pan for 5–10 minutes. Slice into 9 or 12 squares and serve warm.
Notes
- Flavor Boost: Stir in ½ cup of shredded sharp cheddar or a handful of chopped chives to the batter for savory depth.
- Honey Drizzle: A light drizzle of honey or maple syrup transforms this into a sweet breakfast treat.
- Make-Ahead: Bake, then cool completely. Wrap tightly and store at room temperature for up to 2 days, or freeze for up to 1 month. Reheat slices in a warm oven or toaster oven.
- Prep Time: 10 minutes
- Cook Time: 20–25 minutes
Nutrition
- Serving Size: 9 squares
