

If you’ve ever had a pineapple upside-down cake and thought, “This is good, but it could be juicier, richer, more… heavenly,” then this is the cake you’ve been waiting for. Juicy Pineapple Heaven Cake is my go-to when I want something that tastes like a tropical vacation but still brings all the comfort of a homemade dessert. With its golden, caramelized topping and ridiculously moist crumb, it’s the kind of recipe you make once—and then find yourself baking again every chance you get.
I remember the first time I made this for a family get-together. It disappeared before I could even grab a second slice. Everyone was asking for the recipe, and when they realized it started with a simple box of yellow cake mix, they were shocked. But the secret lies in the little upgrades—like the sour cream for richness, the undrained crushed pineapple for that juicy, fruity punch, and the buttery brown sugar topping that turns into the most gorgeous caramel sauce as it bakes.
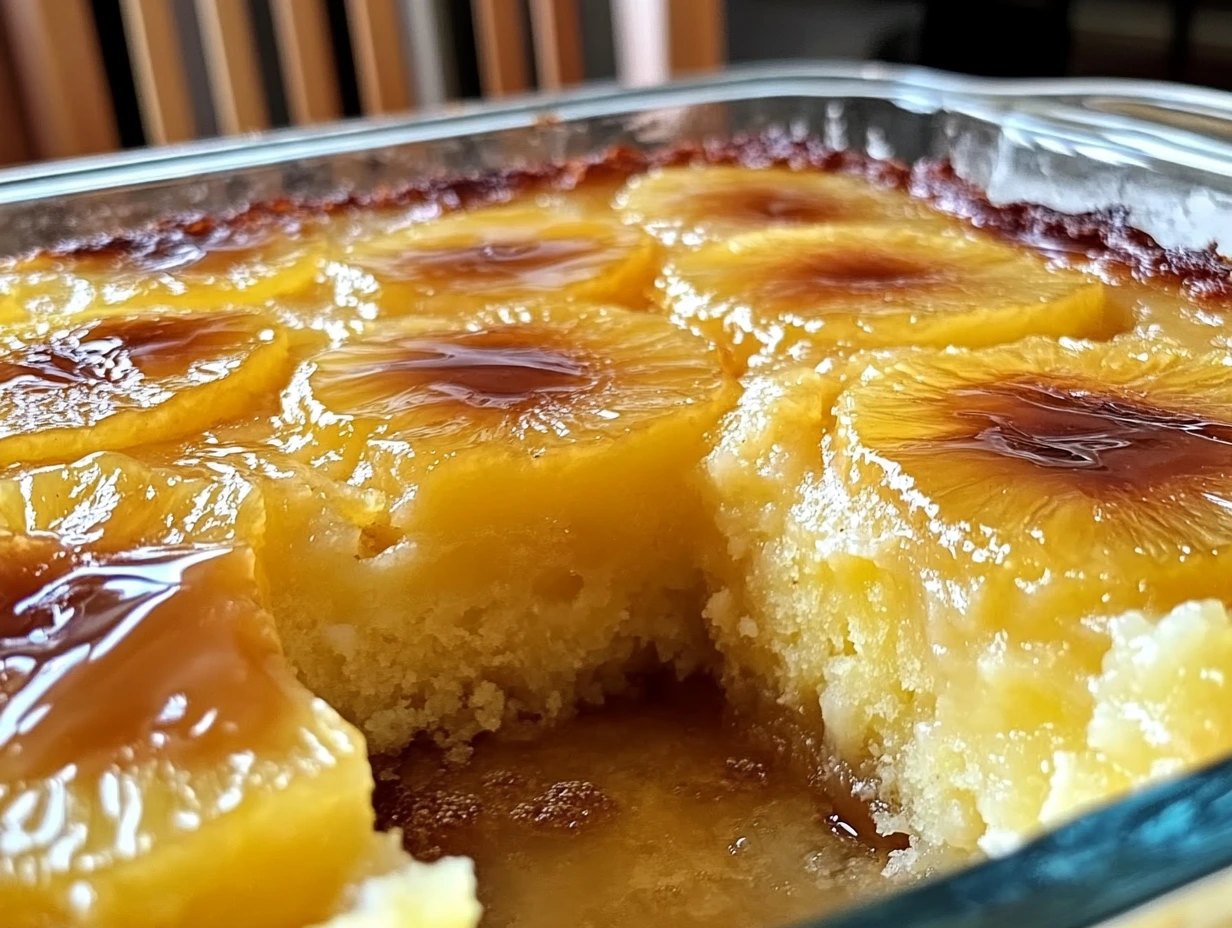
And can we talk about how pretty it is when you flip it out of the pan? The glossy pineapple rings glistening on top make it look like you spent hours making it. No one has to know it only took a few easy steps and minimal prep.
Let’s dive into the recipe, and I’ll walk you through exactly how to make it!
INGREDIENTS YOU’LL NEED
For the Cake:
-
1 box yellow cake mix (or your favorite homemade version)
-
1 can (20 oz) crushed pineapple, undrained
-
1/2 cup sour cream
-
1/2 cup vegetable oil
-
4 large eggs
-
1 teaspoon vanilla extract
For the Topping:
-
1/2 cup unsalted butter, melted
-
1 cup packed brown sugar
-
6–8 pineapple rings (fresh or canned, drained)
-
Maraschino cherries (optional, but so classic!)
STEP 1: PREHEAT THE OVEN
First things first—preheat your oven to 350°F (175°C). While the oven heats up, generously grease a 9×13-inch baking dish or a large round cake pan. This step is crucial if you want that beautiful topping to release easily later on when you flip the cake.
STEP 2: PREPARE THE PINEAPPLE TOPPING
In a small bowl, combine the melted butter and brown sugar. Stir until it turns into a thick, sweet paste. Spread this mixture evenly over the bottom of your prepared pan. It’ll look like a sticky mess now, but once it bakes? Pure gold.
Now arrange your pineapple rings right on top of the sugar mixture. You can go with six rings for a standard look or use up to eight if you’re using a round pan or want to fill in more space. If you’re going the traditional route, pop a maraschino cherry in the center of each ring. Not only does it look adorable, but it adds a hint of sweetness that pairs perfectly with the tangy pineapple.
STEP 3: MIX THE CAKE BATTER
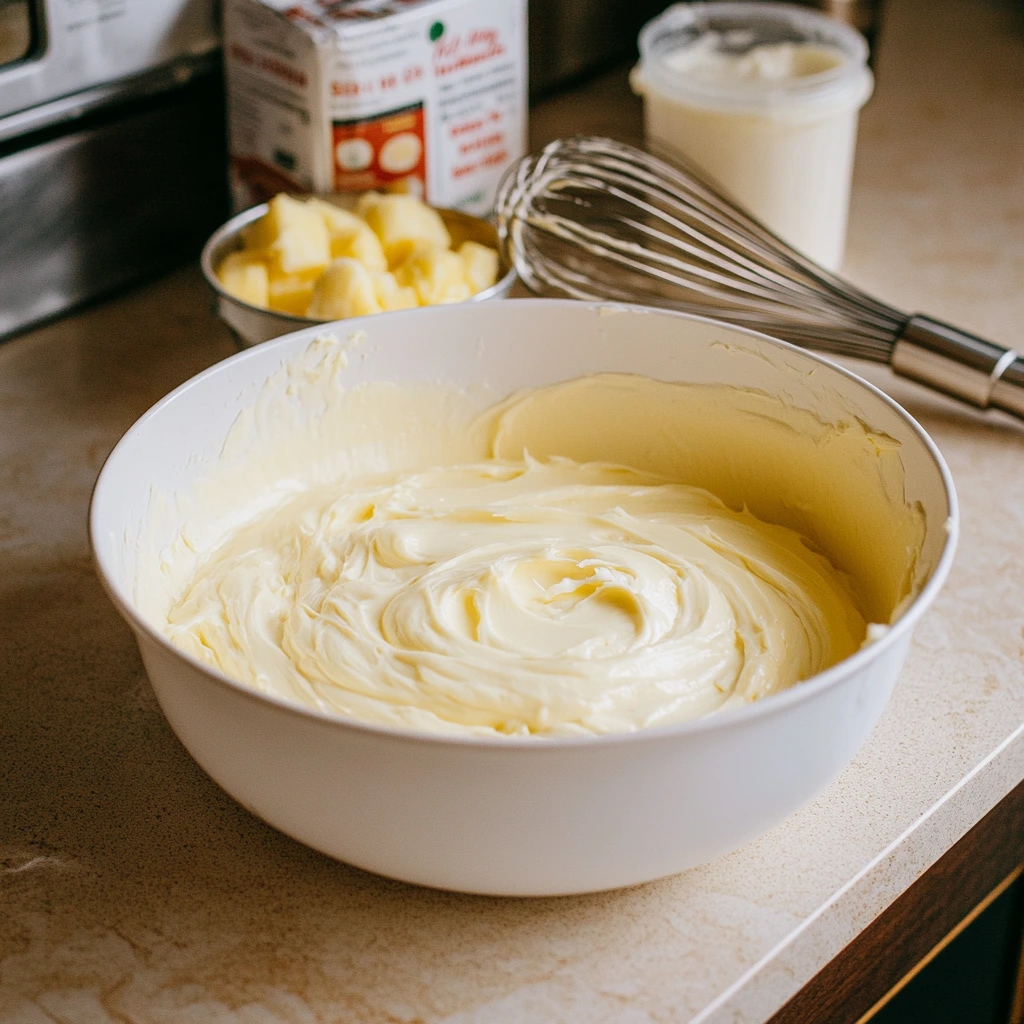
Now for the cake itself. In a large bowl, mix together the yellow cake mix, crushed pineapple (juice and all—don’t drain it!), sour cream, vegetable oil, eggs, and vanilla extract. You can use a hand mixer for ease or a sturdy whisk if you’re up for a mini workout.
The batter should be smooth and thick but pourable. That sour cream adds richness, while the pineapple ensures the cake stays moist and flavorful from top to bottom.
STEP 4: ASSEMBLE IT ALL
Once your batter is ready, carefully pour it over the pineapple topping in your pan. Go slow here—you don’t want to displace your decorative pineapple arrangement underneath. Use a spatula to spread the batter evenly, making sure it reaches all corners of the pan.
Now you’re ready to bake this beauty. Pop it into your preheated oven and bake for 35 to 45 minutes. The top should turn golden brown, and a toothpick inserted in the center should come out clean.
STEP 5: COOL SLIGHTLY, THEN INVERT
Once your cake has finished baking—after about 35 to 45 minutes—you’ll want to check for doneness by inserting a toothpick in the center. If it comes out clean, you’re good to go. The top should be a beautiful golden color, and you might even see a bit of that pineapple juice bubbling up around the edges. That’s the sweet spot.
Now here’s where a lot of people get nervous: the flip.
Let the cake cool in the pan for about 10 minutes. This is important because it gives the topping just enough time to set a bit without hardening. Then run a butter knife gently around the edges to loosen anything that might be clinging to the sides.
Grab a serving platter or tray that’s larger than your cake pan, place it upside-down on top of the pan, and with confidence, flip the whole thing over in one swift motion. Carefully lift the pan off—and prepare to be amazed.
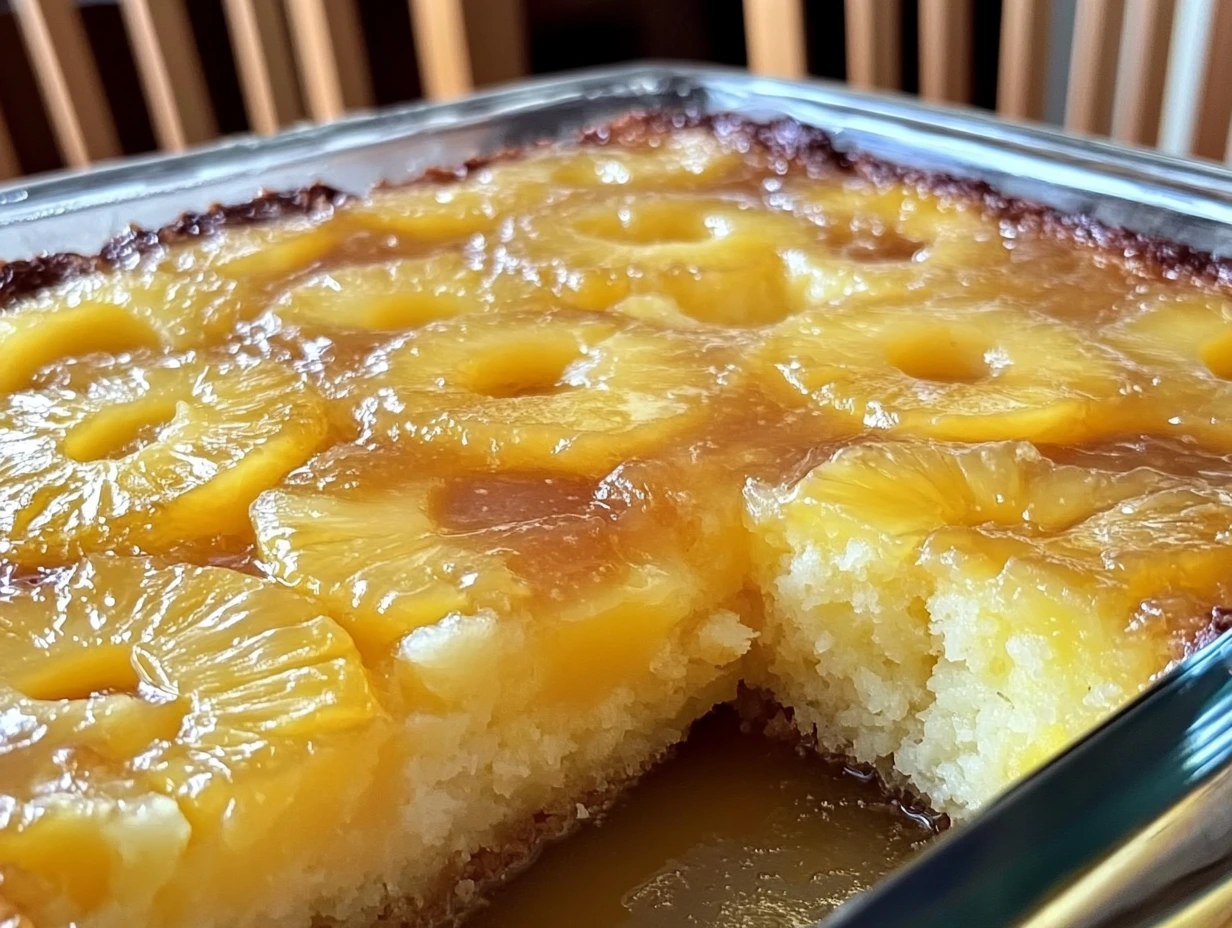
The pineapple rings will be glossy and golden, surrounded by a rich, caramelized brown sugar glaze that’s soaked slightly into the cake. It’s gorgeous every single time.
STEP 6: SERVE IT UP AND DIG IN
You can serve this cake warm, room temperature, or even chilled—each version has its own delicious personality.
If you’re going for a special dessert, add a generous scoop of vanilla ice cream on the side or a swirl of whipped cream right on top. The contrast between the cool creaminess and the warm, buttery cake? Unbelievable.
Even without any extras, though, this cake truly stands on its own. It’s moist from edge to edge, with the perfect balance of sweet pineapple, rich vanilla cake, and a buttery caramel topping.
TIPS & VARIATIONS TO SWITCH IT UP
Want to make this recipe your own? Here are a few easy ways to customize your Juicy Pineapple Heaven Cake:
1. Add coconut flakes: Stir 1/2 cup of sweetened shredded coconut into the batter for a tropical twist. It adds both flavor and a little texture.
2. Try rum extract: Swap the vanilla extract for 1/2 teaspoon of rum extract for a fun pina colada-inspired flavor. You could even brush a tiny bit of spiced rum over the cake after it’s baked for a grown-up version.
3. Use a bundt pan: Yes, you can make this in a bundt pan! Just be sure to arrange the pineapple and topping carefully in the bottom before pouring in the batter. It looks especially elegant for special occasions.
4. Go mini: Make individual servings using jumbo muffin tins or ramekins. Just adjust the baking time to 20–25 minutes and keep an eye on them.
5. Make it a layer cake: If you’re feeling fancy, bake the cake in two round pans, stack them with whipped cream or cream cheese frosting between the layers, and top the whole thing with the pineapple topping. Over-the-top in the best way.
PRO TIP: DON’T DRAIN THAT PINEAPPLE
One of the reasons this cake turns out so incredibly moist is because we use the pineapple with its juice. That extra liquid not only adds flavor, but it also helps replace some of the water usually required by the cake mix. Just dump the whole can right in—juice and all—and mix it with your other ingredients.
It’s a small detail that makes a big difference.
FAQ: COMMON QUESTIONS ABOUT JUICY PINEAPPLE HEAVEN CAKE
1. Can I use fresh pineapple instead of canned?
Absolutely! Fresh pineapple works well—just make sure to cut it into thin rings or chunks and drain off any extra juice. The only thing you’ll miss is the added sweetness of canned juice, so you might want to add an extra tablespoon of sugar to the batter if using fresh.
2. What’s the best way to store leftovers?
Keep leftovers covered in the refrigerator for up to 4–5 days. This cake actually gets better as it sits—the topping soaks into the cake even more, making it extra moist. You can reheat individual slices in the microwave for about 15–20 seconds.
3. Can I freeze this cake?
Yes, you can freeze it! Wrap the cake tightly in plastic wrap, then foil, and freeze for up to 2 months. Let it thaw in the fridge overnight and warm it slightly before serving if you like.
4. My cake stuck to the pan—what did I do wrong?
This usually happens if the pan wasn’t greased well enough or if the cake cooled too long in the pan before flipping. Make sure to use plenty of nonstick spray or butter and flip the cake after about 10 minutes of cooling. Running a knife around the edges before inverting also helps.
5. Can I make this gluten-free?
You can use a gluten-free yellow cake mix and follow the same steps. Make sure the mix is a 1:1 replacement, and check that all other ingredients are certified gluten-free.
6. Can I make this dairy-free?
Yes! Swap the sour cream for a plant-based alternative like coconut yogurt or almond milk yogurt, and use dairy-free butter. The results are still moist and delicious.
7. Do I need to use sour cream? What can I substitute?
Sour cream adds richness, but if you don’t have it on hand, plain Greek yogurt works perfectly. You can also use buttermilk or a mix of milk and lemon juice (1 tablespoon lemon juice per cup of milk) in a pinch.
WHY THIS CAKE BELONGS IN YOUR RECIPE BOX
Juicy Pineapple Heaven Cake is more than just a dessert—it’s a mood-lifter, a memory-maker, and a guaranteed crowd-pleaser. It has that classic upside-down cake charm but with a richer, moister twist that makes it feel a little extra special.
I love how versatile it is. It’s easy enough for a weekday treat but fancy-looking enough to bring to a potluck or serve at a dinner party. And while it might look like you spent all day making it, it comes together in just about an hour with ingredients you probably already have.
So the next time you’re craving something sweet, nostalgic, and a little bit tropical, give this cake a try. I’d love to hear how it turns out for you—whether you make it exactly as written or add your own spin. Drop a comment, share your photos, or let me know your favorite variations!
Happy baking, and don’t forget—dessert doesn’t have to be complicated to be unforgettable.
Print
JUICY PINEAPPLE HEAVEN CAKE
- Total Time: 55 minutes
Description
A tropical twist on a classic favorite, this moist and rich pineapple cake features a caramelized pineapple topping that melts in your mouth. Perfect for gatherings or as a sweet treat for yourself!
Ingredients
For the Cake:
- 1 box yellow cake mix (or homemade equivalent)
- 1 can (20 oz) crushed pineapple, undrained
- 1/2 cup sour cream
- 1/2 cup vegetable oil
- 4 large eggs
- 1 tsp vanilla extract
For the Topping:
- 1/2 cup unsalted butter, melted
- 1 cup packed brown sugar
- 6–8 pineapple rings (fresh or canned, drained)
- Maraschino cherries (optional, for garnish)
Instructions
1️⃣ Preheat the oven
Preheat your oven to 350°F (175°C). Grease a 9×13-inch baking pan or a round cake pan generously to prevent sticking.
2️⃣ Prepare the topping
In a small bowl, mix the melted butter and brown sugar until fully combined. Spread the mixture evenly over the bottom of the prepared pan.
Arrange the pineapple rings decoratively on top of the sugar mixture. Optional: place a maraschino cherry in the center of each ring for that classic touch.
3️⃣ Make the cake batter
In a large mixing bowl, combine the yellow cake mix, crushed pineapple (with juice), sour cream, vegetable oil, eggs, and vanilla extract.
Beat until smooth and well incorporated using a hand mixer or whisk.
4️⃣ Assemble and bake
Carefully pour the cake batter over the arranged pineapple topping. Use a spatula to smooth it out evenly.
Bake for 35–45 minutes, or until a toothpick inserted into the center comes out clean.
5️⃣ Cool and invert
Let the cake cool in the pan for 10 minutes. Then run a knife around the edges to loosen it.
Place a serving platter on top and invert the cake so the pineapple topping is beautifully displayed on top.
6️⃣ Serve and enjoy
Slice and serve warm or at room temperature. Top with whipped cream or a scoop of vanilla ice cream for an extra indulgent treat!
Notes
- The undrained crushed pineapple keeps the cake ultra-moist and packed with flavor.
- Make sure to invert while the cake is still slightly warm—this helps the topping release more easily.
- Store leftovers covered at room temperature for up to 2 days or refrigerate for longer shelf life.
- Prep Time: 15 minutes
- Cook Time: 40 minutes
Nutrition
- Serving Size: 8–10
