

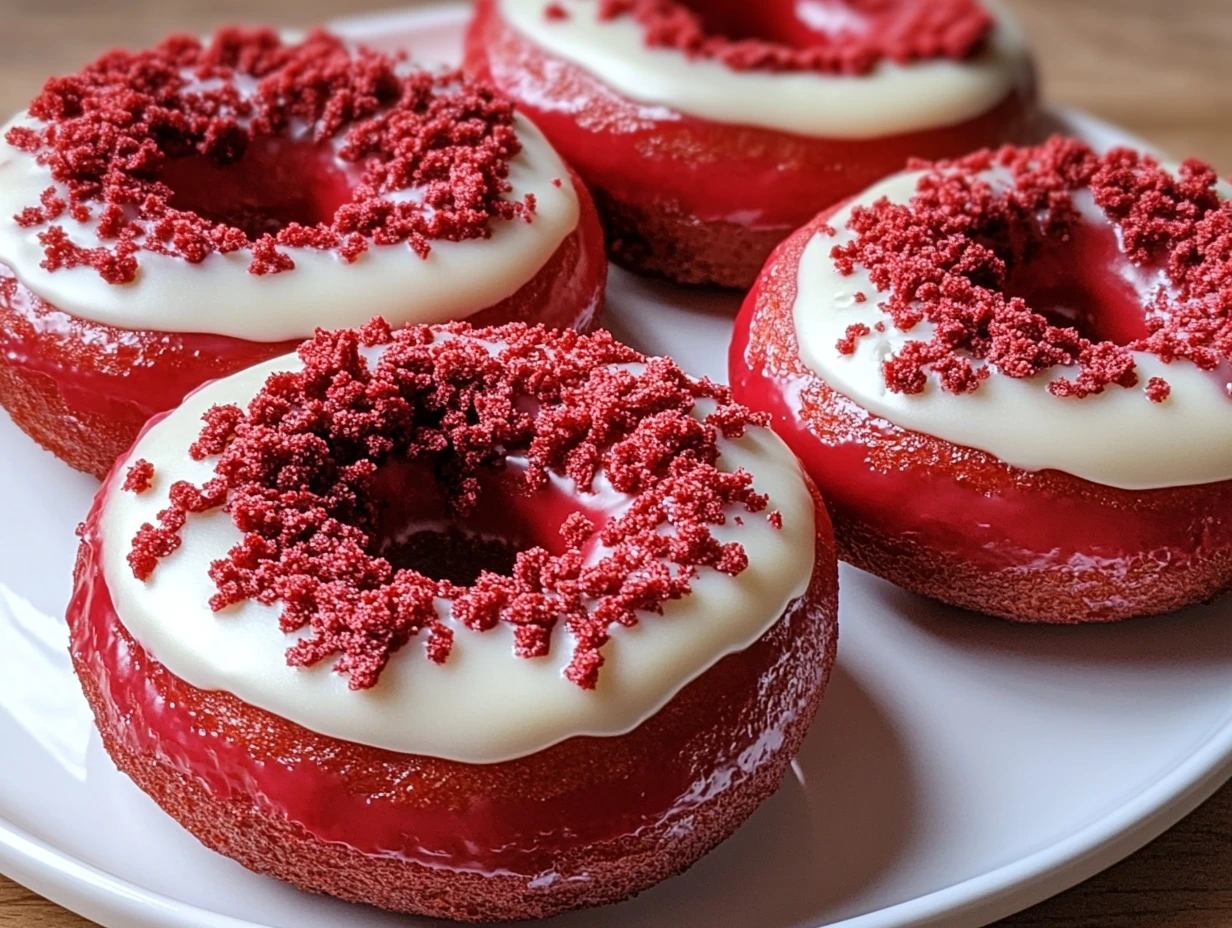
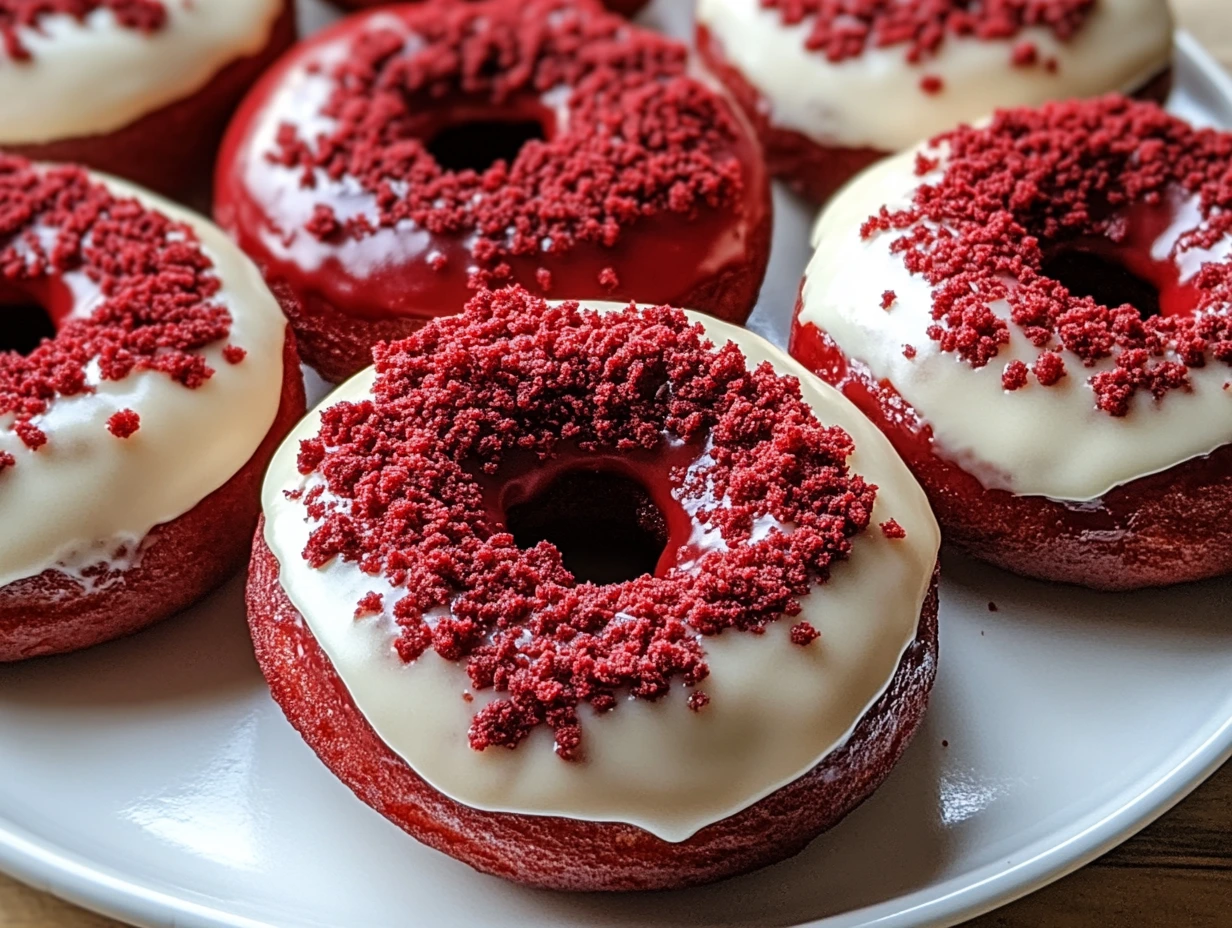
There’s just something about red velvet that makes any treat feel extra special. Maybe it’s the gorgeous deep red color, the hint of cocoa, or the rich, velvety texture. Whatever it is, red velvet never fails to impress. And when you turn it into a donut? Pure magic!
These Red Velvet Donuts with Cream Cheese Glaze are soft, fluffy, and bursting with that classic red velvet flavor. Topped with a silky-smooth cream cheese glaze, they taste just like a red velvet cupcake—only in donut form! The best part? They’re baked, not fried, which means they’re easy to make at home without any of the hassle of deep frying.
So, whether you’re making these for a weekend breakfast, a Valentine’s Day treat, or just because you’re craving something sweet, this recipe is bound to be a hit. Let’s get baking!
The Secret to the Perfect Red Velvet Donut
Before we dive into the recipe, let’s talk about what makes a red velvet donut truly amazing. Red velvet is all about balance—it’s not just a chocolate donut with red food coloring! The combination of a little cocoa powder, tangy buttermilk, and a touch of vinegar gives it that signature flavor. The result? A donut that’s light, slightly tangy, and rich in flavor.
And of course, no red velvet treat is complete without cream cheese glaze. This glaze is smooth, creamy, and just the right amount of sweet, perfectly complementing the donuts.
Ingredients You’ll Need
For the donuts, you’ll need:
- All-purpose flour: The base of our donuts, giving them structure.
- Cocoa powder: Just a touch for that classic red velvet flavor.
- Baking powder & baking soda: Helps the donuts rise and stay fluffy.
- Salt: Enhances the flavors.
- Granulated sugar: Adds sweetness and helps with moisture.
- Egg: Binds everything together.
- Buttermilk: A key ingredient that makes the donuts soft and tender.
- Melted butter: Adds richness and keeps the donuts moist.
- Vanilla extract: Enhances the overall flavor.
- Red food coloring: The signature red velvet look! You can adjust the amount based on how vibrant you want the color to be.
- White vinegar: Reacts with the baking soda for extra fluffiness.
And for the cream cheese glaze:
- Cream cheese: The star of the glaze—rich, tangy, and creamy.
- Powdered sugar: Sweetens and thickens the glaze.
- Milk: Thins the glaze to the perfect consistency.
- Vanilla extract & salt: Enhances the overall flavor.
Step-by-Step: Making the Donuts
Step 1: Preheat the Oven
First things first—preheat your oven to 350°F (175°C). If you’re using a metal donut pan, lightly grease it with cooking spray or butter. If you have a silicone donut mold, you may not need to grease it, but I still like to give it a quick spritz to ensure nothing sticks.
Step 2: Mix the Dry Ingredients
In a large mixing bowl, whisk together the flour, cocoa powder, baking powder, baking soda, and salt. This step is crucial to evenly distribute the leavening agents and prevent clumps of cocoa powder in the batter. Once everything is well combined, set the bowl aside.
Step 3: Mix the Wet Ingredients
In a separate bowl, whisk together the sugar, egg, buttermilk, melted butter, vanilla extract, and red food coloring. The mixture should turn a beautiful deep red.
Next, stir in the white vinegar. This may seem like an unusual ingredient, but trust me—it’s essential! The vinegar reacts with the baking soda, helping the donuts rise and giving them that signature red velvet texture.
Step 4: Combine the Wet and Dry Ingredients
Now comes the fun part! Gradually add the wet mixture to the dry ingredients, stirring gently until everything is combined. Be careful not to overmix—overworking the batter can make the donuts dense instead of soft and fluffy. You just want to mix until you no longer see streaks of flour.
Step 5: Fill the Donut Pan
The batter is ready to go! To make things easy, you can either spoon the batter into the donut molds or use a piping bag (or even a zip-top bag with the corner snipped off) to pipe it in neatly. Fill each donut cavity about ¾ full—this ensures they rise perfectly without overflowing.
Now, it’s time to bake!
Step 6: Bake the Donuts
Place your donut pan in the preheated oven at 350°F (175°C) and bake for 12-15 minutes. The exact baking time can vary depending on your oven and the size of your donut molds, so I recommend checking them at the 12-minute mark.
To test if they’re done, insert a toothpick into the center of a donut—if it comes out clean or with just a few moist crumbs, they’re ready! If there’s still wet batter, give them another minute or two.
Once they’re baked to perfection, remove the pan from the oven and let the donuts cool in the pan for about 5 minutes. This helps them set so they don’t fall apart when transferring.
Then, carefully transfer them to a wire rack to cool completely. This step is important—if you try to glaze them while they’re still warm, the glaze will just melt right off. And trust me, you don’t want to miss out on that thick, luscious cream cheese glaze!
Step 7: Make the Cream Cheese Glaze
While the donuts are cooling, let’s whip up the best part—the cream cheese glaze! This glaze is rich, creamy, and adds the perfect balance of tangy sweetness to our red velvet donuts.
Here’s how to make it:
- In a medium bowl, beat the softened cream cheese until smooth. This step ensures there are no lumps in the glaze.
- Add the powdered sugar, milk, vanilla extract, and a pinch of salt. Whisk everything together until the glaze is silky and smooth.
- If the glaze feels too thick, add a bit more milk, one teaspoon at a time, until you reach your desired consistency. If it’s too thin, mix in a little more powdered sugar.
You want the glaze to be thick enough to coat the donuts but still smooth enough to drizzle. Think of the consistency of a thick pancake batter—it should gently flow off a spoon but not be runny.
Step 8: Glaze the Donuts
Now for the best part—glazing! You have two options here:
- Dip the donuts: Hold each cooled donut upside down and dip the top into the glaze, letting the excess drip off before placing it back on the wire rack. This gives you a thick, even coating.
- Drizzle the glaze: If you prefer a lighter glaze, use a spoon to drizzle it over the tops.
Either way, once you’ve glazed them, let the donuts sit for a few minutes so the glaze can set. If you’re feeling fancy, you can add sprinkles, crushed nuts, or even a light dusting of cocoa powder for an extra special touch.
And just like that—you have homemade red velvet donuts that look like they came straight from a bakery!
Tips for Perfect Red Velvet Donuts
Want to take your donuts to the next level? Here are a few helpful tips to keep in mind:
- Don’t overmix the batter: Stir just until combined. Overmixing can lead to dense donuts instead of light and fluffy ones.
- Use a piping bag for easy filling: This keeps things neat and ensures each donut cavity is evenly filled.
- Make sure the donuts are completely cool before glazing: If they’re even slightly warm, the glaze will melt and slide right off.
- Store leftovers properly: These donuts are best enjoyed fresh, but if you have extras, store them in an airtight container in the fridge for up to 3 days.
Frequently Asked Questions (FAQ)
Baking donuts at home is a fun and rewarding experience, but if it’s your first time making red velvet donuts, you might have a few questions. Here are some common ones to help you out!
1. Can I make these donuts without a donut pan?
Absolutely! If you don’t have a donut pan, you can use a muffin tin and shape a small foil ball in the center of each cup to create a hole. The texture may be slightly different, but they’ll still taste delicious!
2. Can I use natural food coloring instead of red food dye?
Yes! If you prefer to avoid artificial dyes, you can use beet powder or natural red food coloring. Just keep in mind that the color may not be as vibrant as traditional red velvet.
3. What can I use instead of buttermilk?
No buttermilk? No problem! You can make a quick substitute by mixing ¾ cup of milk with 1 teaspoon of white vinegar or lemon juice. Let it sit for about 5 minutes, and you’ve got a perfect buttermilk alternative!
4. Can I make these donuts ahead of time?
Yes! You can bake the donuts a day in advance and store them in an airtight container at room temperature. I recommend glazing them just before serving to keep the texture perfect.
5. How do I store leftover donuts?
Store your donuts in an airtight container in the refrigerator for up to 3 days. The glaze will firm up slightly, but you can always warm them in the microwave for a few seconds to soften them up before eating.
6. Can I freeze these donuts?
You sure can! Place the un-glazed donuts in an airtight container or freezer bag and freeze for up to 2 months. When ready to eat, thaw at room temperature and glaze before serving.
Conclusion: Time to Enjoy Your Red Velvet Donuts!
And there you have it—Red Velvet Donuts with Cream Cheese Glaze that are soft, fluffy, and absolutely irresistible! These baked beauties are perfect for special occasions, weekend treats, or just because you’re craving something sweet.
The combination of the light cocoa flavor, the subtle tang from the buttermilk, and the rich, creamy glaze makes these donuts a must-try. Plus, since they’re baked instead of fried, they’re easier to make and just a little bit lighter than traditional donuts.
Happy baking!
Print
RED VELVET DONUTS
- Total Time: 45 mins
Description
These Red Velvet Donuts are soft, fluffy, and packed with that classic red velvet flavor, topped with a rich cream cheese glaze. Perfect for a sweet breakfast or a festive dessert!
Ingredients
For the Donuts:
- 1 ½ cups all-purpose flour
- 1 tablespoon cocoa powder
- 1 teaspoon baking powder
- ¼ teaspoon baking soda
- ¼ teaspoon salt
- ¾ cup granulated sugar
- 1 large egg
- ¾ cup buttermilk
- ¼ cup unsalted butter, melted
- 1 teaspoon vanilla extract
- 1 tablespoon red food coloring (or more for a deeper red color)
- 1 teaspoon white vinegar
For the Cream Cheese Glaze:
- 4 oz cream cheese (softened)
- 1 cup powdered sugar
- 2 tablespoons milk (or more for desired consistency)
- ½ teaspoon vanilla extract
- A pinch of salt
Instructions
1️⃣ Preheat the oven: Preheat your oven to 350°F (175°C). Lightly grease a donut pan or use a silicone donut mold.
2️⃣ Mix dry ingredients: In a large bowl, whisk together flour, cocoa powder, baking powder, baking soda, and salt. Set aside.
3️⃣ Mix wet ingredients: In a separate bowl, whisk together sugar, egg, buttermilk, melted butter, vanilla extract, and red food coloring. Add the vinegar and mix until smooth.
4️⃣ Combine wet and dry ingredients: Gradually add the wet mixture into the dry ingredients, stirring just until combined. Avoid overmixing to keep the donuts light and fluffy.
5️⃣ Fill the donut pan: Spoon or pipe the batter into the donut molds, filling each ¾ full for the perfect shape.
6️⃣ Bake the donuts:
Bake for 12-15 minutes, or until a toothpick inserted in the center comes out clean.
Let the donuts cool in the pan for 5 minutes, then transfer them to a wire rack to cool completely.
7️⃣ Prepare the glaze: While the donuts are cooling, whisk together the softened cream cheese, powdered sugar, milk, vanilla extract, and salt until smooth. Add more milk if needed for a thinner consistency.
8️⃣ Glaze the donuts: Dip the tops of the donuts into the cream cheese glaze, or drizzle it over with a spoon.
Notes
- Don’t overmix! Overmixing the batter can make the donuts dense. Stir until just combined.
- No donut pan? Use a muffin tin and bake as mini cupcakes!
- Storage: Store in an airtight container in the fridge for up to 3 days. Warm slightly before serving.
- Prep Time: 15 mins
- Cook Time: 30 mins
