

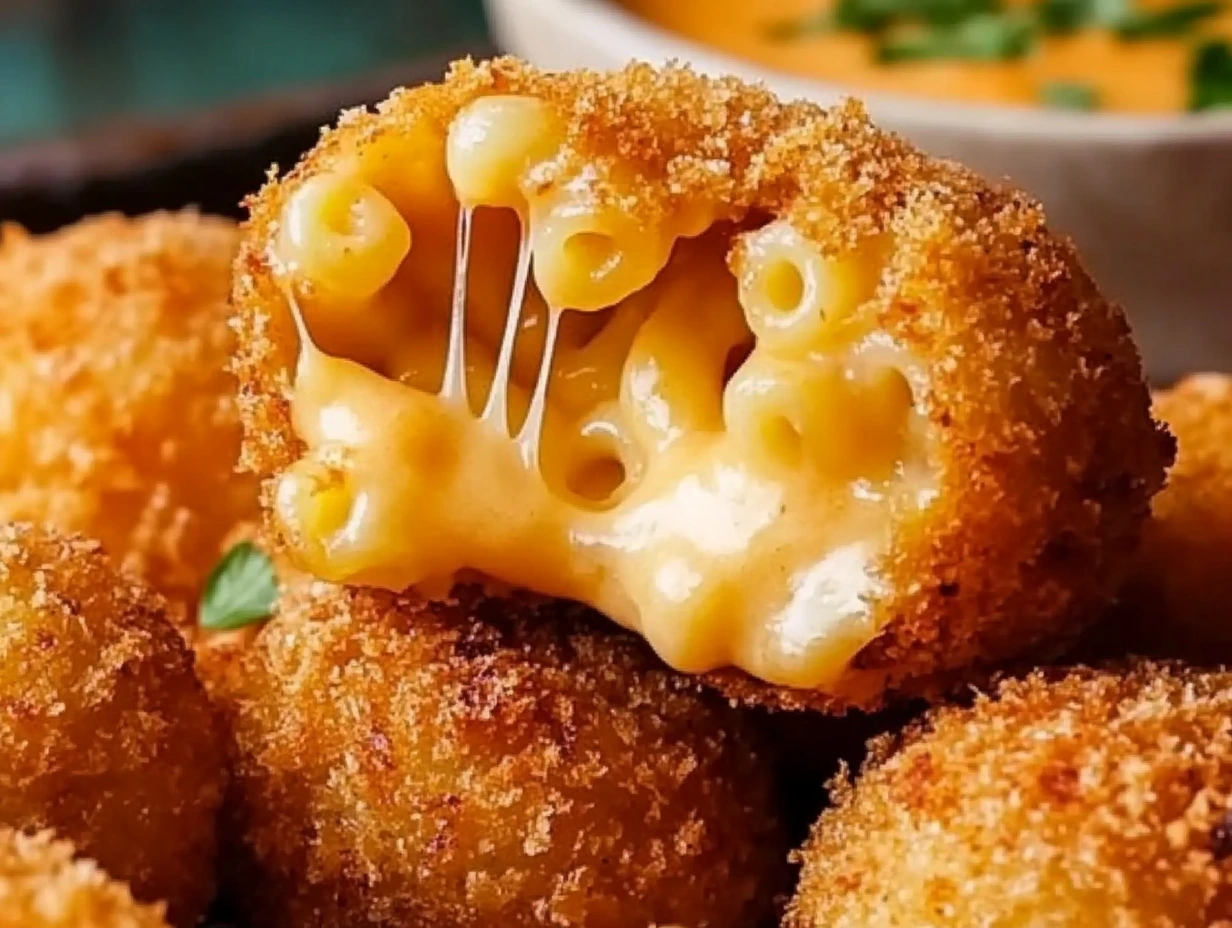
There’s just something about mac and cheese that feels like a warm hug in a bowl. But when you take that creamy, cheesy goodness, roll it into a bite-sized ball, coat it in crispy breadcrumbs, and deep fry it to golden perfection? Well, that’s next-level comfort food! These Crispy Fried Mac and Cheese Balls are the perfect party appetizer, game-day snack, or indulgent treat when you just want something extra special.
I first made these for a family gathering, and let me tell you—people were practically fighting over the last one. They disappeared within minutes! The best part? They’re surprisingly easy to make. All you need is some leftover mac and cheese (or a fresh batch if you can’t wait), a few pantry staples, and a little patience while they chill.
Ready to turn your favorite childhood dish into an irresistible crispy bite? Let’s get started!
Step 1: Make the Creamy Mac and Cheese
The base of these fried mac and cheese balls is, of course, a rich and cheesy mac and cheese. This version is super simple but incredibly flavorful. Here’s what you’ll need:
Ingredients for the Mac and Cheese:
- 2 cups elbow macaroni, cooked and drained
- 2 tbsp unsalted butter
- 2 tbsp all-purpose flour
- 1 cup milk
- 2 cups shredded cheddar cheese
- ½ cup grated Parmesan cheese
- Salt and pepper to taste
Instructions:
- Make the cheese sauce – In a medium saucepan over medium heat, melt the butter. Once melted, whisk in the flour and cook for about 1–2 minutes, stirring constantly. This helps get rid of the raw flour taste while creating a smooth base for the sauce.
- Add the milk – Slowly pour in the milk while whisking. This keeps the sauce silky and prevents lumps. Let it cook for another 2–3 minutes until it thickens slightly.
- Stir in the cheese – Add the shredded cheddar and Parmesan cheese, stirring until melted and completely smooth. The combination of cheddar’s sharpness and Parmesan’s nutty depth makes this sauce absolutely irresistible!
- Season and mix – Add salt and pepper to taste, then pour the cheese sauce over the cooked macaroni. Stir everything together until the pasta is well coated.
At this point, you might be tempted to just grab a spoon and dig in. I get it! But trust me, the real magic happens when we let this chill and firm up.
Chill for Easy Shaping
Now, transfer the mac and cheese mixture into a shallow baking dish, spreading it out evenly. Pop it in the fridge for at least 2 hours (or even overnight if you’re prepping ahead). This step is crucial because it helps the mixture firm up, making it easier to roll into balls later.
Pro Tip: If you’re short on time, you can speed things up by placing it in the freezer for about 30–45 minutes—just don’t let it freeze completely!
Step 2: Shape the Mac and Cheese Balls
Once your mac and cheese mixture is nice and firm, it’s time to shape it into bite-sized balls.
How to Shape Them Perfectly:
- Scoop and roll – Use a small cookie scoop or spoon to portion out 1–2 inch-sized pieces of the chilled mac and cheese mixture. Roll them between your hands to form smooth, compact balls. (If the mixture is too sticky, lightly coat your hands with a bit of flour or cooking spray!)
- Keep them uniform – Try to make them all roughly the same size so they cook evenly. If you’re making these for a party, smaller balls work best since they’re easier to pop in your mouth.
- Place them on a tray – Arrange the rolled balls on a parchment-lined baking sheet as you go. If they start getting soft, pop them back in the fridge for 15-20 minutes before breading them.
Step 3: Coat for Maximum Crispiness
Now, let’s talk about that golden, crunchy coating—because what’s a fried mac and cheese ball without a perfectly crispy exterior?
You’ll Need:
- 1 cup all-purpose flour
- 2 large eggs, beaten
- 1 ½ cups seasoned breadcrumbs
How to Coat Them:
- Flour first – Roll each ball lightly in flour, shaking off any excess. This helps the egg stick better.
- Dip in egg – Next, dip the floured ball into the beaten eggs, ensuring it’s fully coated.
- Breadcrumbs last – Finally, roll the ball in seasoned breadcrumbs, pressing gently to make sure the coating sticks.
Pro Tip: For an extra crispy exterior, double coat the balls by dipping them back into the egg and breadcrumbs one more time before frying!
Once all the balls are coated, place them back on the tray and let them chill in the fridge for another 15-20 minutes. This helps the breading set and prevents them from falling apart in the oil.
Step 4: Fry to Golden Perfection
Now, it’s time to fry! If deep-frying sounds intimidating, don’t worry—I’ll guide you through it so you get that golden, crispy crunch without any greasy mess.
How to Fry Them:
- Heat the oil – Pour vegetable oil into a deep skillet or fryer, filling it about 2 inches deep. Heat to 350°F (175°C)—the perfect temperature for a crispy, golden crust without burning.
- Fry in batches – Carefully drop a few mac and cheese balls into the hot oil, being careful not to overcrowd the pan. (Too many at once will lower the oil temperature, making them soggy instead of crispy.)
- Cook until golden – Fry for 2-3 minutes, turning occasionally, until they’re golden brown and crispy all over.
- Drain excess oil – Use a slotted spoon to remove the fried balls and place them on a paper towel-lined plate to absorb any excess oil.
Pro Tip: Keep an eye on the oil temperature! If it drops too low, the coating will absorb more oil and turn greasy. If it’s too hot, the outside will brown too quickly while the inside stays cold. A kitchen thermometer is your best friend here!
Step 5: Serve and Enjoy!
These crispy mac and cheese balls are best enjoyed hot and fresh when the centers are still gooey and cheesy. Here are a few ways to serve them:
Dipping Sauce Ideas:
A good dip takes these to the next level! Here are some of my favorite pairings:
- Marinara Sauce – A classic choice that adds a bright, tangy contrast to the rich cheese.
- Ranch Dressing – Cool, creamy, and just the right amount of herby goodness.
- Spicy Mayo – A mix of mayo and sriracha for a little kick.
- Honey Mustard – Sweet, tangy, and surprisingly delicious with the crispy coating.
- Buffalo Sauce – If you love a bit of heat, this is a must-try!
Pro Tip: If you’re serving these at a party, set up a little “dip bar” with a few different sauces so guests can mix and match.
Best Ways to Enjoy:
- Serve them as a party appetizer or game-day snack.
- Pair them with a fresh side salad for a fun twist on mac and cheese night.
- Add them to a charcuterie board for a surprising, indulgent bite.
However you serve them, one thing’s for sure—these mac and cheese balls won’t last long!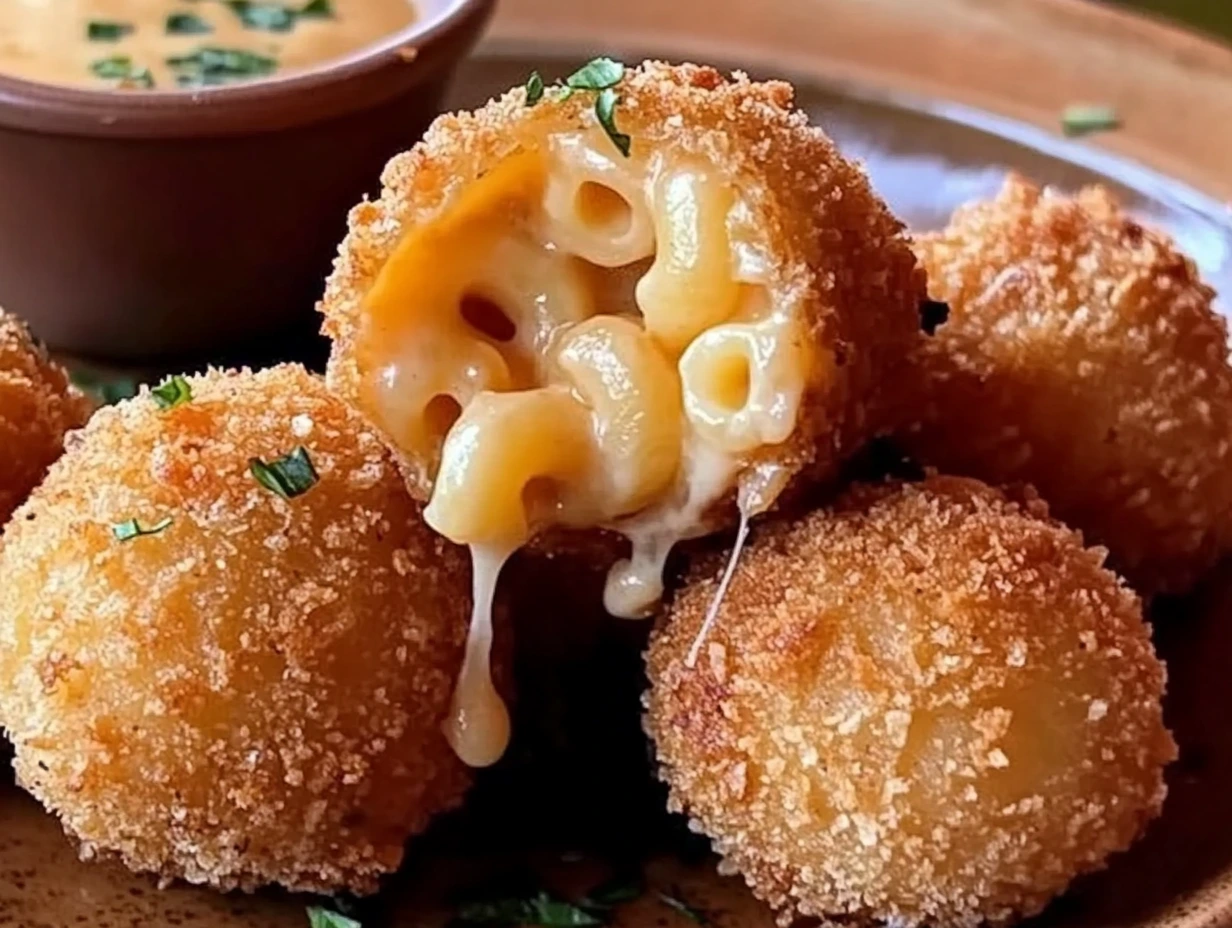
FAQ: Your Mac and Cheese Ball Questions, Answered!
I know deep-frying can sometimes feel intimidating, so here are answers to some of the most common questions to help you make the best batch possible!
1. Can I make these ahead of time?
Yes! You can shape and coat the mac and cheese balls, then store them in the fridge for up to 24 hours before frying. If you want to prep them even further in advance, freeze them (see next question).
2. Can I freeze them?
Absolutely! After coating them, place the mac and cheese balls on a baking sheet and freeze until solid. Once frozen, transfer them to a zip-top bag and store for up to 3 months. Fry them straight from frozen—just add an extra minute or two to the frying time.
3. What if I don’t want to deep-fry? Can I bake or air-fry them?
Yes! For a lighter version:
- Air fryer: Preheat to 375°F (190°C) and cook for 8-10 minutes, shaking the basket halfway through.
- Oven: Bake at 400°F (200°C) for about 15-20 minutes, flipping halfway. Spray with cooking oil to help them crisp up.
4. Why did my mac and cheese balls fall apart while frying?
This usually happens if they weren’t chilled long enough or if the oil wasn’t hot enough. Make sure they’re firm before frying and that your oil is at 350°F (175°C).
5. Can I use a different type of cheese?
Of course! While cheddar and Parmesan are a great combo, you can also try:
- Mozzarella for an extra gooey center
- Gouda for a smoky, rich flavor
- Pepper Jack if you want a little spice
6. How do I store and reheat leftovers?
Store leftover mac and cheese balls in an airtight container in the fridge for up to 3 days. Reheat them in the oven at 375°F (190°C) for 10 minutes or in the air fryer for 5 minutes to keep them crispy. Avoid the microwave—it’ll make them soggy!
Conclusion: Try These Crispy Mac and Cheese Balls Today!
And there you have it—the ultimate Crispy Fried Mac and Cheese Balls! These little bites of heaven are crunchy on the outside, creamy on the inside, and packed with cheesy goodness. Whether you’re making them for a party, a family gathering, or just because you deserve a treat, they’re guaranteed to be a hit.
Happy cooking, and enjoy every crispy, cheesy bite!
Print
CRISPY FRIED MAC AND CHEESE BALLS
- Total Time: 20 mins
Description
These crispy, cheesy bites are the ultimate comfort food! Perfect as a snack, appetizer, or party dish, these golden-brown mac and cheese balls have a crunchy outer layer with a creamy, cheesy center. Serve them hot with your favorite dipping sauce for a truly indulgent treat!
Ingredients
For the Mac and Cheese:
- 2 cups elbow macaroni, cooked and drained
- 2 tbsp unsalted butter
- 2 tbsp all-purpose flour
- 1 cup milk
- 2 cups shredded cheddar cheese
- ½ cup grated Parmesan cheese
- Salt and pepper to taste
For Coating and Frying:
- 1 cup all-purpose flour
- 2 large eggs, beaten
- 1 ½ cups seasoned breadcrumbs
- Vegetable oil, for frying
Instructions
1️⃣ Prepare the Mac and Cheese:
In a saucepan, melt butter over medium heat.
Whisk in the flour and cook for 1–2 minutes until lightly golden.
Gradually add milk, whisking constantly until the mixture thickens.
Stir in cheddar and Parmesan cheese until melted and smooth. Season with salt and pepper.
Mix the cheese sauce with the cooked macaroni until well coated.
Transfer to a baking dish and refrigerate for at least 2 hours or until firm.
2️⃣ Shape the Balls:
Once chilled, scoop out small portions and roll them into balls about 1–2 inches in diameter.
3️⃣ Coat the Balls:
Roll each ball in flour, then dip into beaten eggs, and finally coat with breadcrumbs.
Repeat for all balls, ensuring they’re evenly coated.
4️⃣ Fry the Balls:
Heat vegetable oil in a deep skillet or fryer to 350°F (175°C).
Fry the mac and cheese balls in batches for 2–3 minutes until golden brown and crispy.
Drain on a paper towel-lined plate to remove excess oil.
5️⃣ Serve:
Serve hot with your favorite dipping sauces like marinara, ranch, or spicy mayo.
Notes
- For extra crunch, double coat the balls by repeating the egg and breadcrumb steps.
- Use panko breadcrumbs for a lighter, crispier texture.
- Want a flavor boost? Add turkey bacon bits, jalapeños, or hot sauce to the mac and cheese before chilling.
- Make ahead: Prepare the balls and freeze them. Fry them straight from frozen for quick party snacks!
- Prep Time: 15 mins
- Cook Time: 2 hours
